Service Provider Setup
You can provide your IdP metadata to ASP.NET using two ways either you can add it by uploading XML metadata file/using metadata url or manually provide your IdP metadata.
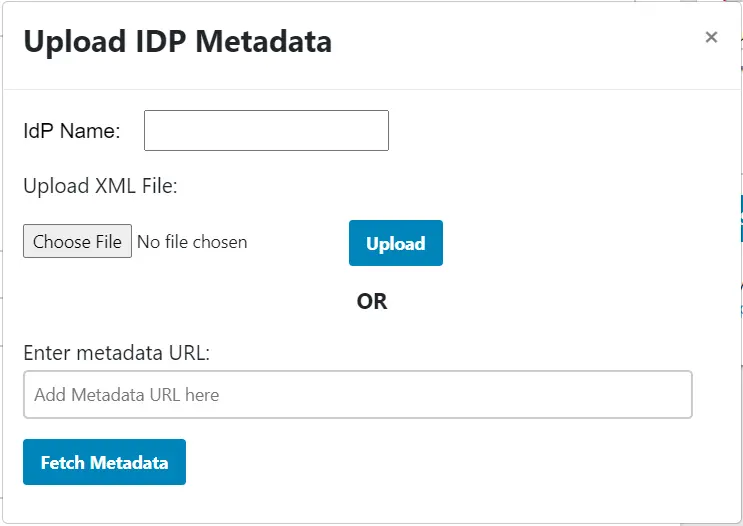
- A] Uploading Metadata XML file - You can upload your IdP metadata by clicking on Upload IDP Metadata button which provide you with two options:
You can either choose to upload the metadata XML file or you can enter the metadata URL of your IdP.

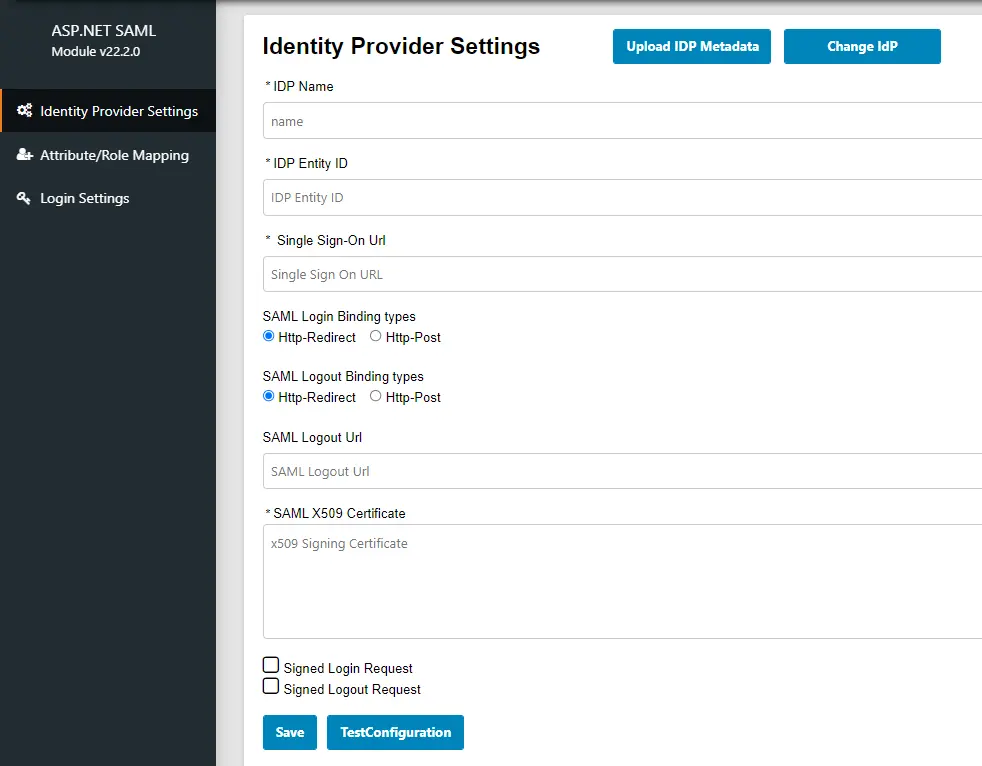
- B] Manual Configuration - You can manually provide your IdP credentials where you need to provide the required settings and save them.
-
Identity Provider Name
-
IdP Entity ID or Issuer
-
SAML Login URL ( The url where SAML request needs to be posted not the login URL )
-
X.509 Certificate from the IDP.

Test Configuration: After you provide your IdP’s metadata URL, you SAVE it and go to Test Configuration. There a new window will open which will display either of the following configuration status :-
-
Configuration successful – with user attributes.
-
Error message – if any configuration error is sent by IdP.
When you are configuring your IdP, you will be given two options to send your SAML request in the Sign SSO & SLO Requests option.
Enabling these settings adds another layer of security to your SSO process as the SSO and SLO requests will be digitally signed using the default signing and encryption certificate present in the plugin. You can also use your own custom certificate for this instead.
Note: This option is present in the Premium and Enterprise.
You can select any of these options to send your SAML Request if your IDP supports the selected methods.
-
HTTP-Post binding type
-
HTTP-Redirect binding type

While configuring, it also provides the feature to add a Single Logout URL. But, this feature will only work if your IDP supports Single logout. Here also you can select the option of binding type to send your request.
Note: This is present in all our plugins from the Premium plan onwards.
