User Profile
The User Profile tab provides an option to update the user’s Atlassian application attributes based on the attributes received in the response from OAuth/OpenID (OIDC) Provider. Attributes are the user details stored in OAuth/OpenID provider. User Profile Mapping helps you to get user attributes from your provider and map them to Atlassian application’s user attributes. With the options given in this tab, the username, email, and first name, last name attributes can be assigned by default after successful SSO, you can also extract the user name from email using the different regex pattern.
For simplicity, we are going to use ‘response’ at the place of ‘OAuth/OpenID (OIDC) response’ and ‘provider’ instead of ‘OAuth/OpenID (OIDC) Provider’ in this document.
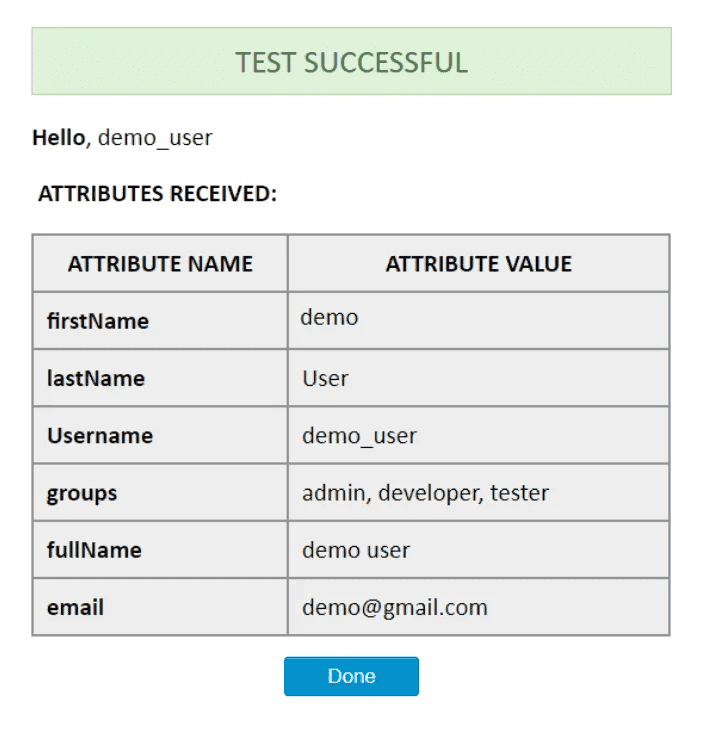
The profile attribute names and values returned in the response can be viewed by clicking the Test Configuration button on the OAuth Configuration tab. Let us consider a scenario in which we use Keycloak as an OpenID Connect provider. Here we will configure the username which is already in Keycloak to the username of Jira to associate the user with their Keycloak account.
When a user attempts SSO, the response from Keycloak will contain the username, user’s first name, last name, and email address.
The User Profile tab has the following features:
Disable attribute mapping
Checking this option will ensure that the profile attributes of existing users will not be updated whenever they attempt SSO. This will not affect new users. The app creates a new user’s profile in the application based on the attributes received in the response.
Each SSO attempt generates an OAuth/OpenID request which the app sends to the provider. The response from provider contains all the user’s attributes. The user’s profile is updated with the attributes received in the response to the latest SSO attempt. If this option is set then the user’s profile will only be updated once, after the first successful SSO attempt. The profile of existing users will not be updated, irrespective of the attributes received in an OAuth response.
In case a directory is being used as a user store, this option may need to be checked based on the type of directory permission provided to the application. The recommended setting for each permission:
- Read Only or Read Only With Local Groups: With either of these permissions the user’s profile in the directory cannot be updated, so the option should be checked.
- Read/Write: This permission allows the user’s profile to be updated. Here, there is no restriction for this option. If left unchecked, then the user’s profile in the directory will be updated whenever SSO is performed successfully. If checked, then the user’s profile will be updated only after the SSO is performed successfully.
Login Application user account by
This option gives the choice to use either the user’s username or email for authentication. If the username is selected, then the app matches the users username in Atlassian application with the username received in the response (which is mapped with Username in User Profile). The same applies for email address, here the email address is matched.
While this allows user authentication through email, it is recommended that the option be set to username as there is no restriction on the creation of multiple user profiles having the same email attribute.
If no match is found, the user is considered a new user and a new account is created for that user in Atlassian application.
Attribute Mapping
As mentioned earlier, the app allows the updation of the user’s profile in the application with attribute values from the provider. This is done by mapping the attribute names received in the OAuth response to the attributes of the user’s profile.
To map attributes from the provider to the application, the attribute names received in the response need to be entered in their corresponding fields. These attribute names can be viewed in the Test Configuration.
Consider the earlier example of using Keycloak as an provider. Let’s assume we want the user’s email attribute value in Keycloak to be the username in the application user profile. We need to enter the attribute name, i.e. email, in the field for username. This way we can map other attribute names returned by the provider to attributes in the application. Now, when the response is received the app will take the attribute values corresponding to the mapped attribute names and assign them to the respective user profile attributes. But if no attribute values are mapped then the user’s email will automatically be detected for authentication.
The user profile attributes that can be configured via attribute mapping are :
-
Username: The attribute name that corresponds to the username of the user is entered in this field. There is an option to extract the username from the attribute value of any other attribute name returned in the response. The working of this option is explained in the next section
-
Email ID: The attribute name with the user’s email as attribute value is entered in this field. This is a required field and cannot be empty.
-
Full Name Attribute: The attribute name that has the user’s full name as value is entered in this field. This field is left blank by default and is not a required field. If the response contains attribute names for the user’s first name and last name separately then there is an option to switch from Full Name Attribute to First Name and Last Name. This option is explained in a later section.
-
First Name: If the provider returns the user’s first name in the response, the attribute name that contains the first name value is entered in this field.
-
Last Name: If the provider returns the user’s last name in the response, the attribute name that contains the last name value is entered in this field.
Apply Regular expression on username field
This option is used if the username value needs to be extracted from any one of the attribute values returned in the response. This option takes a regular expression (or regex) pattern as input. The username value is extracted by applying the regular expression to the value corresponding to the attribute name entered in the Username field.
Steps to configure the Regex Option:
- Map the username: The username needs to be extracted from one of the attribute values, enter the corresponding attribute name in the Username field.
- Then check the checkbox for enabling the regex pattern. Once this is checked, the section to enter a regex and test it is displayed.
- Enter the required regex in the field provided (you can also use the regex pattern mentioned in the description).
- To check the output of the regex, click on the Test Regex button. This will open a new window, where you can enter a value in the field provided. Click the Test button to apply the given regex to the entered value. The extracted value is displayed in the same window next to the input field.
Let’s consider a case where the username needs to be extracted from the user’s email. The attribute name containing the user’s email as value is entered in the Username field and the Apply Regular expression on username field option is checked. The regex *^.?(?=@) is entered in the regex field. If the email attribute value received in the OAuth response is abc@domain.com, then the app will apply the entered regex on this value and extract abc** and this will be set as the username in the user’s profile.
Here are some examples of regex patterns:
| Regex | Username | Result | ||
|---|---|---|---|---|
| (^.{1,3})..(.{1,4}).@.* | first.last@example.com | firlast | ||
| ._(.).@. | first.middle_last@gmail.com | last | ||
| (^.[^._]).@(.[^.]). | firstname.lastname_something@company.com | firstnamecompany |
Separate Name Attributes
This option is used to switch between using the Full Name attribute field or using the First Name and Last Name fields to set the user’s full name in the user profile. This can depend on how the provider being used returns the user’s full name in the response.
Let’s suppose the response contains one attribute that contains the user’s full name. In this case, this option need not be checked and the Full Name attribute field can be used. But if the response contains two attribute names, one each for the first name and last name then the fields First Name and Last Name need to be used. To do this the Separate Name Attributes option needs to be checked. After the option is checked the First Name and Last Name fields will get enabled and the Full Name attribute field will get disabled.
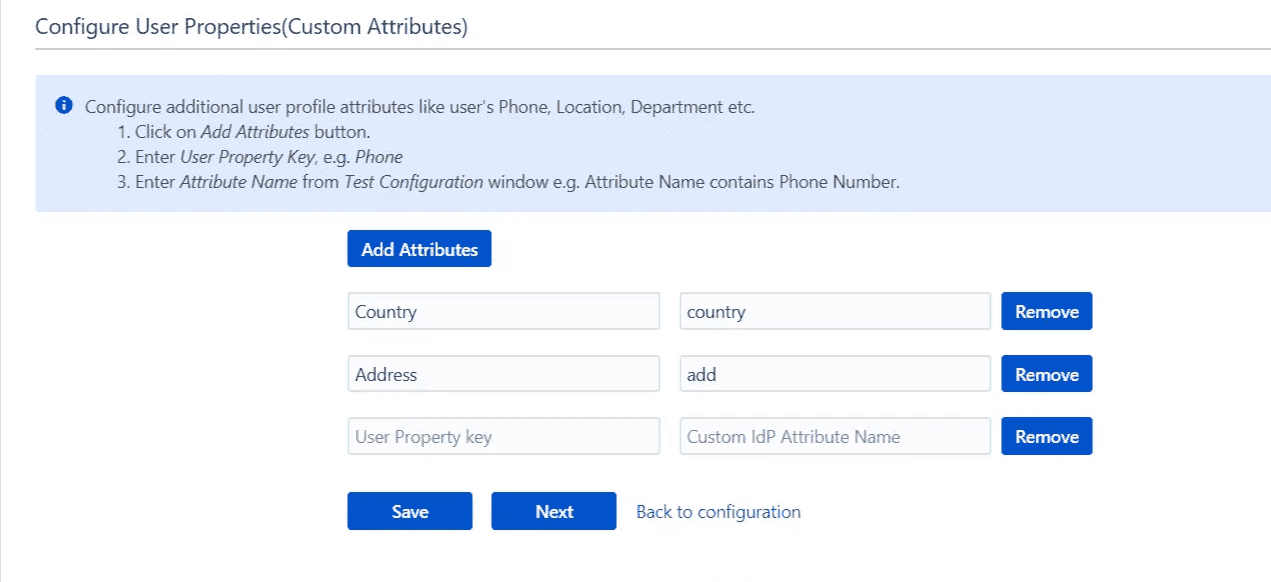
Configure Custom User Attribute
If response contains additional attributes (e.g. Phone, Location, Department) you can map those attributes against the user properties in the application.