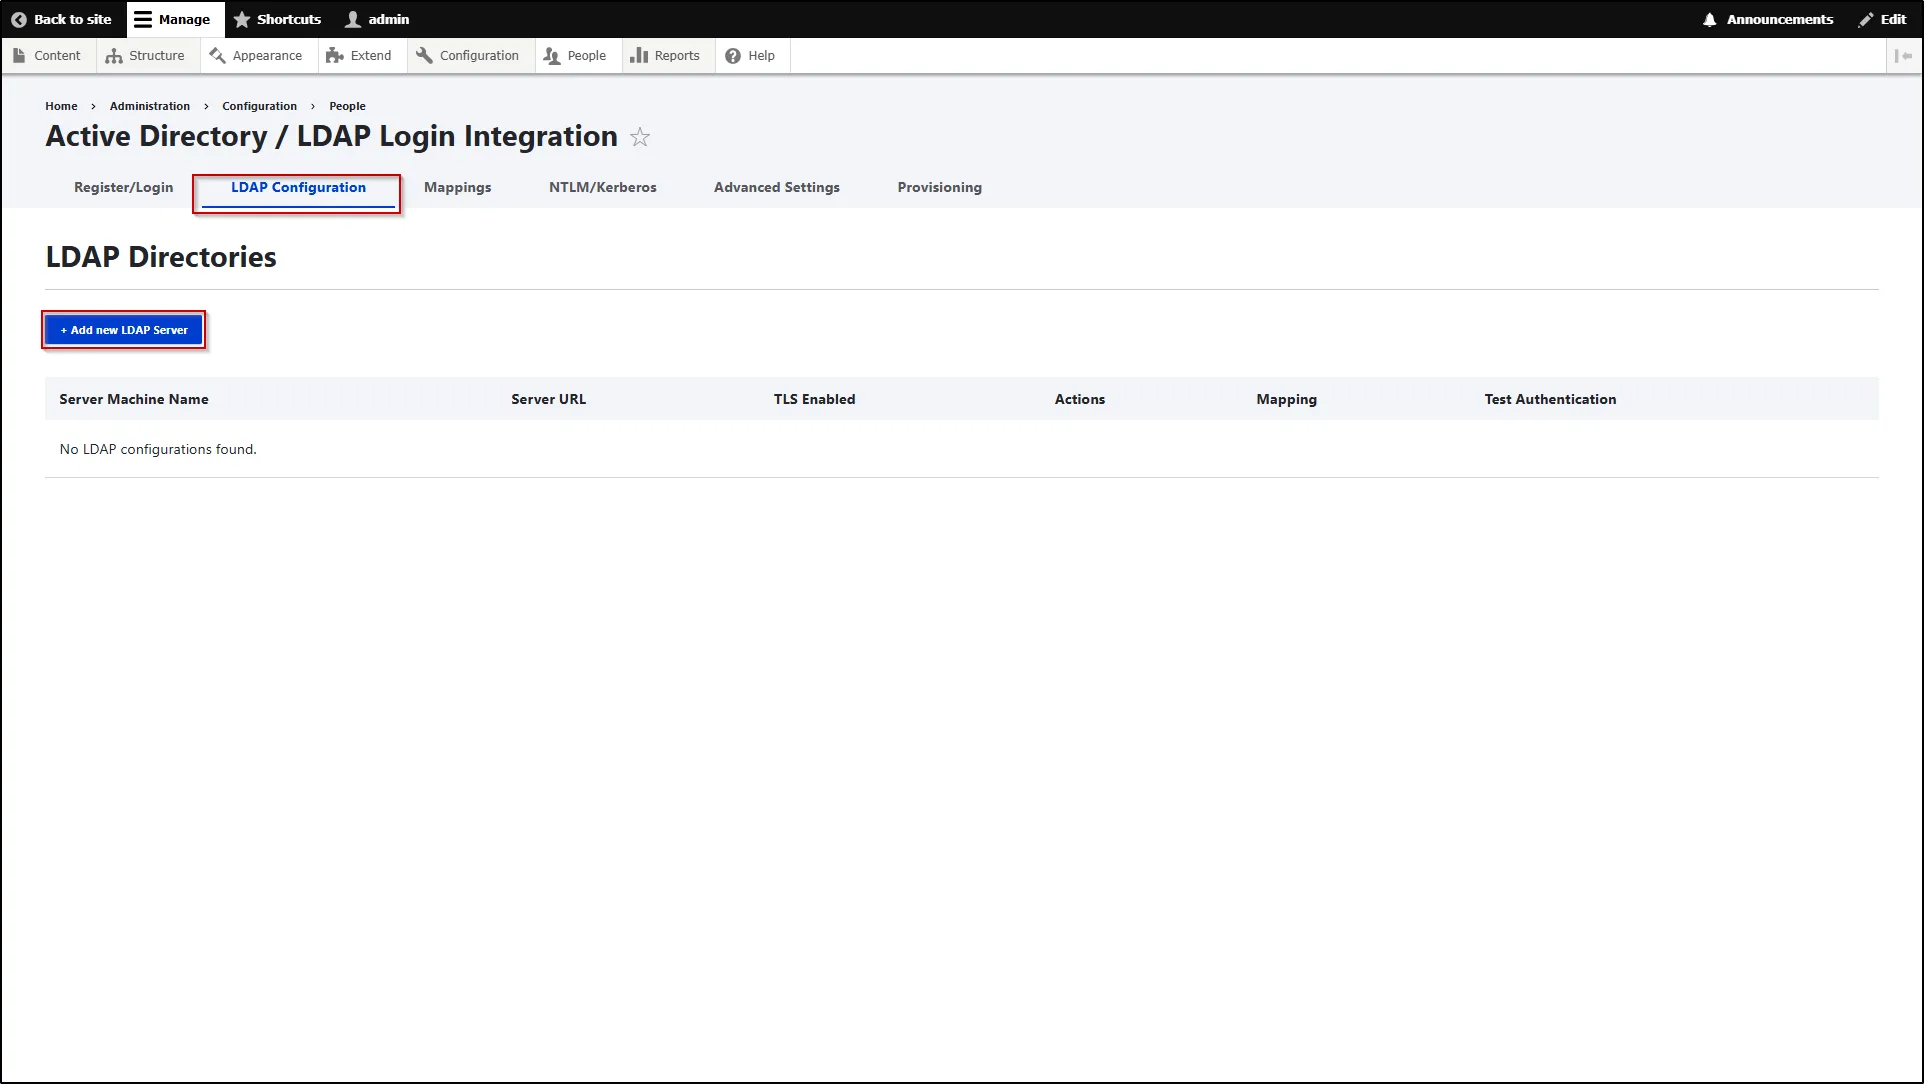
LDAP Configuration
- After login to the module with administrator credentials, navigate to the LDAP Configuration tab.
- In the LDAP Configuration tab, click the Add New LDAP Server button to begin the configuration.
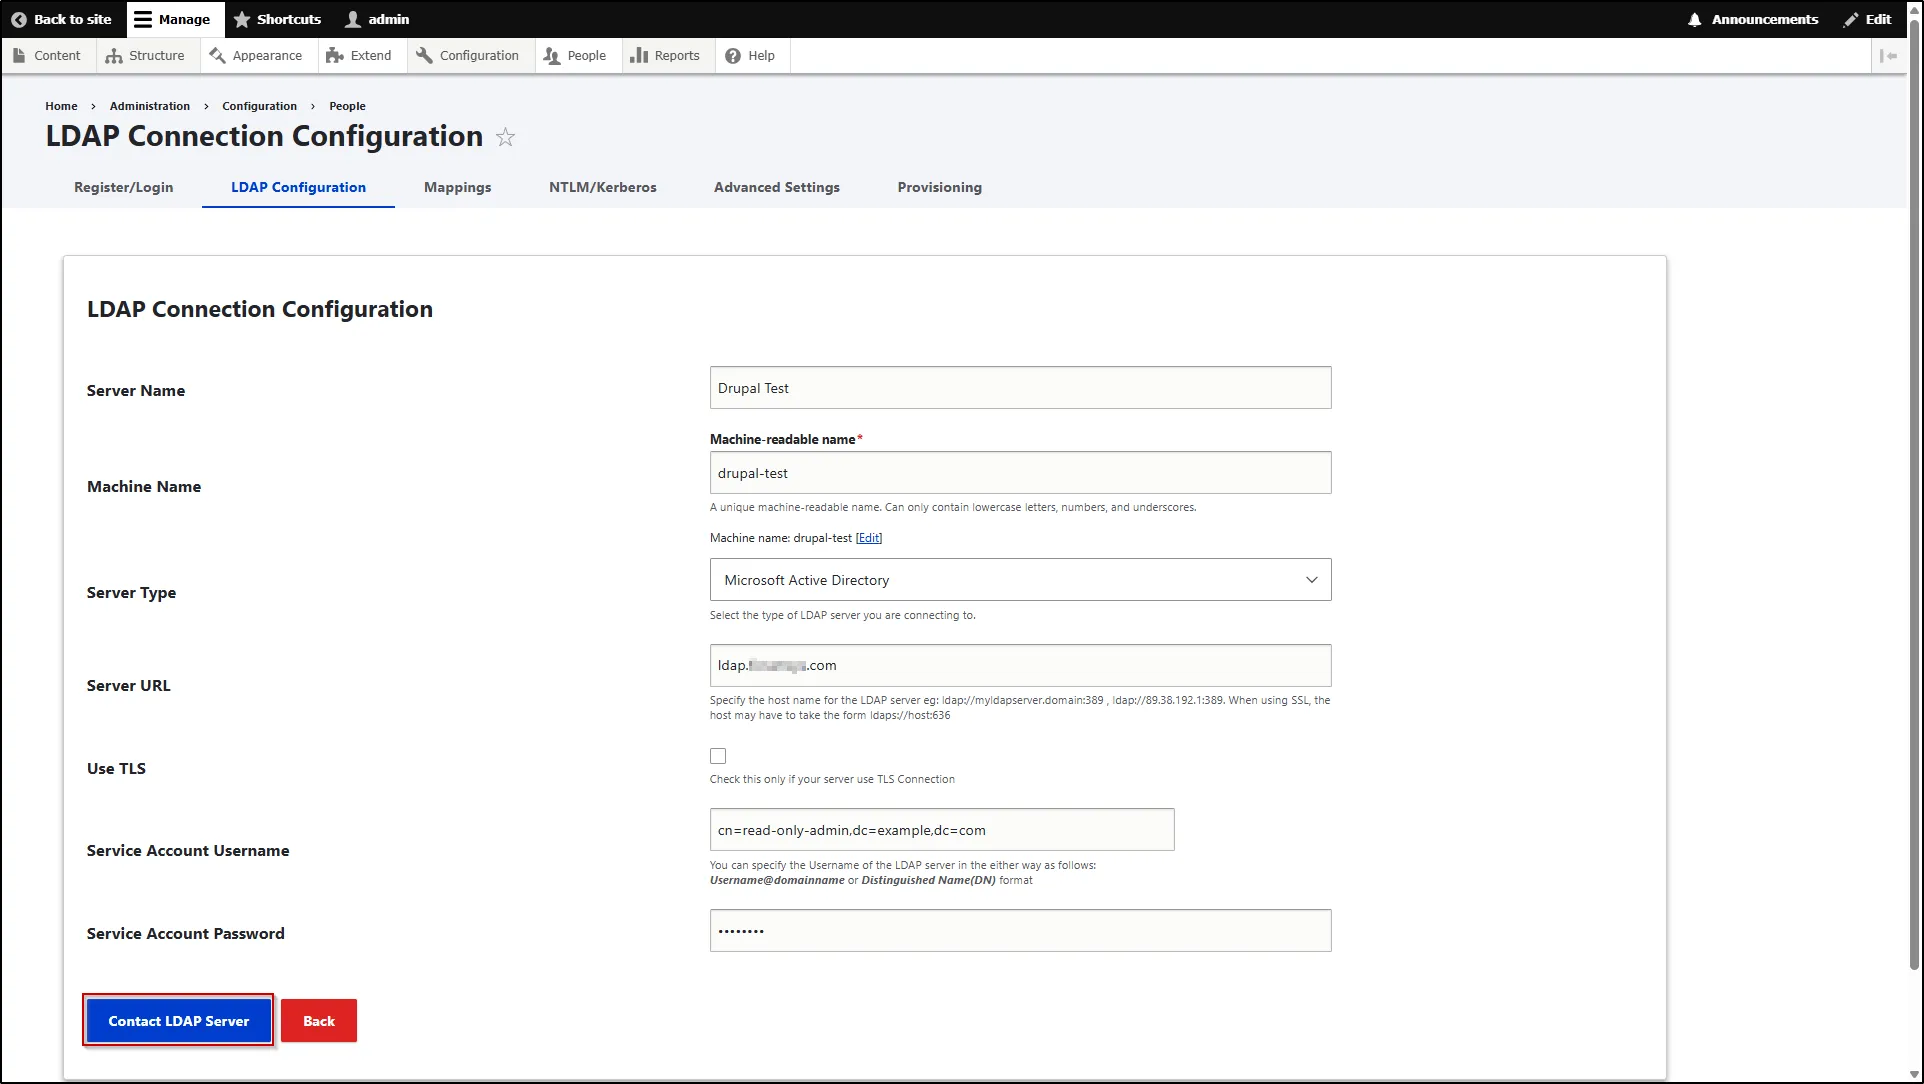
- In the LDAP Connection Configuration section, enter the LDAP connection details. After that, click the Connect LDAP Server button.
| Field Name | Description |
|---|---|
| Server Name | Enter the name of the LDAP server as per your preference. |
| Machine Name | This will be auto-generated. |
| Server Type | Select the LDAP server type from the dropdown. |
| Server URL | Enter the LDAP server URL. |
| Use TLS | This feature will work only if your server is using the TLS (Transport Layer Security) connection. TLS establishes secure authentication between Drupal and the LDAP Server. Select the checkbox to enable TLS connection. |
| Service Account Username | Enter the service account user name. |
| Service Account Password | Enter the service account password. |
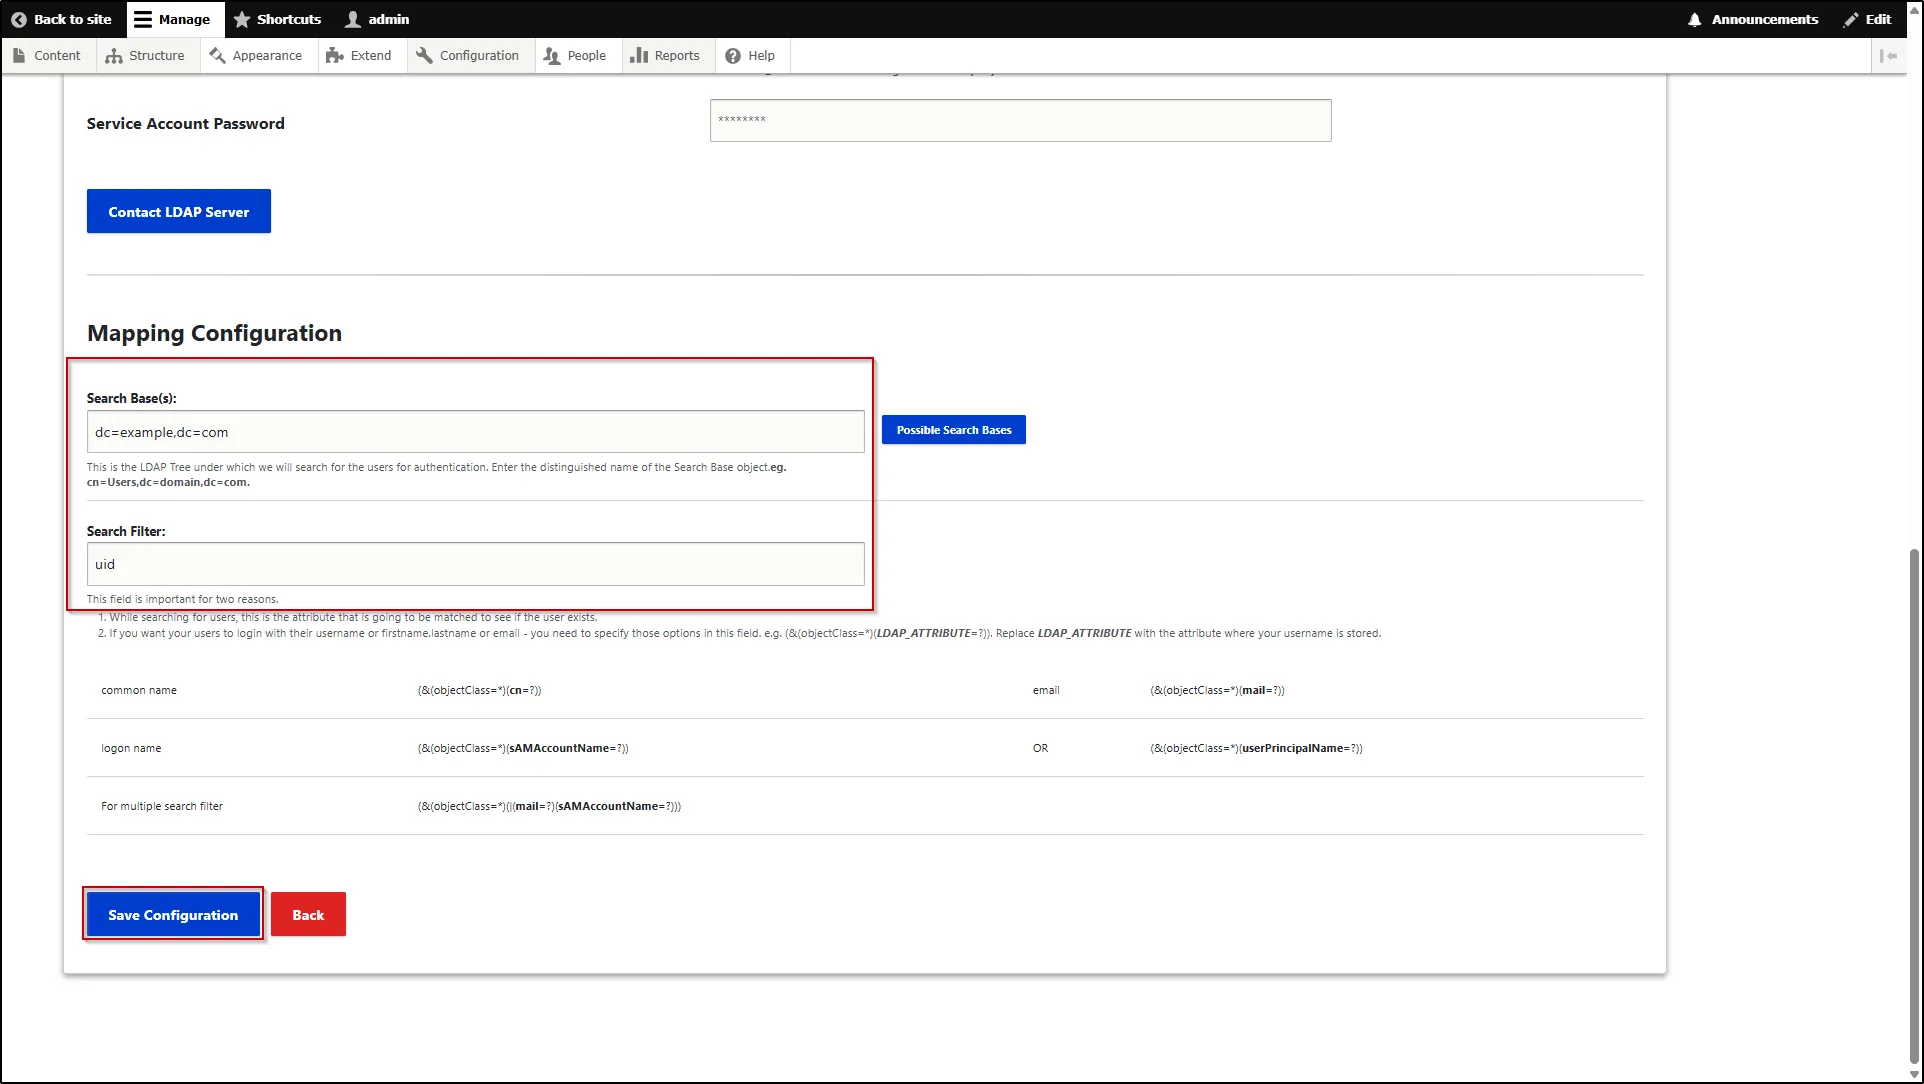
- After the successful Test Connection, scroll down to the Mapping Configuration.
- In the Mapping Configuration section, enter the Search Base and Search Filter in the respective text fields
- Click the Save Configuration button.
- Now, click the Test Authentication button in the LDAP Directories section.
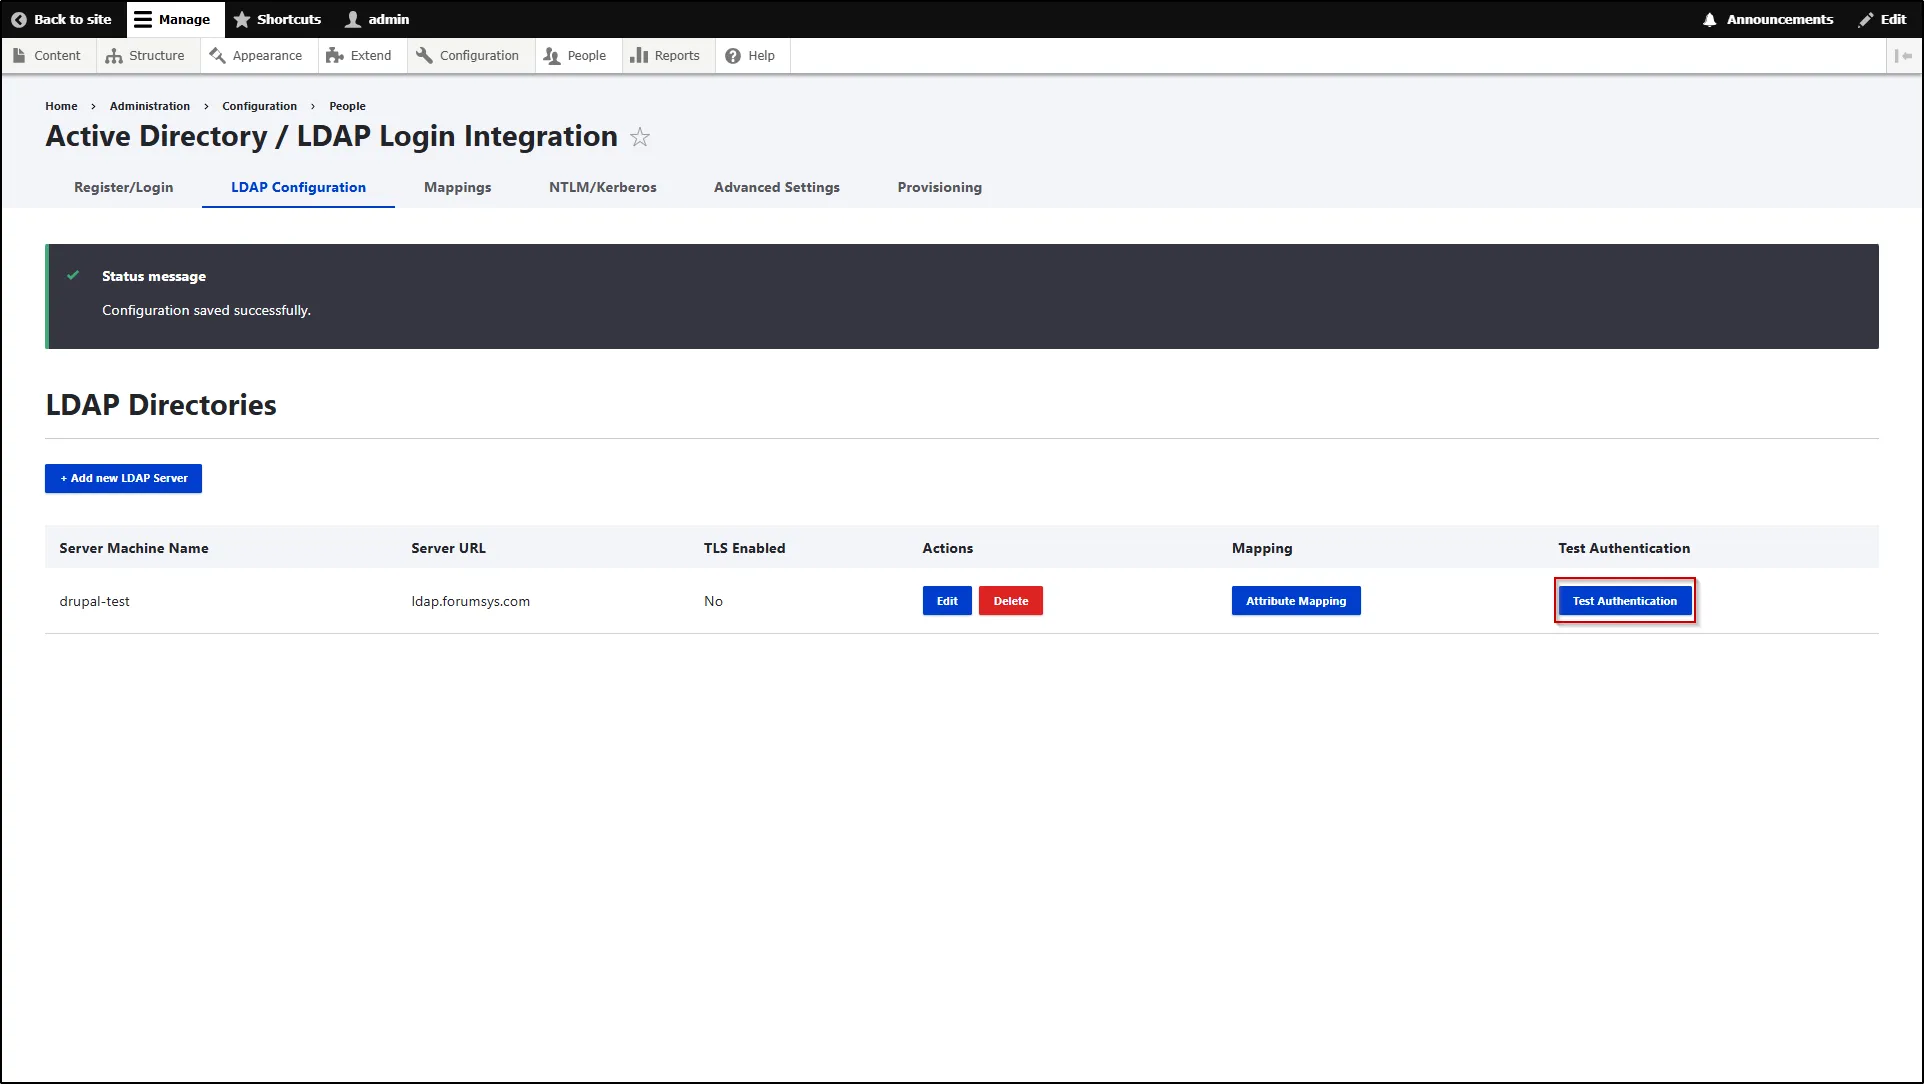
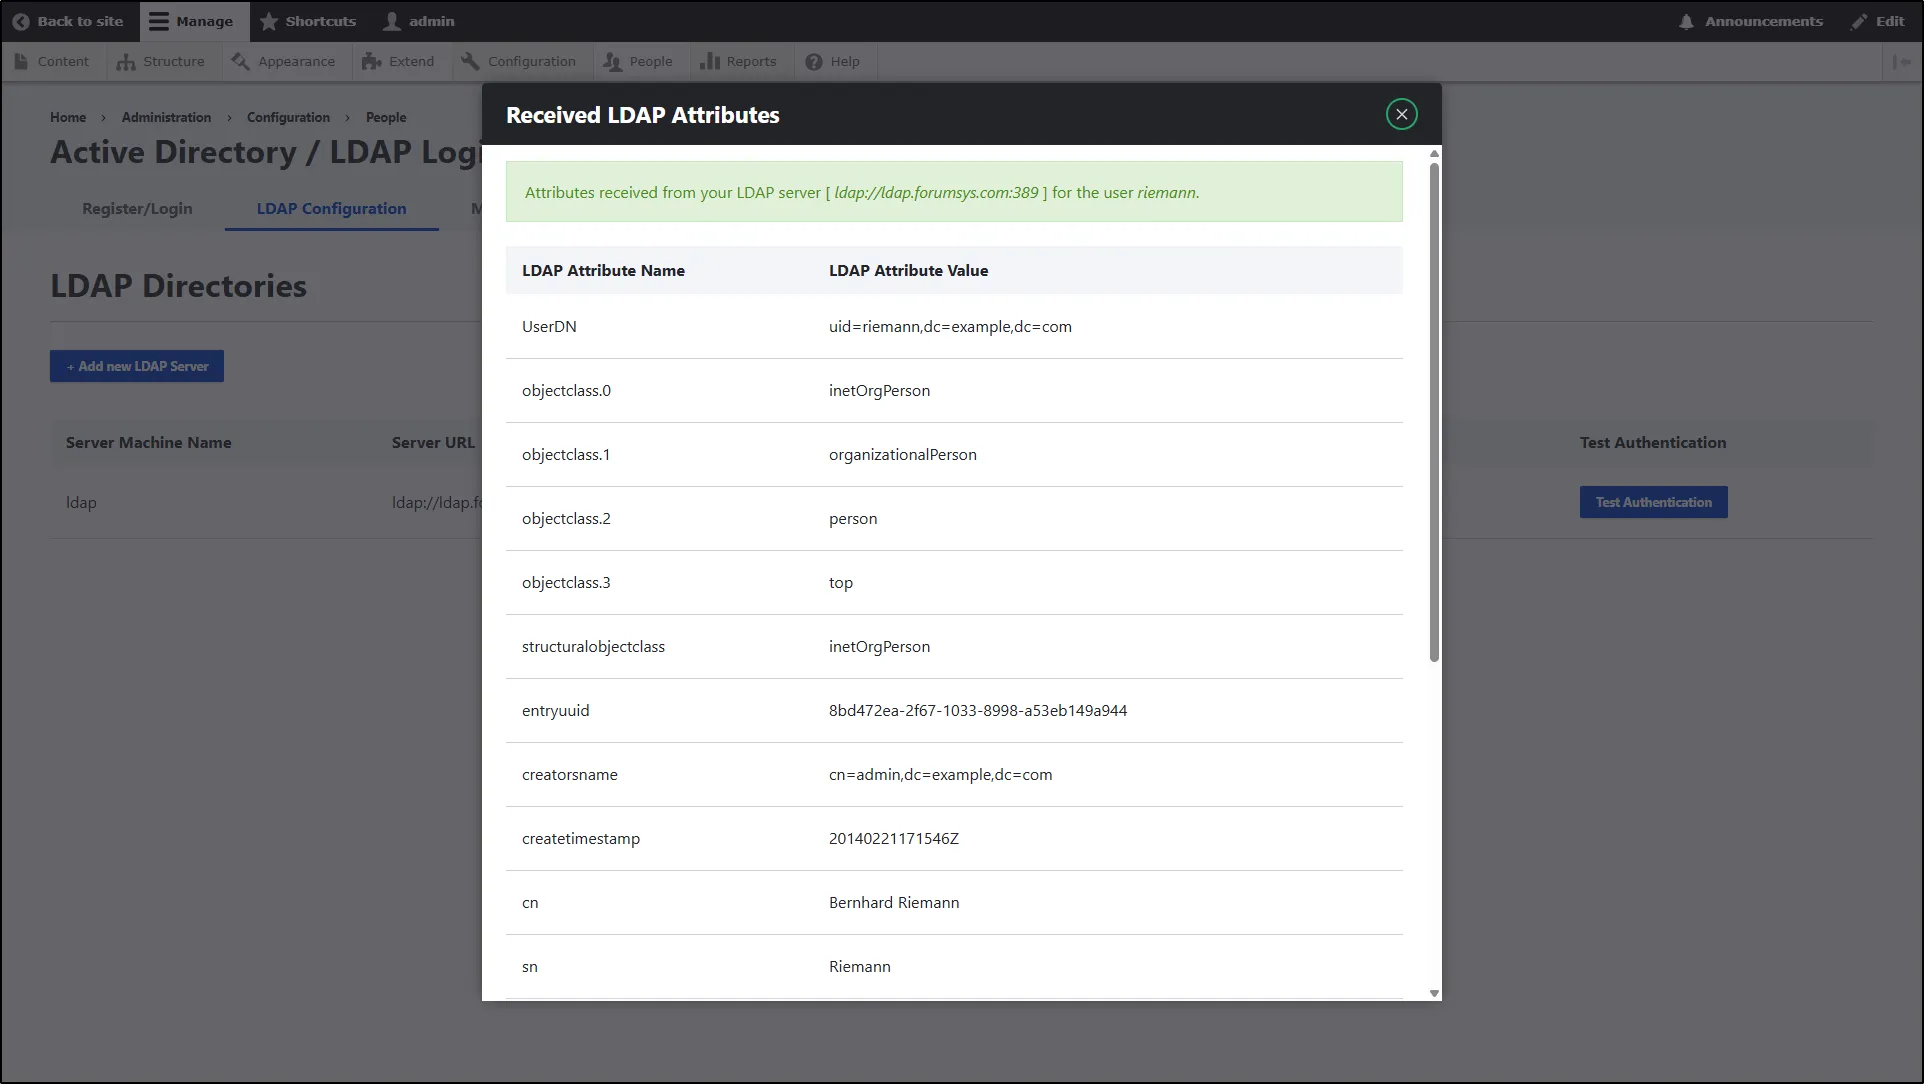
- Now, on the Test Authentication pop-up, enter the user name and password to check the configuration.

- After successful authentication, click the Get Your LDAP Attributes button to view the attributes received from the LDAP server.