4. Mapping
4.1 Attribute Mapping
-
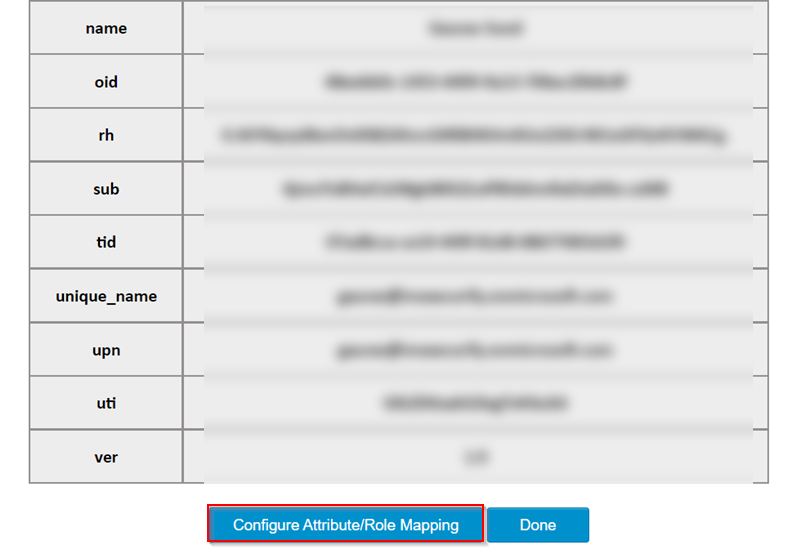
After successful Test Configuration click on Configure Attribute/Role Mapping button for performing mapping.
-
This feature can be used to map user attributes coming from OAuth Server with Drupal user details.
-
It provides the feature to map attributes like Username Attribute, Email Attribute. While auto registering the users in your Drupal site, these attributes will automatically get mapped to your Drupal user details.
-
Enter the Email Attribute name and Username Attribute name from the right side dropdown(Attributes received fron the OAuth Server) and click on Save Configuration button.

-
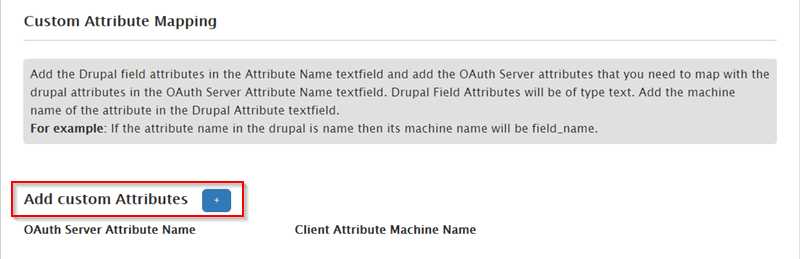
Users also perform the Custom Attribute Mapping. Click on Add custom Attributes button to perform more than one mapping.
-
It provides an additional feature to Add Custom Attributes which means users can Add extra OAuth Server attributes which they wanted to be included in their user profile.
-
If you wish to create more/custom Attributes in Drupal, please refer to the Steps Below:
-
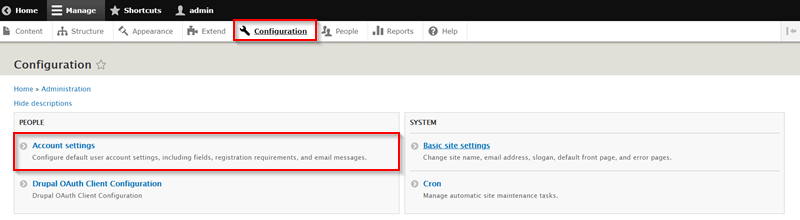
Navigate to Configuration -> Account settings.
-
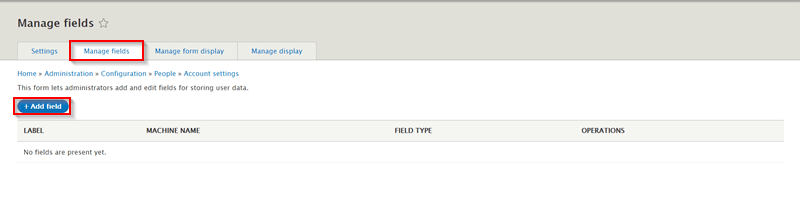
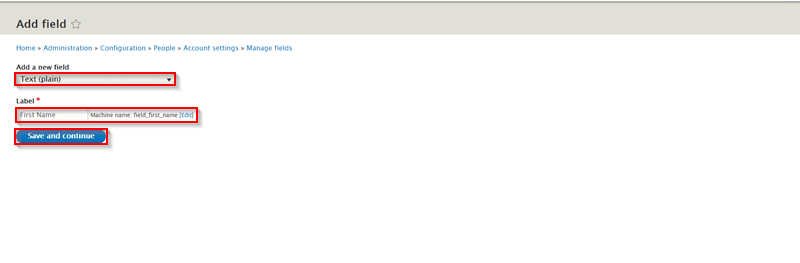
Now, go to the Manage fields and click on the Add field button to create a new field.
-
Select a field type from the dropdown box and enter the Label name. Click on Save and continue button to save your settings.
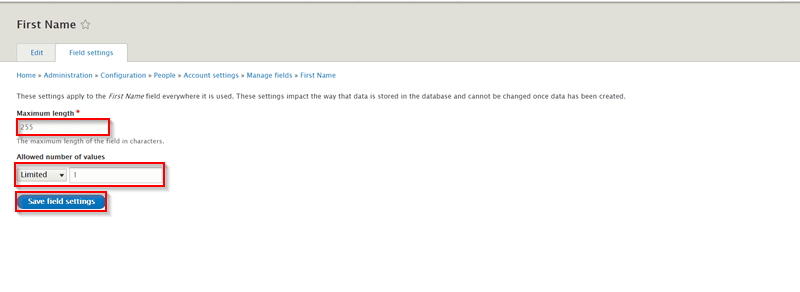
-
You can Allow a number of values and click on the Save field settings button.
-
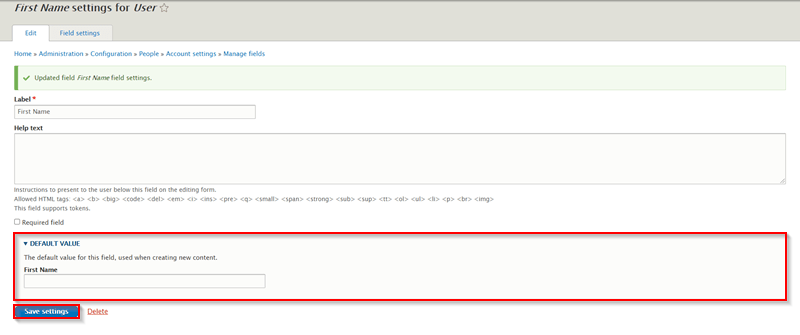
You will be redirected to the Edit page here you can check email setting for User. Also you can enter the DEFAULT VALUE to the field when creating the new content. Click on the Save settings button.
-
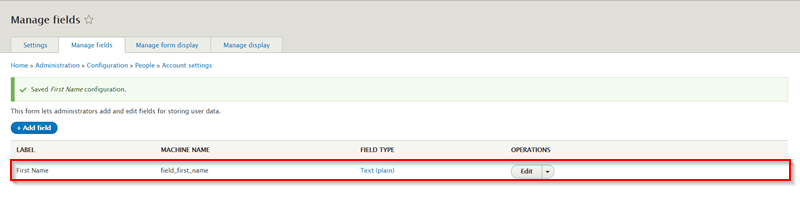
Field is created you can check LABEL, MACHINE NAME and FIELD TYPE here.
-
-
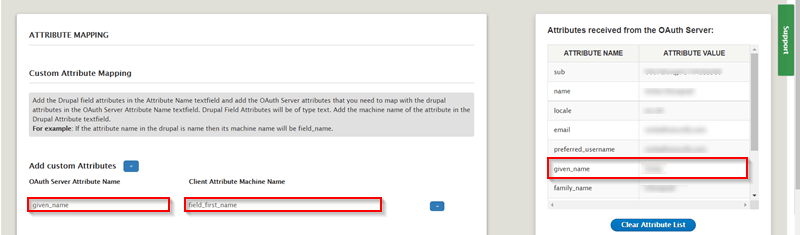
Please follow the below steps to configure Custom Attribute Mapping:
-
Go to the Attribute & Role Mapping tab of the module.
-
Under the Custom Attribute Mapping section , enter the OAuth Server Attribute Name that you are getting from your Provider’s end and enter the Client Attribute Machine Name which you have created in the above step.
-
Click on the Save Configuration button to save your custom Attribute Mapping.
-
-
Let’s see how this works:
-
Open a new Browser / Private window and go to your Drupal site’s login page.
-
Click on the Login using <your provider name> link.

-
-
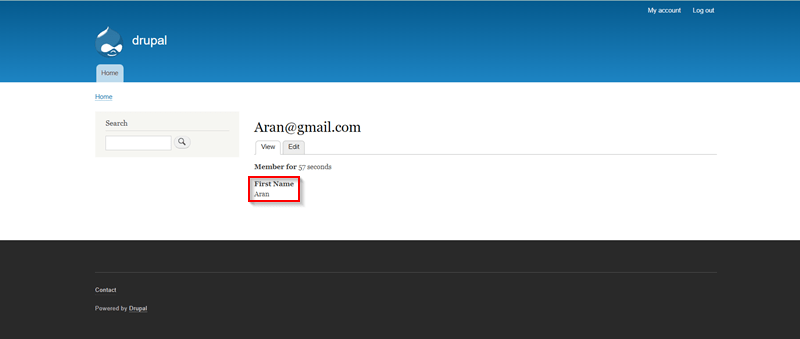
You have successfully performed Custom Attribute Mapping.
4.2 Role Mapping
-
Role Mapping allows you to map roles/groups received from your OAuth Provider to your existing roles in Drupal.
-
Roles in Drupal:
-
By default, Drupal provides you with 2 roles:
- Authenticated User.
- Administrator.
-
Every Drupal user has the Authenticated User role by default.
-
If you wish to create more/custom roles in Drupal, please refer to the Steps Below:
-
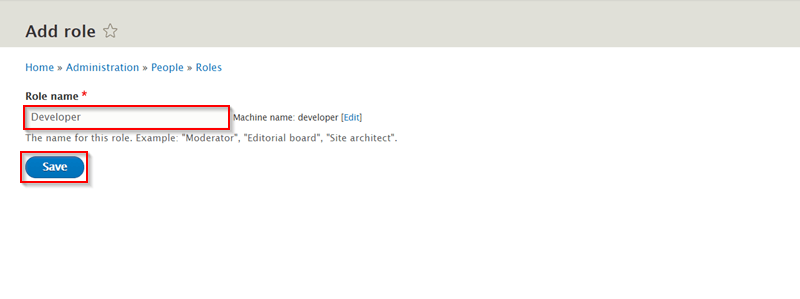
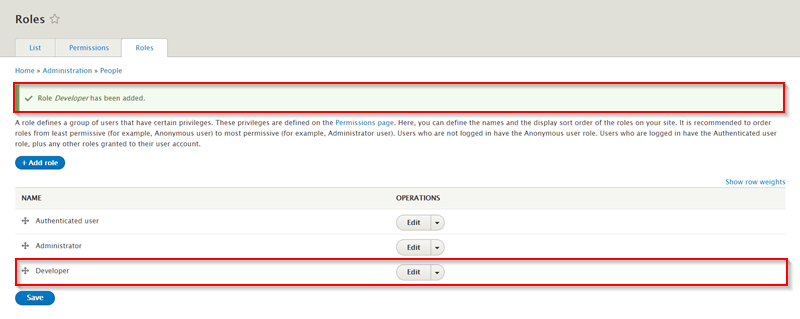
Navigate to People -> Roles. Now, click on the Add Role button to create a new role.

-
Enter the desired Role name and click on the Save button to save your settings.
-
-
Please follow the below steps to configure Role Mapping:
-
Go to the Attribute & Role Mapping tab of the module.
-
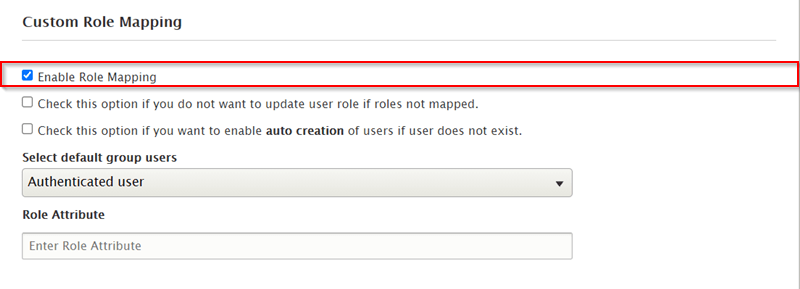
Under the Custom Role Mapping section , select the Enable the Role Mapping checkbox.
-
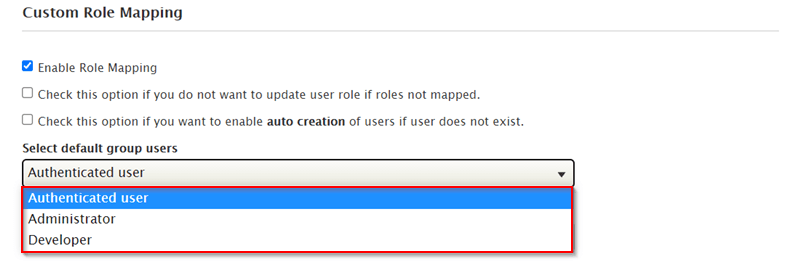
The Select default role for users dropdown box allows you to select and assign a default Drupal role for the new users that are created automatically during SSO.
-
For instance, if you wish to assign the Developer Drupal role to a user who has a dev_team role in your Provider. Also for this particular example, we will assume that you are getting all your user roles in the role attribute(you can refer to the image given below)

-
Under the Role Attributes section, you will find 2 columns.
- OAuth Client Role: On this side, you will be selecting the Drupal role.
- OAuth Server/Provider Role: In this side, you will be entering the name of the roles that you are getting from your Provider’s end. The users with the roles entered here will be assigned the Drupal role that you selected on the corresponding OAuth Client Role’s side. Please note that you can add multiple role names here.
-
Click on the Save Configuration button to save your settings.
-
-
Let’s see how this works:
-
Open a new Browser / Private window and go to your Drupal site’s login page.
-
Click on the Login using <your provider name> link.
-
-
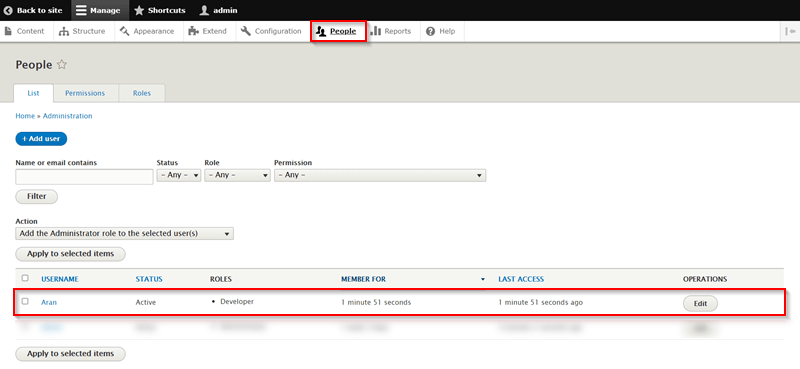
After successful SSO, go to the People tab of your Drupal site and check the Role has been assigned to the user.
-
You have successfully performed Custom Role Mapping.