User Email Domain-RLS Mapping
This feature allows you to apply Row-Level Security (RLS) dynamically by mapping the user’s email domain (the part after @ in their email address) to an RLS role defined in Power BI. This makes data filtering automatic and manageable without assigning users manually to each role.
Why?
Manually managing RLS roles for each user can become difficult and error-prone, especially in organizations with multiple departments or email domains. By leveraging users' email domains, this feature enables:
- Automatic RLS role matching
- Streamlined data restriction
- Simplified setup for multi-tenant or department-based data filtering
Solution
When this feature is enabled in the plugin, it captures the user’s email address upon login through WordPress and extracts the domain from it (for example, sales.com from user@sales.com). The plugin then matches this domain to a PowerBI RLS (Row-Level Security) role with the same name. As a result, users are automatically assigned to the corresponding RLS role and can only view the data allowed for their domain.
Example:
- Let’s say your company has users with the email domains: @marketing.com and @sales.com
- You can create two RLS roles in your PowerBI dataset: marketing.com and sales.com
- When a user logs in with user@marketing.com, the plugin matches them to the marketing.com RLS role.
- When a user logs in with employee@sales.com, the plugin assigns them the sales.com RLS role.
Each user will then only see the data filtered for their respective department or domain — no manual role assignment needed.
How the Plugin Captures User Email?
- When a user logs into your WordPress site, their email address is retrieved from their WordPress account.
- The plugin automatically extracts the domain part of the email (e.g., @sales.com).
- This domain is then used to determine the RLS role when embedding the report.
License Requirement
To enable this feature, you need the Enterprise version of the Power BI Embed Report Plugin by miniOrange.
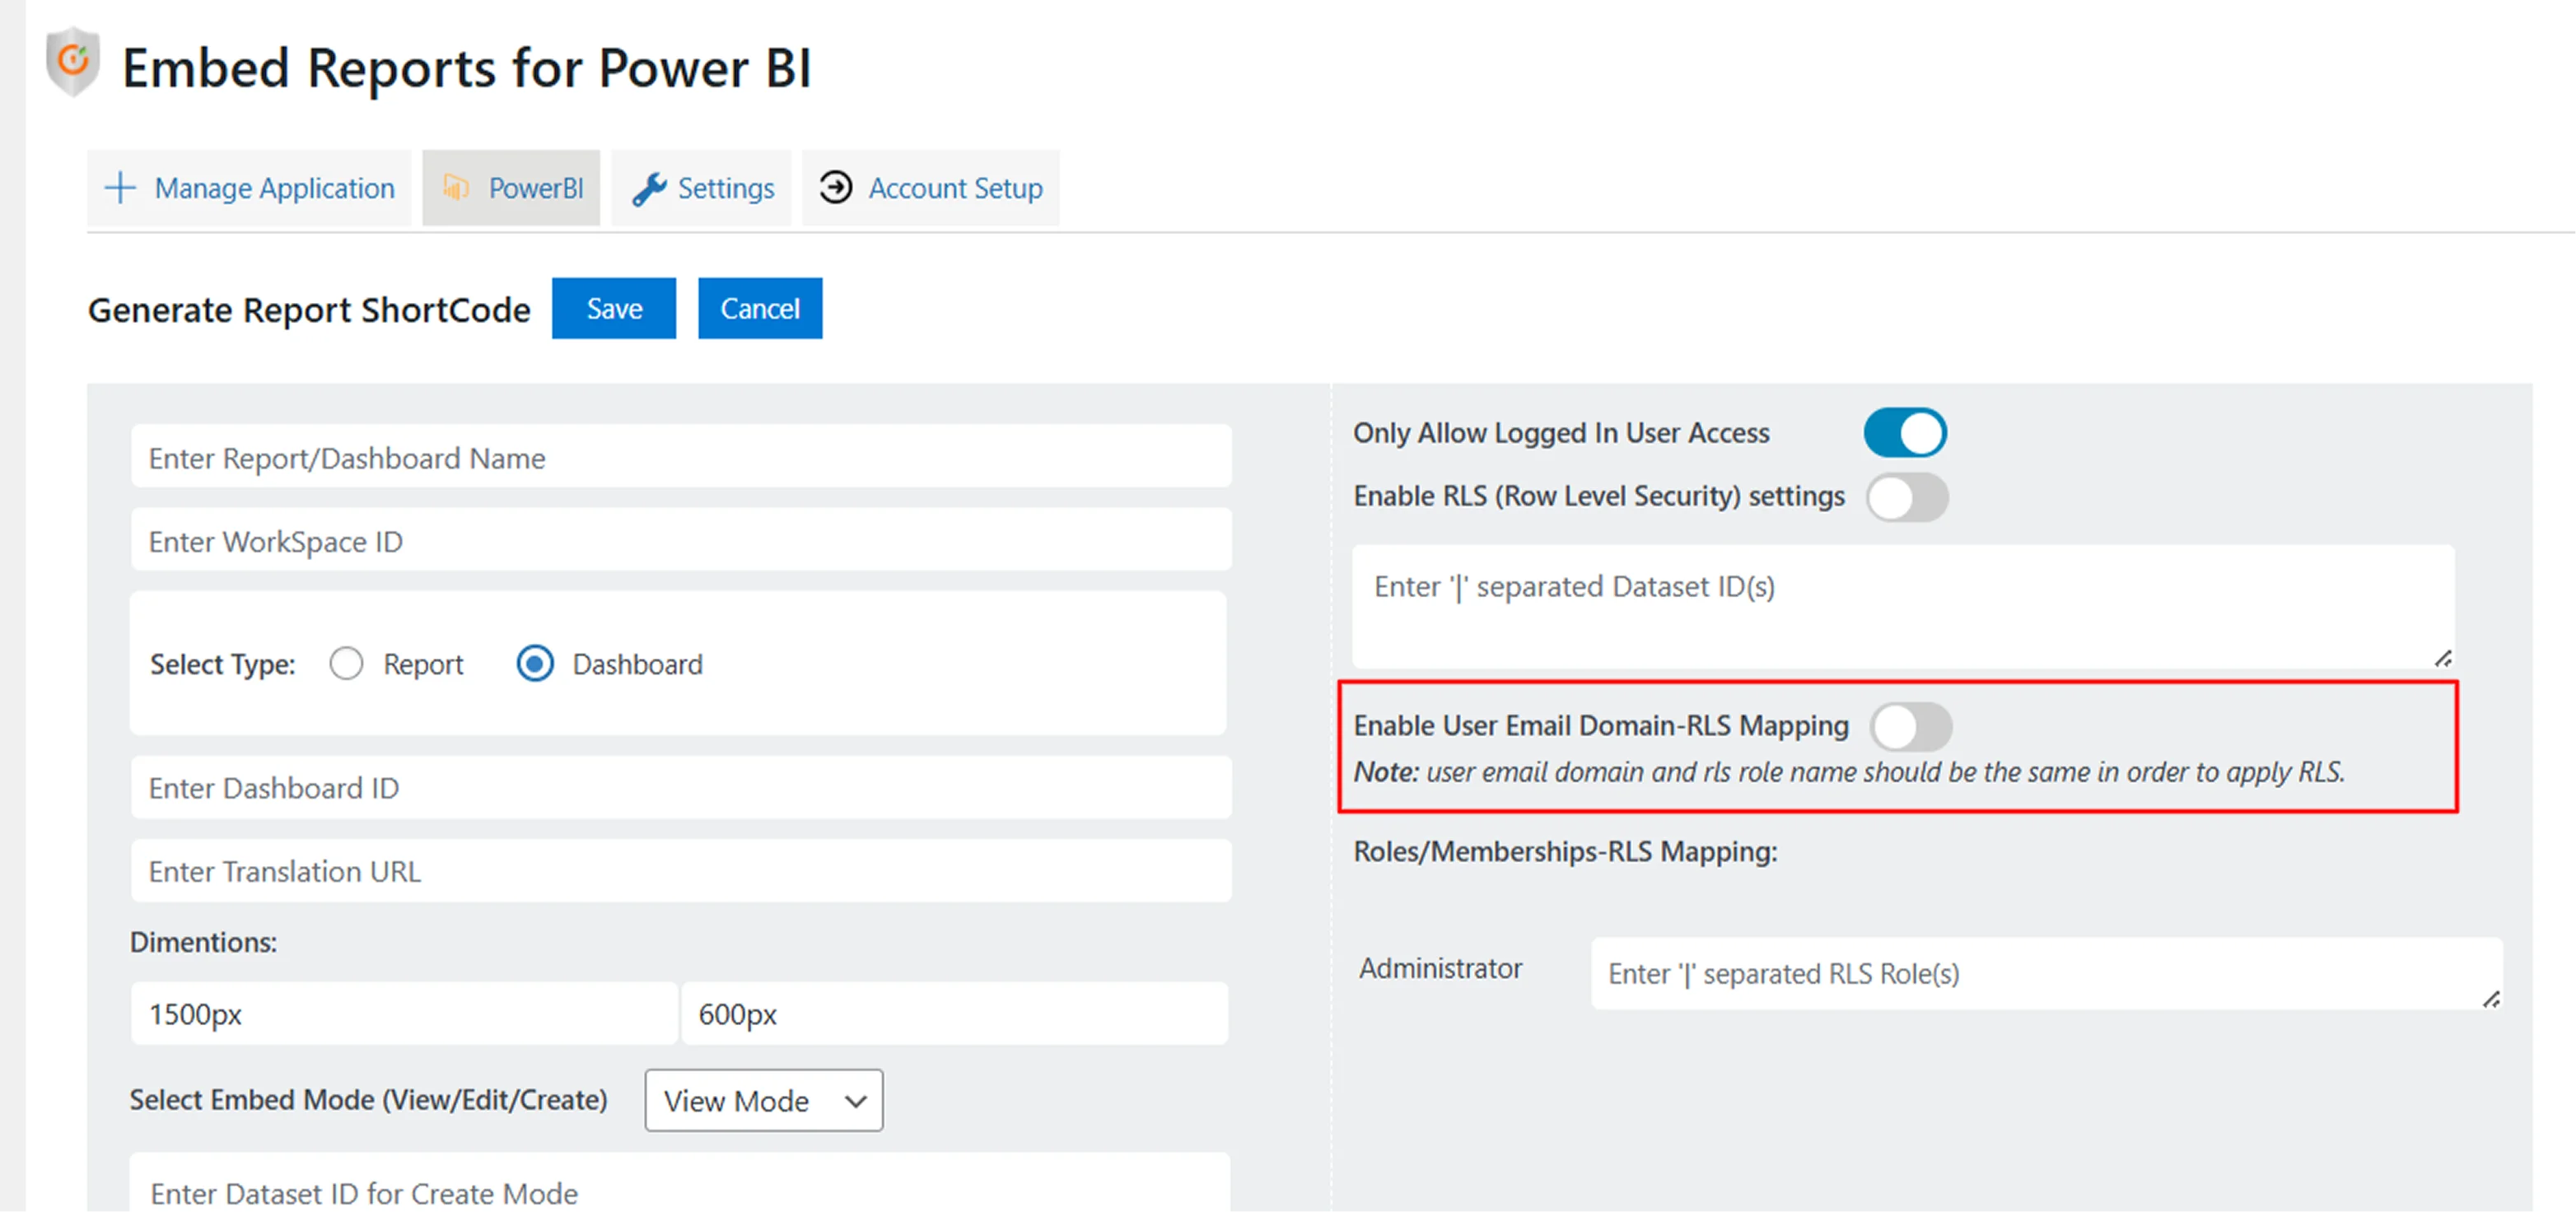
How to Enable Email Domain-RLS Mapping?
Follow the below steps to Enable Email Domain-RLS Mapping Feature:
-
Go to your WordPress Admin Panel.
-
Navigate to PowerBI Embed Settings.
-
Enable the toggle Enable User Email Domain-RLS Mapping.
-
Ensure that RLS roles in your PowerBI report are named after the domains you want to filter (e.g., sales.com, marketing.com).
-
Save the settings.
You have now successfully enabled Email Domain-RLS Mapping based on WordPress roles!
For more information visit our Embed Power BI Reports Plugin for WordPress page or mail us at office365support@xecurify.com.