Power BI Report Embedding with Paid Memberships Pro Integration
This integration allows you to embed Power BI reports and dashboards on your WordPress site while managing access based on Paid Memberships Pro membership levels.
Why?
Managing user access to Power BI reports can be challenging when using WordPress. This integration ensures:
- Seamless report embedding for logged-in users
- Membership-based access control
- Advanced security with Row-Level Security (RLS) where you can map your paid membership pro membership levels with your RLS roles
Solution
This integration simplifies managing Power BI report access on WordPress by linking Paid Memberships Pro levels with report permissions. You can restrict access to specific membership levels, ensuring only eligible users can view the reports. With RLS (Row-Level Security), you can further secure data by mapping membership levels to RLS roles, filtering report data based on user roles. The plugin allows easy generation of shortcodes with these settings, which can be embedded on WordPress pages or posts. This ensures seamless, secure, and scalable access control for your Power BI reports.
License Requirement
To enable this feature, you need an Enterprise version Power BI Embed Report Plugin license by miniOrange and Paid Memberships Pro plugin set up on your WordPress site.
How to Integrate Power BI with Paid Memberships Pro?
Follow the below steps to Integrate Power BI with Paid Memberships Pro:
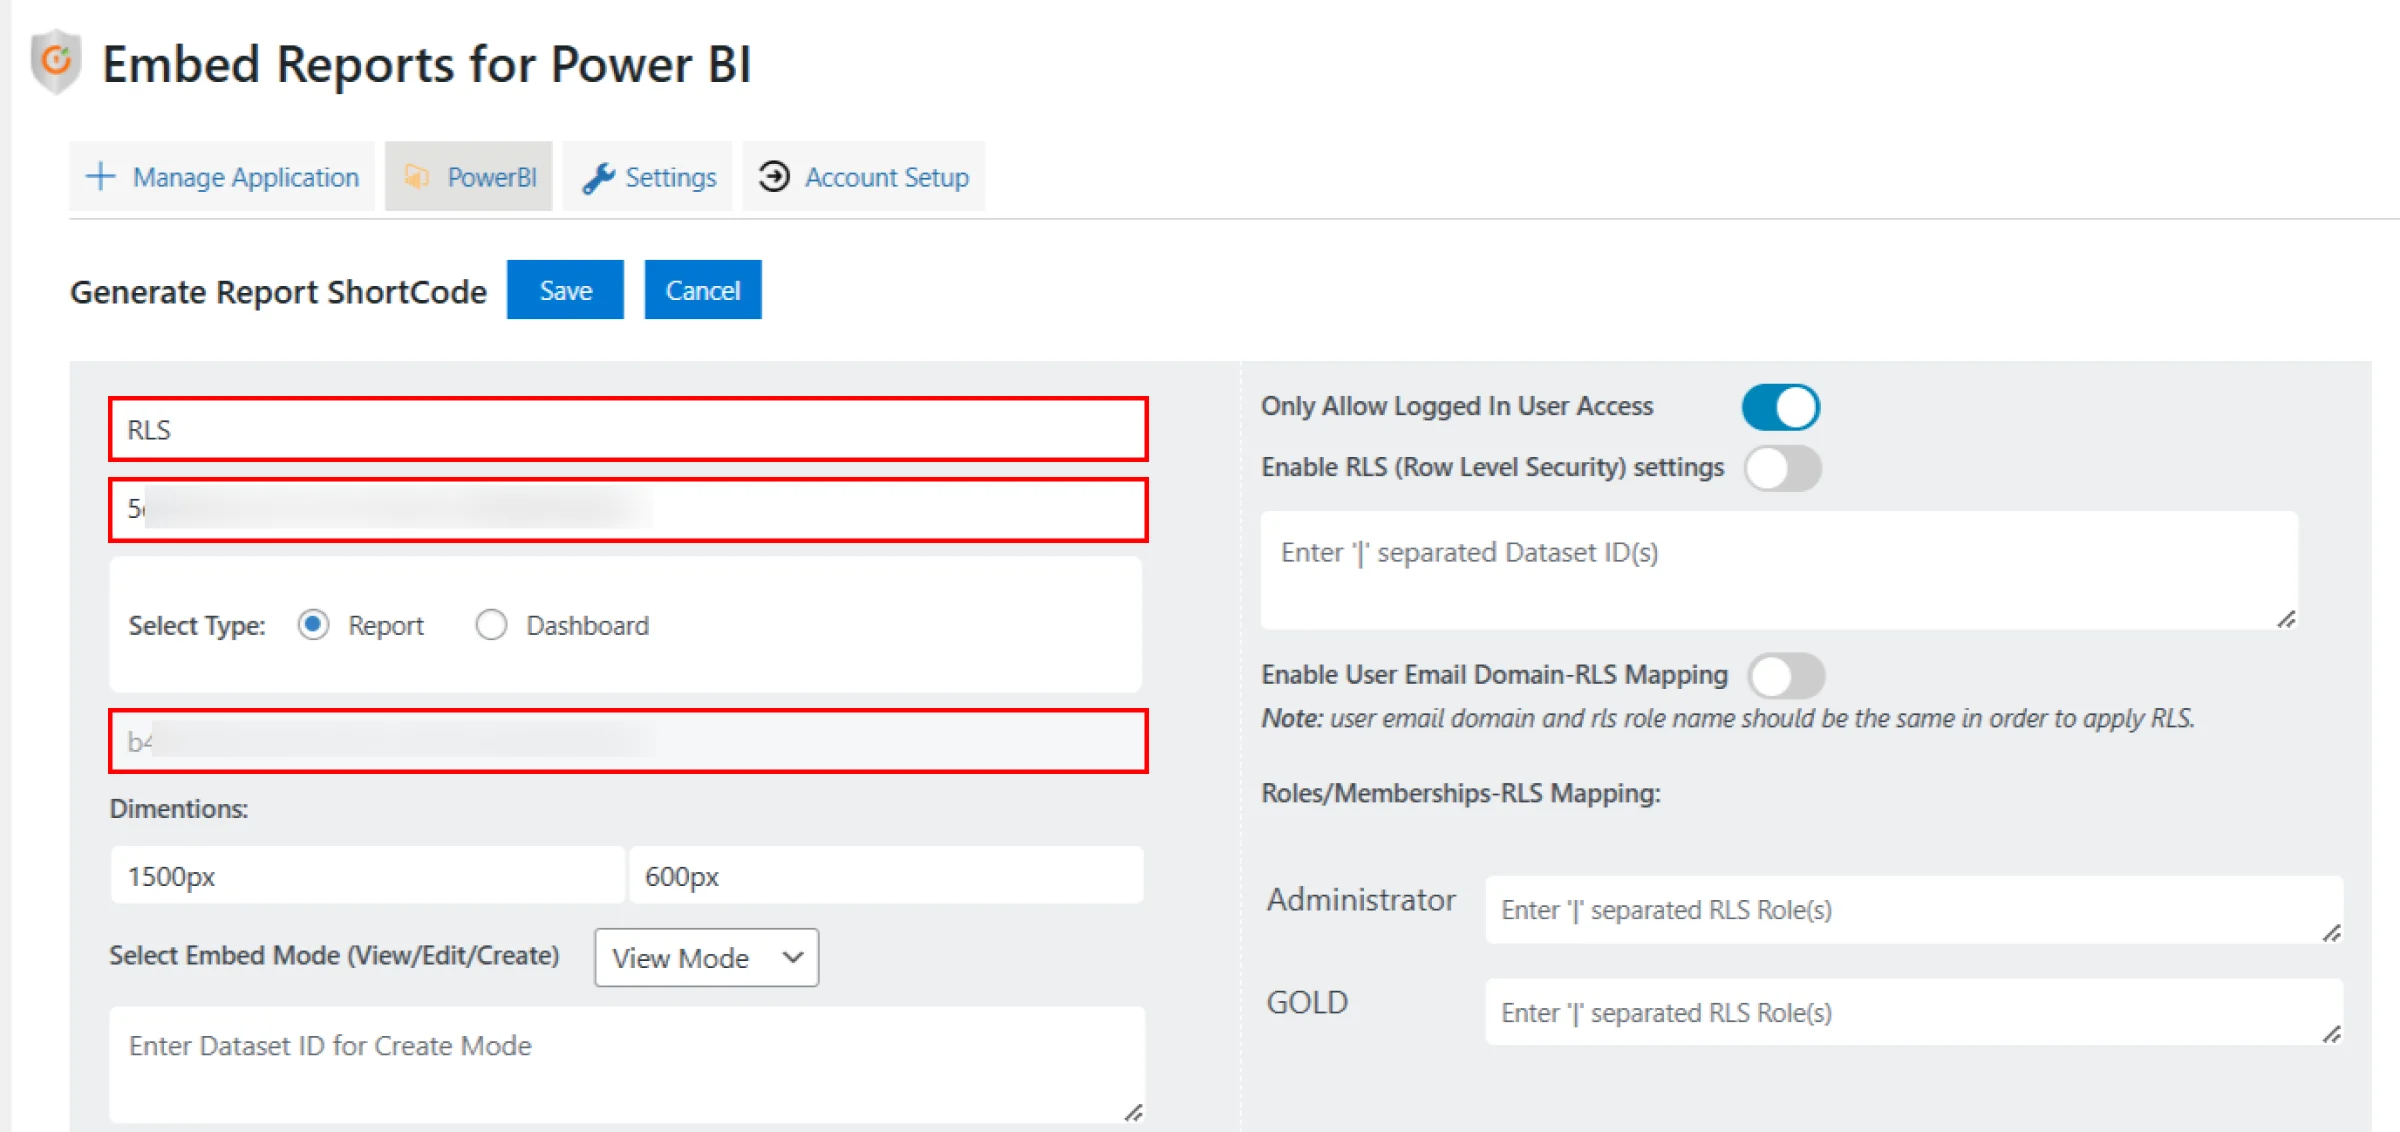
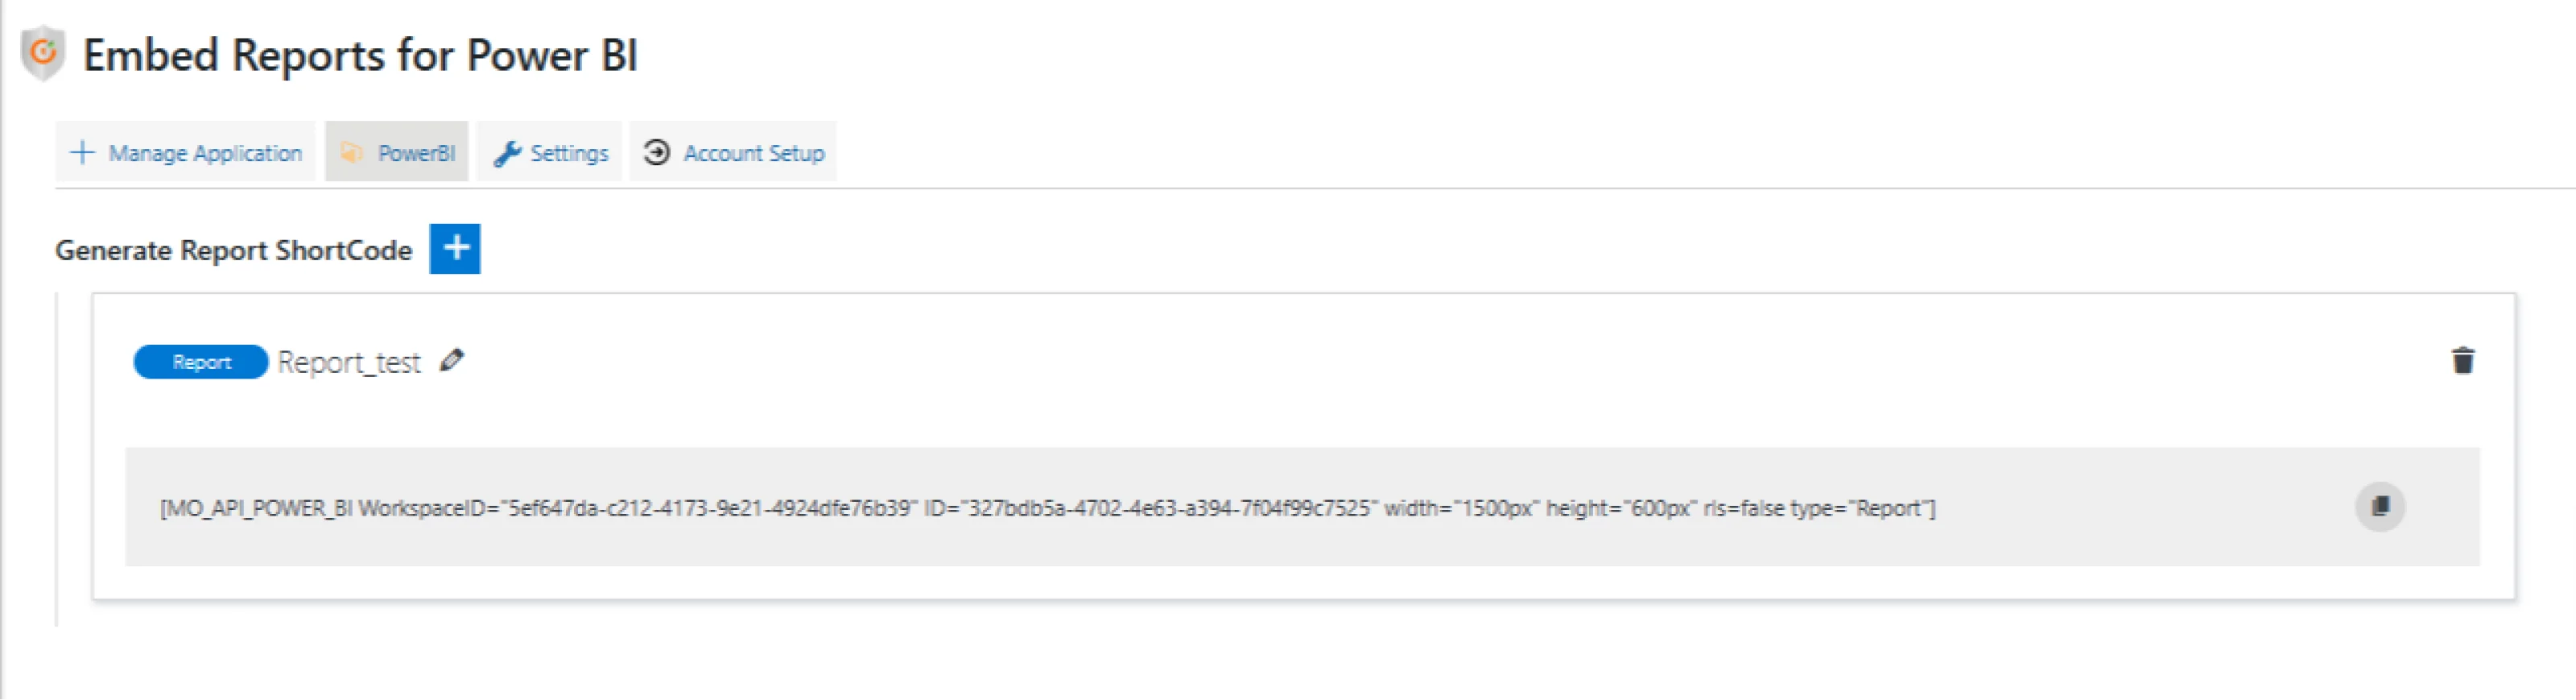
Step 1: Generate the Power BI Shortcode
-
Go to the Power BI tab in the plugin.
-
Click on the
+button to create a new shortcode.
-
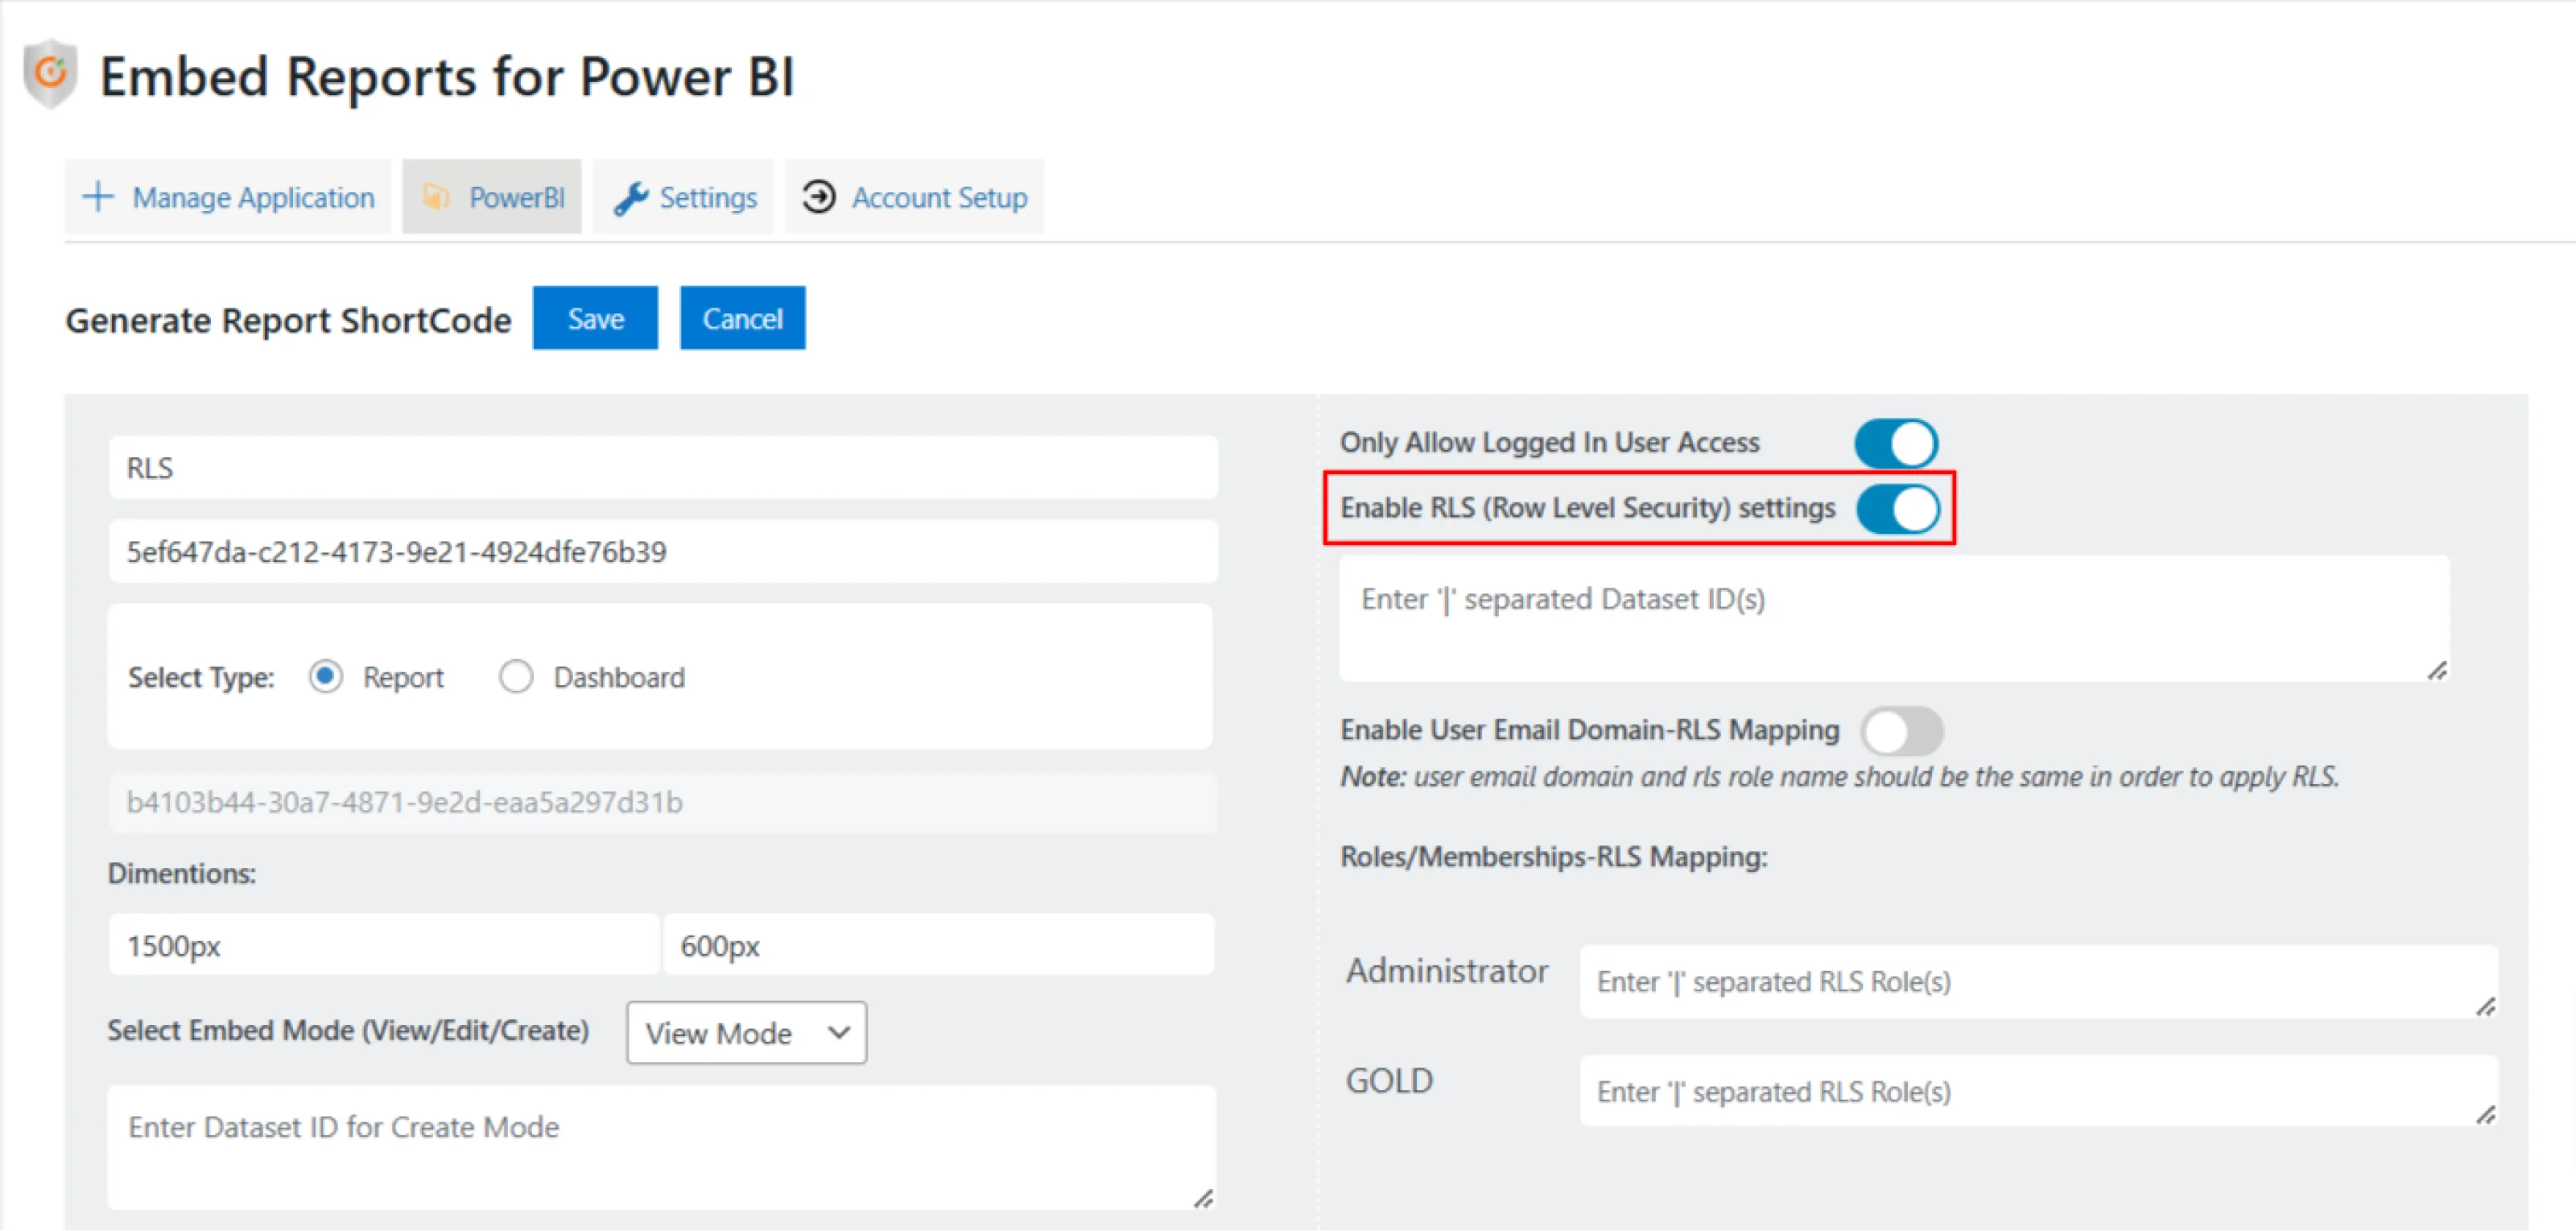
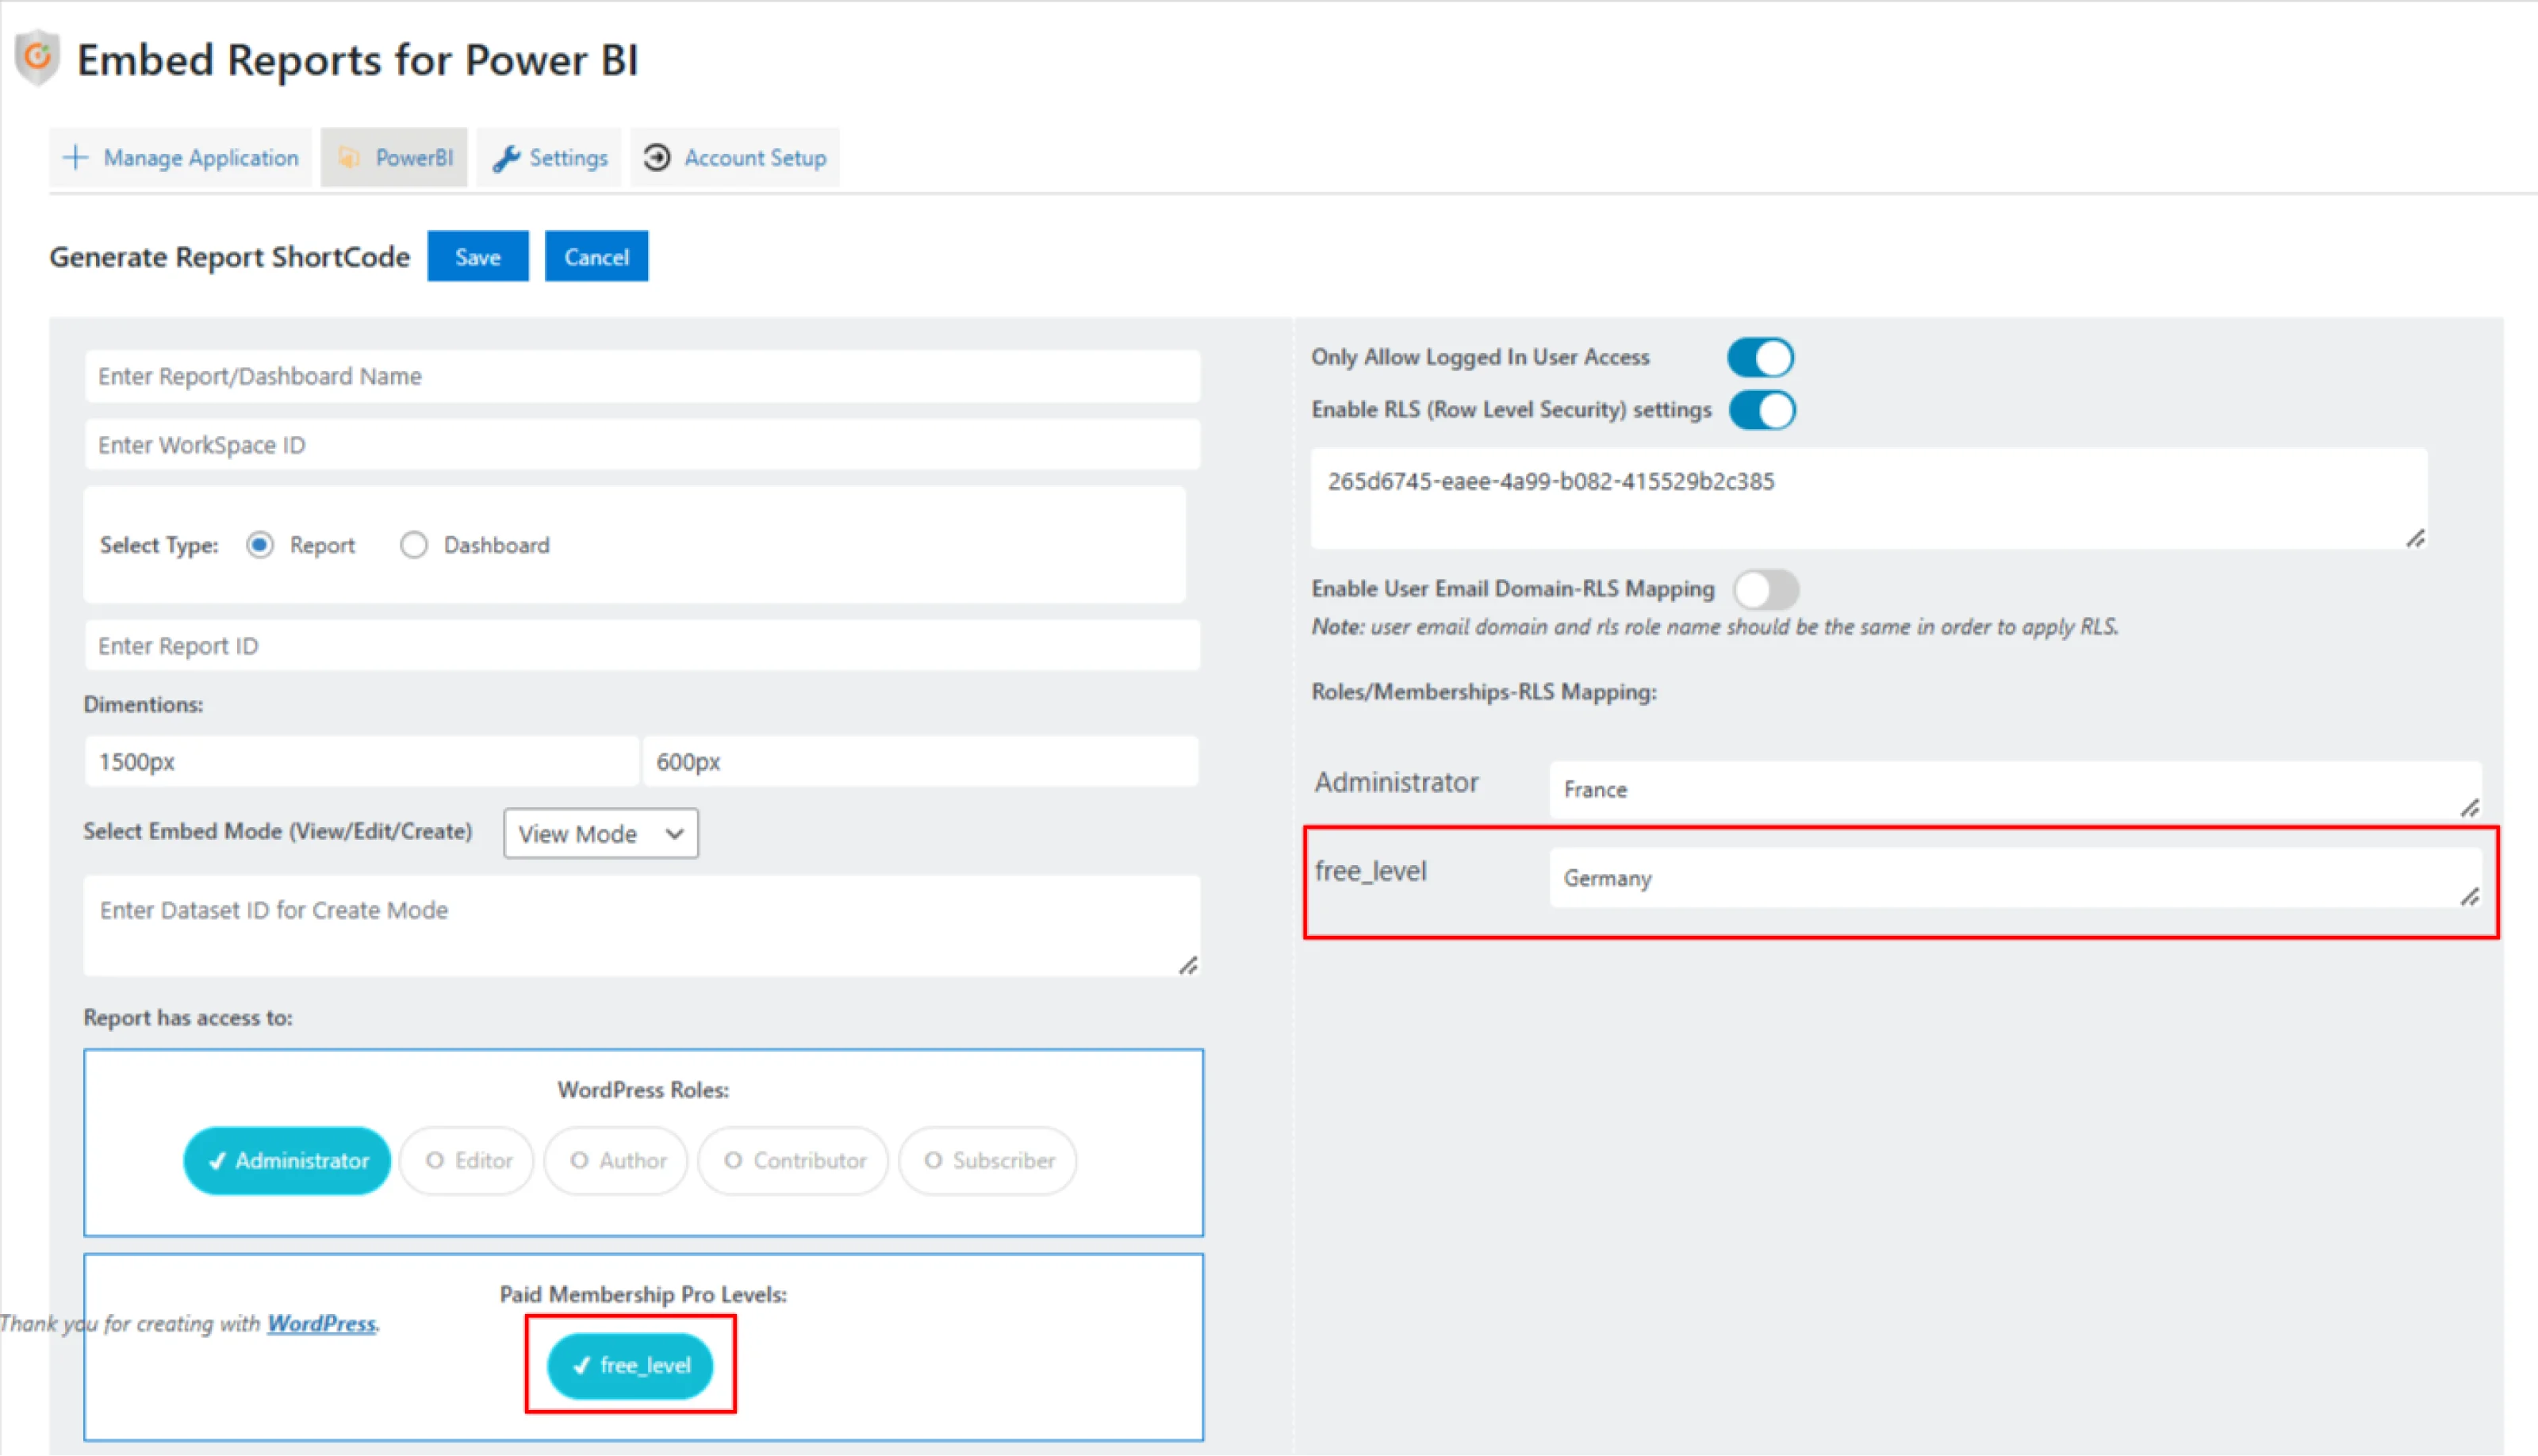
Enter the required details such as Report Name, Workspace ID, and Report ID.
-
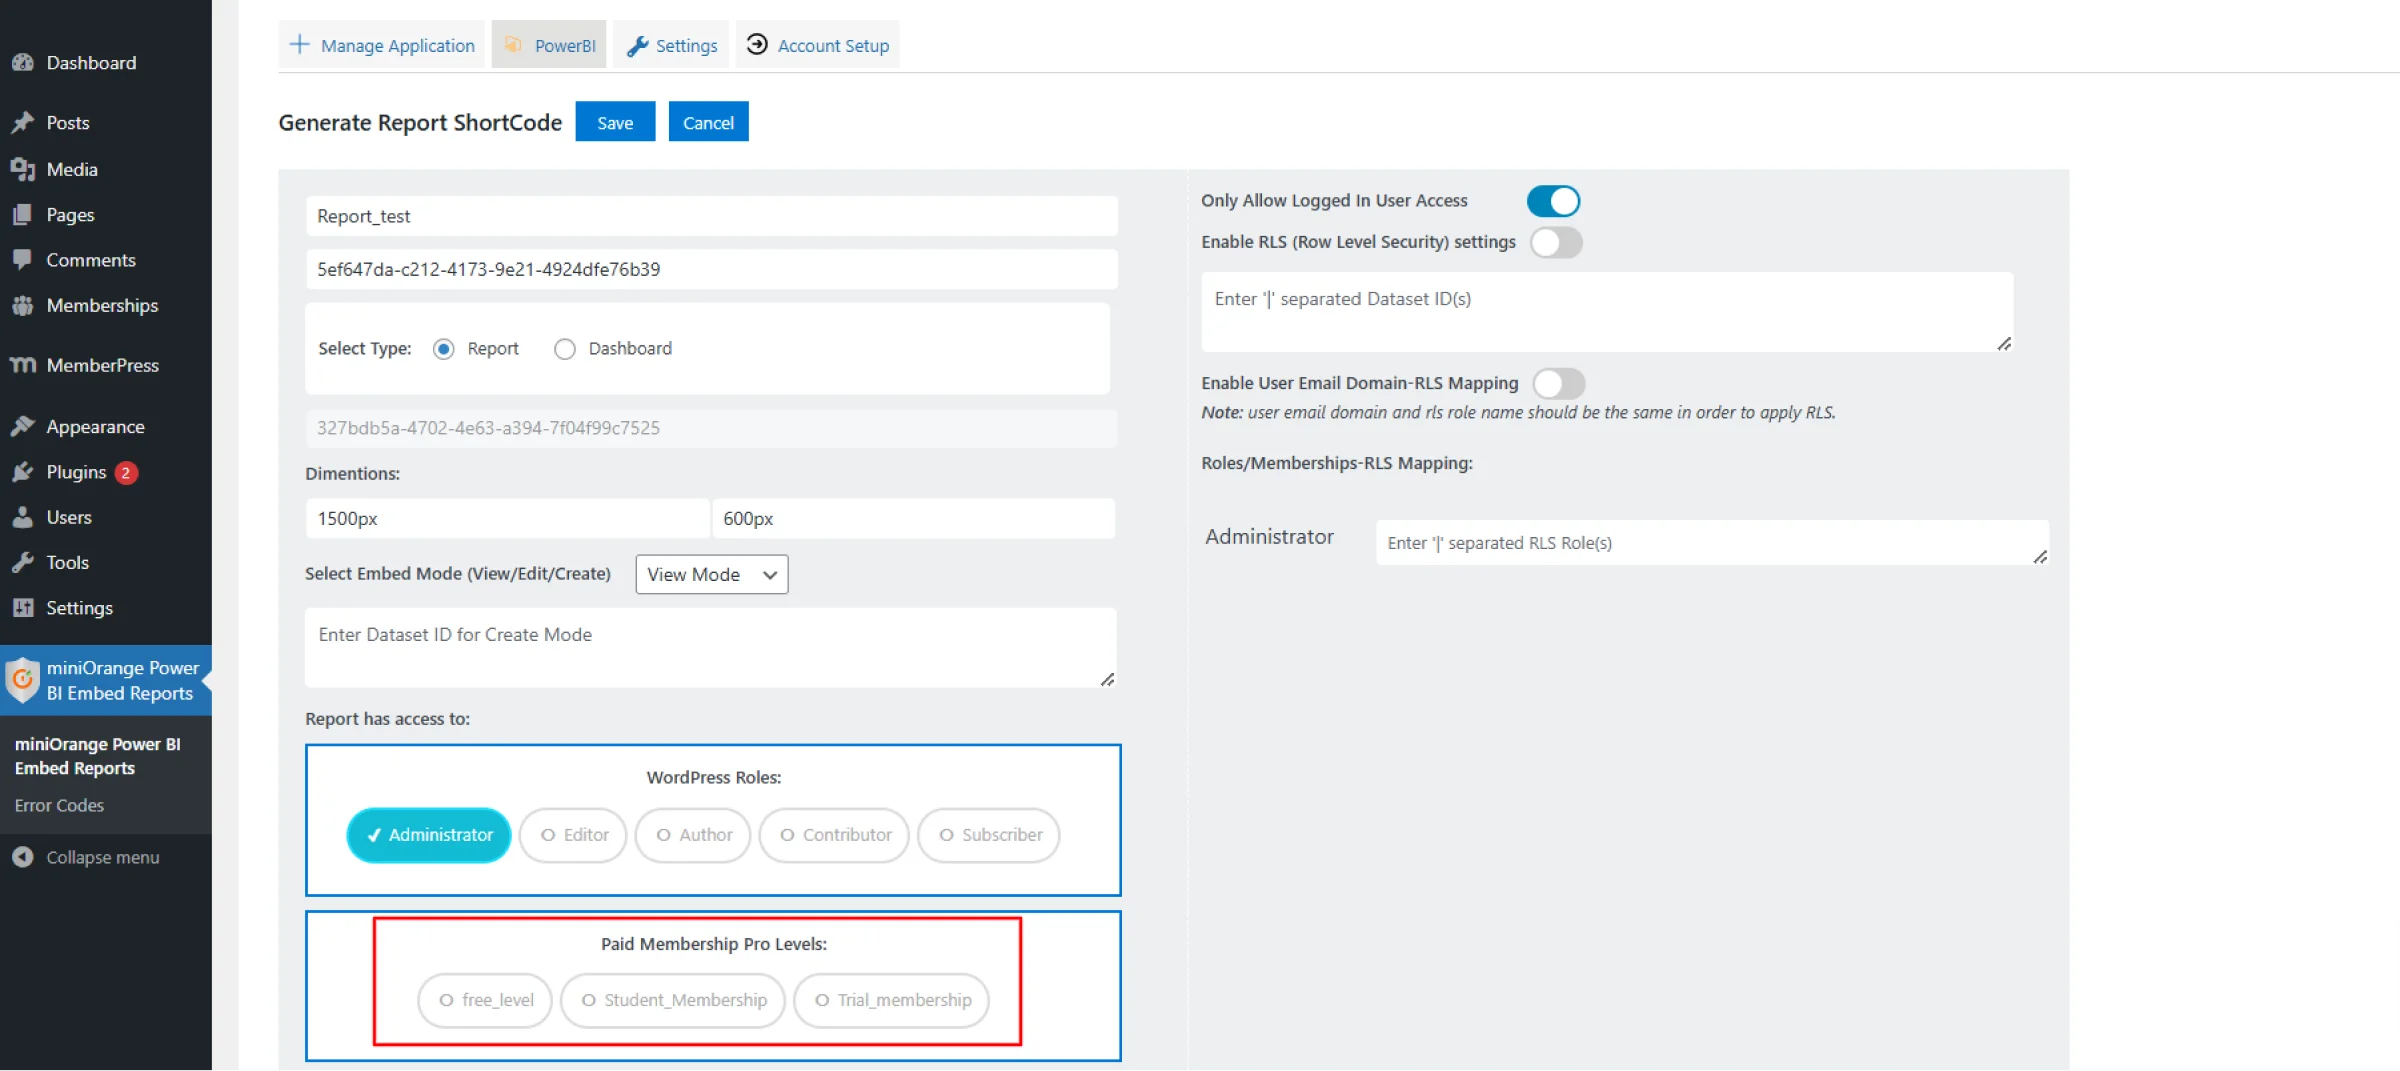
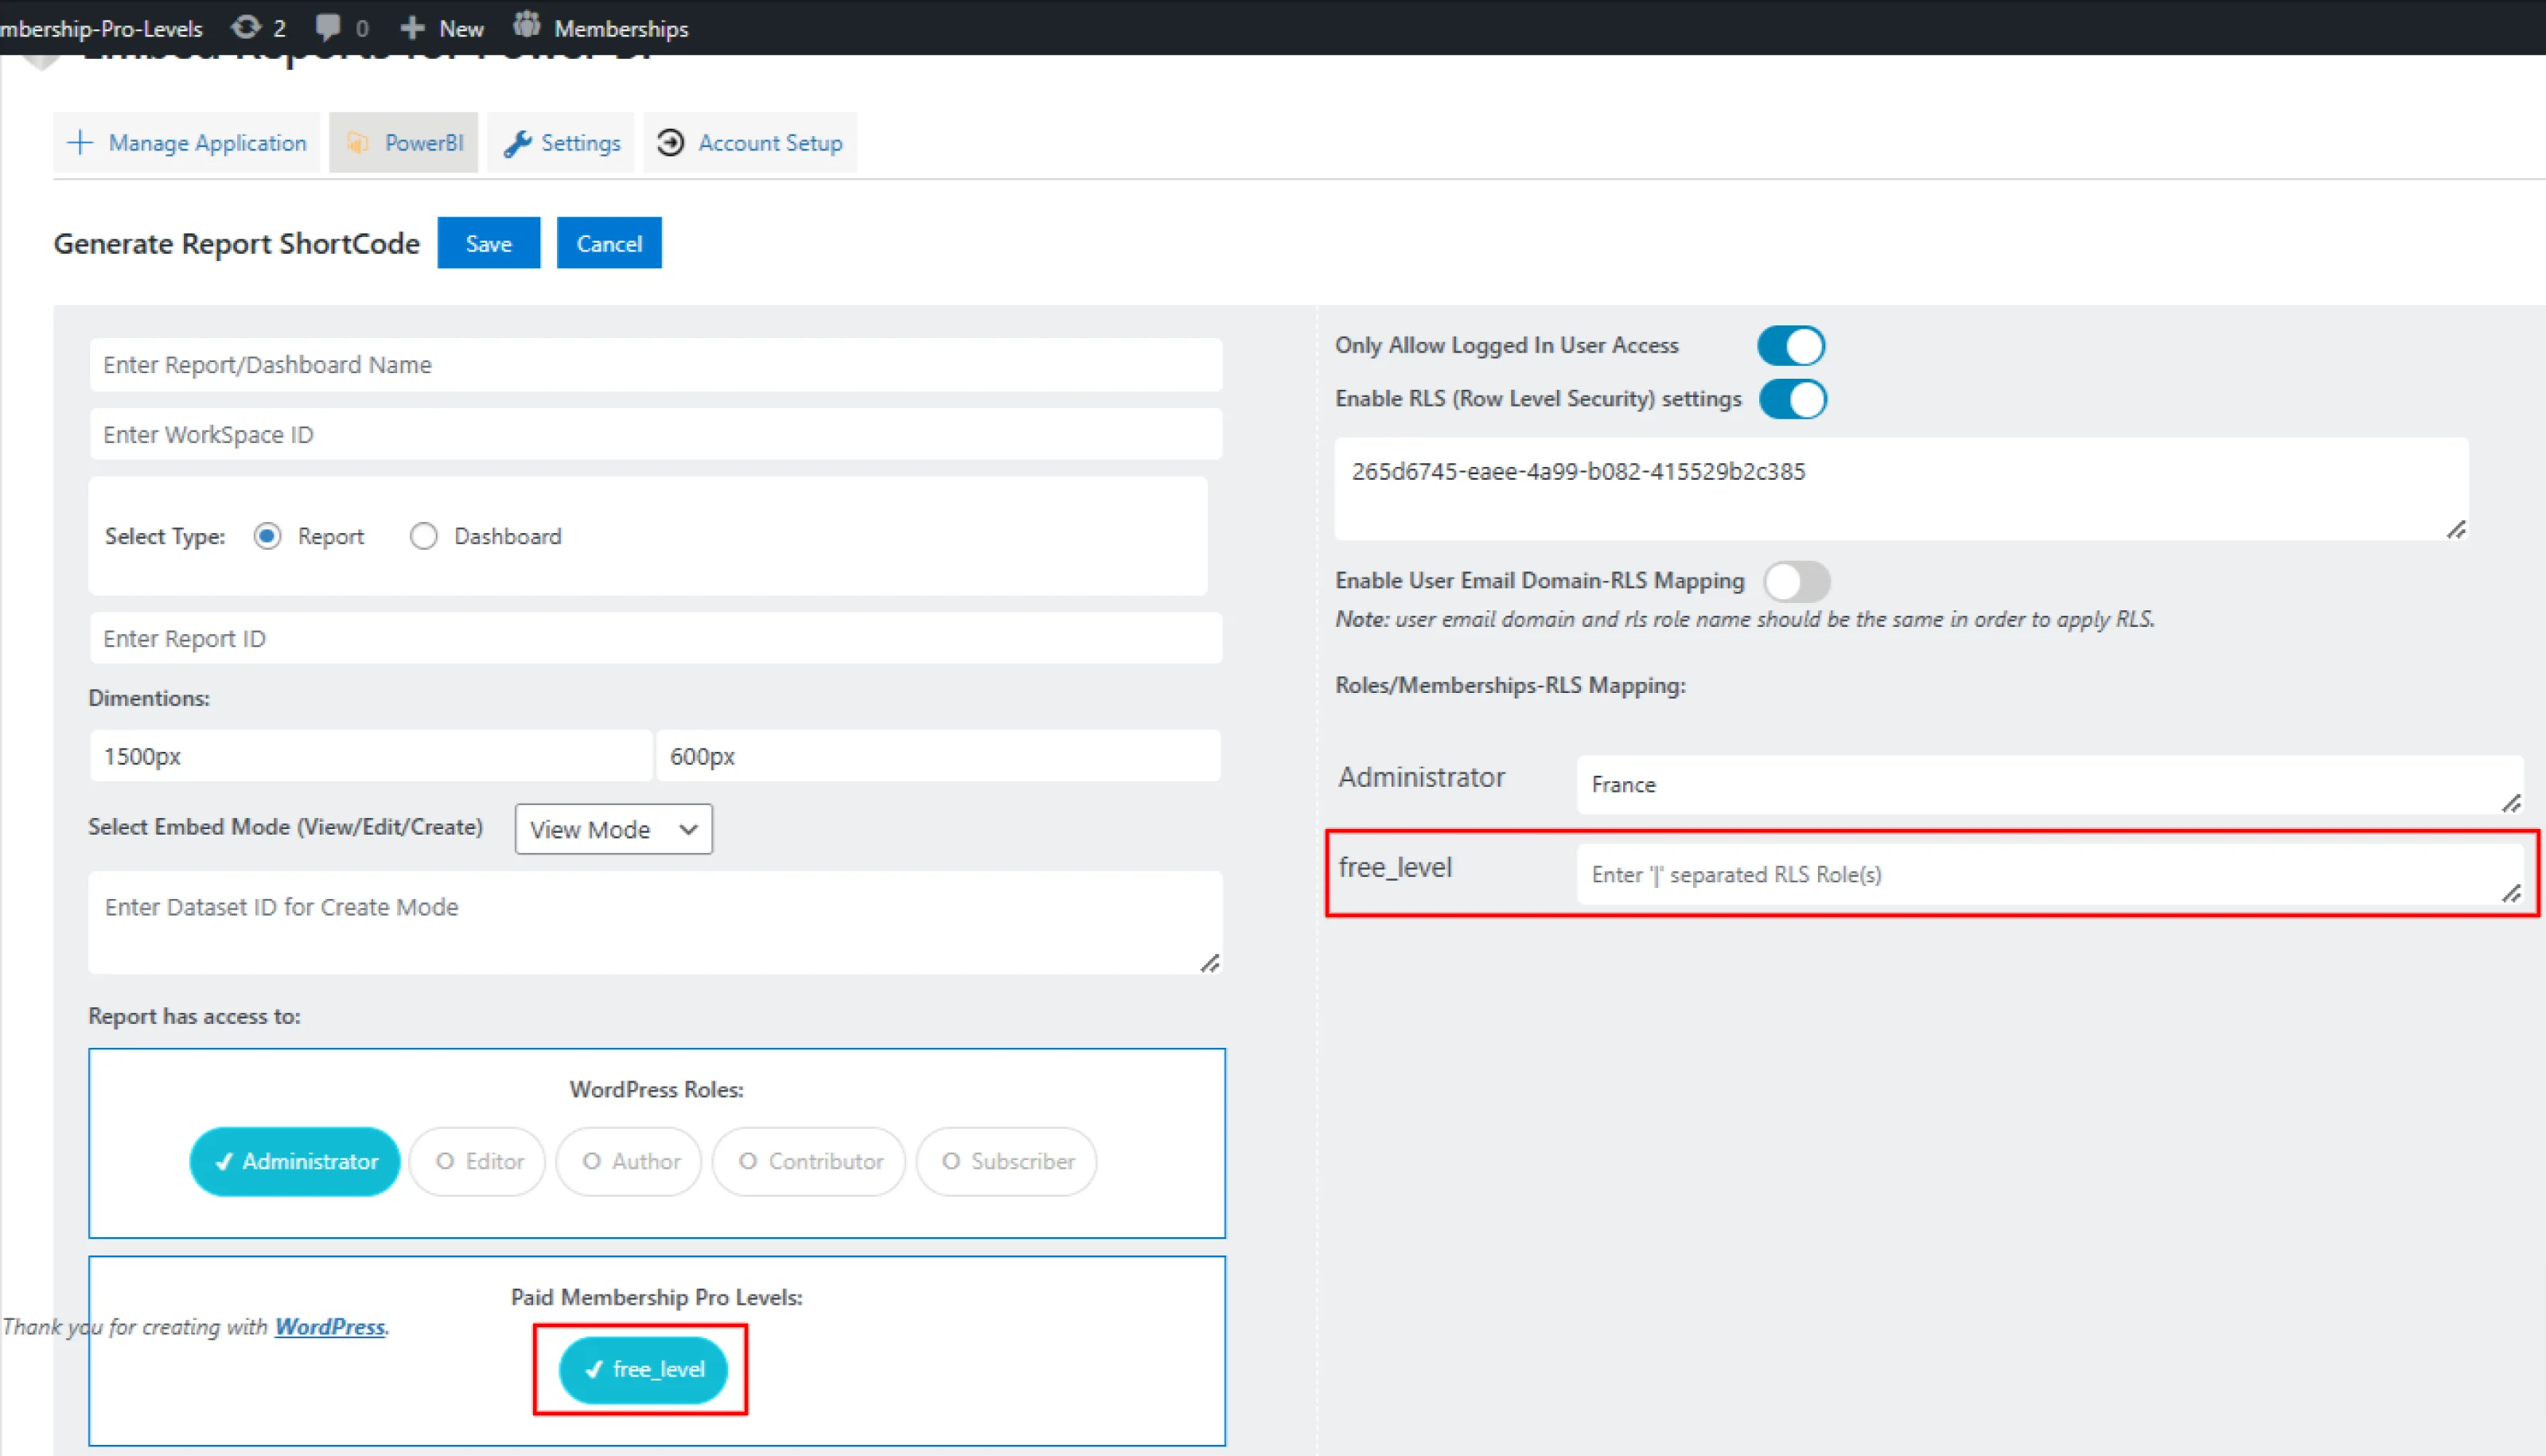
Once the details are entered, locate the Restrict Action section.
- Here, you will see the Paid Membership Pro levels (ensure you have already created these levels in the Paid Membership Pro plugin).
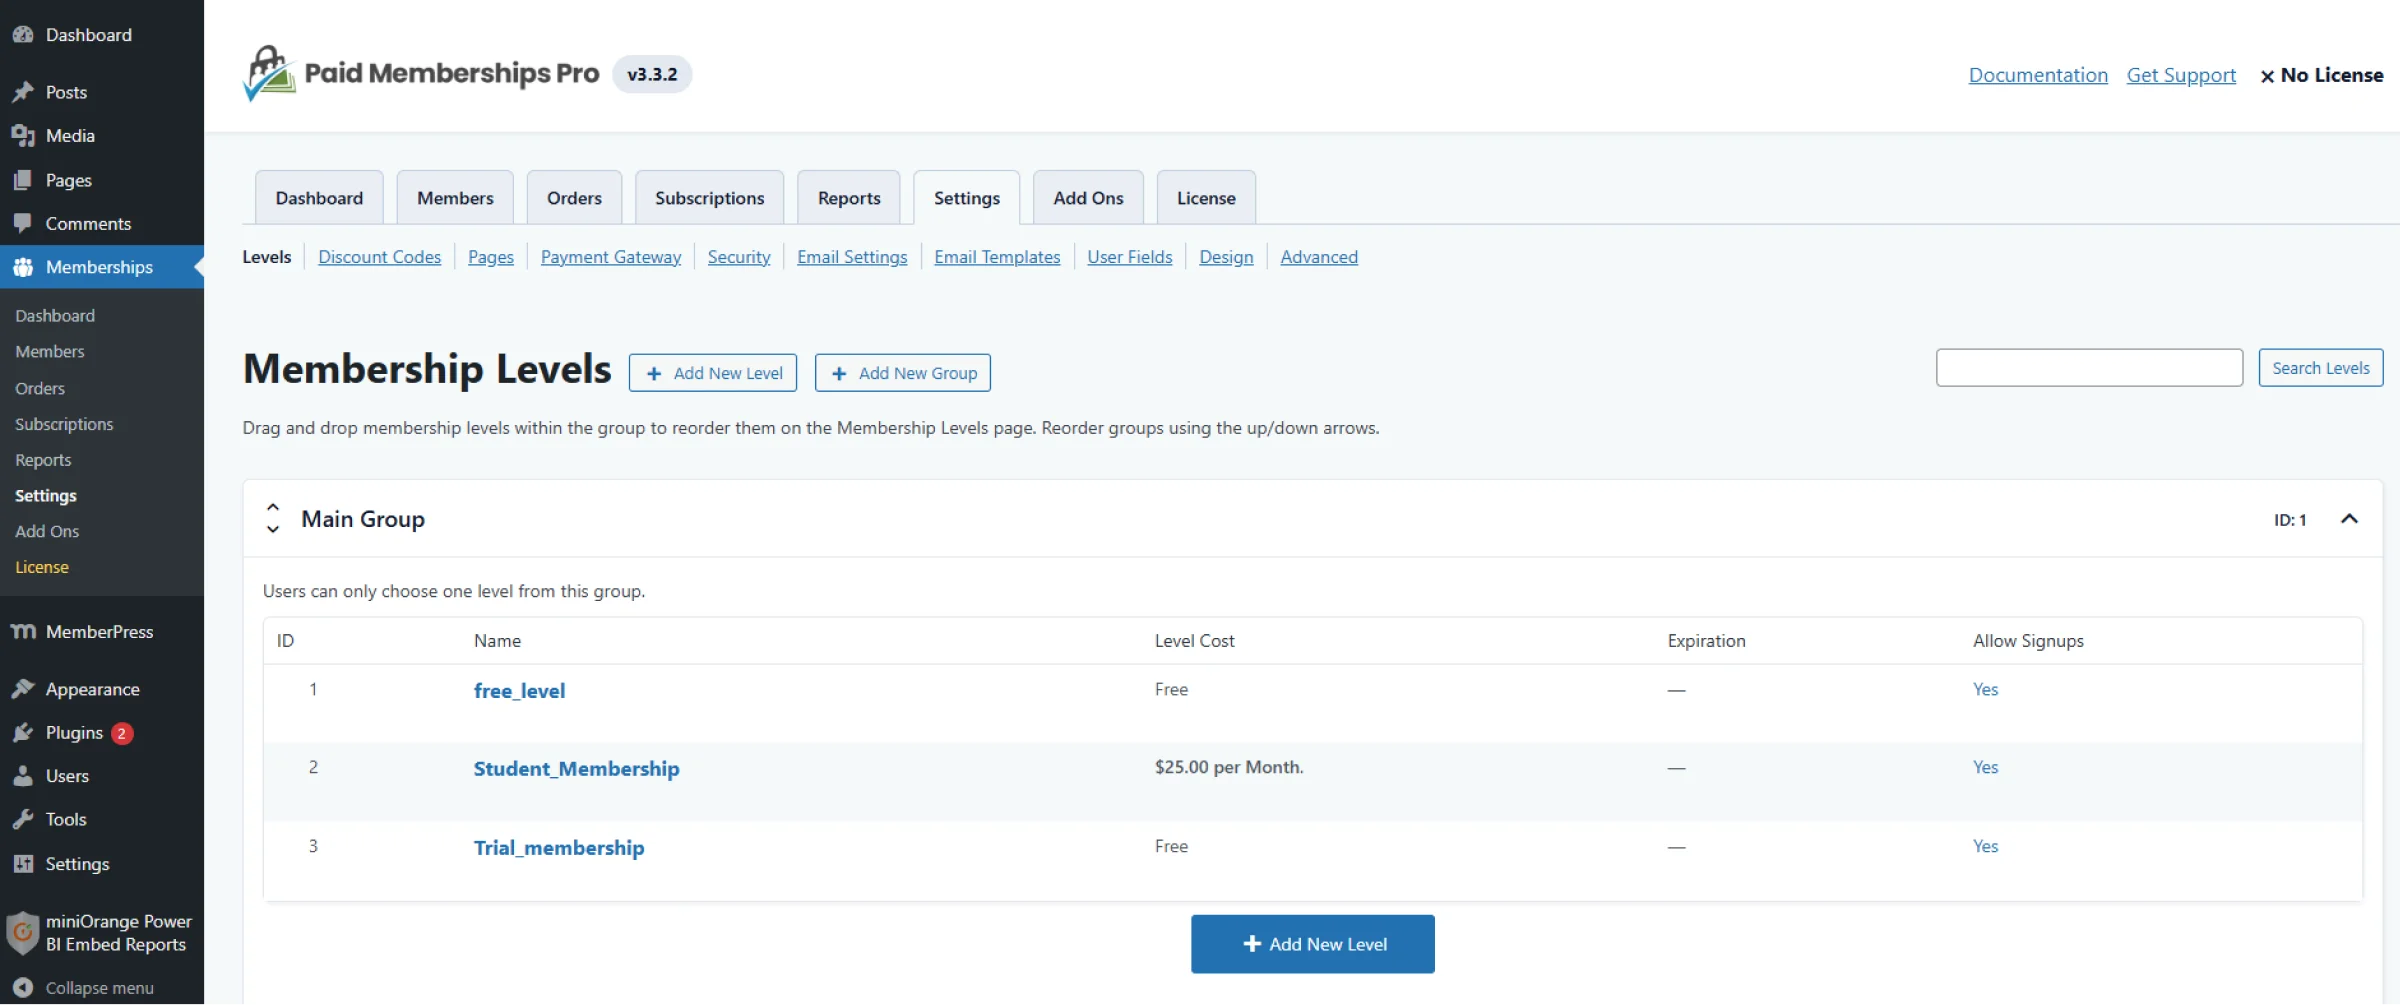
- Here, you will see the Paid Membership Pro levels (ensure you have already created these levels in the Paid Membership Pro plugin).
-
Give Access Based on Membership Levels:
-
Simply select the membership level to which you want to provide access to the report.
-
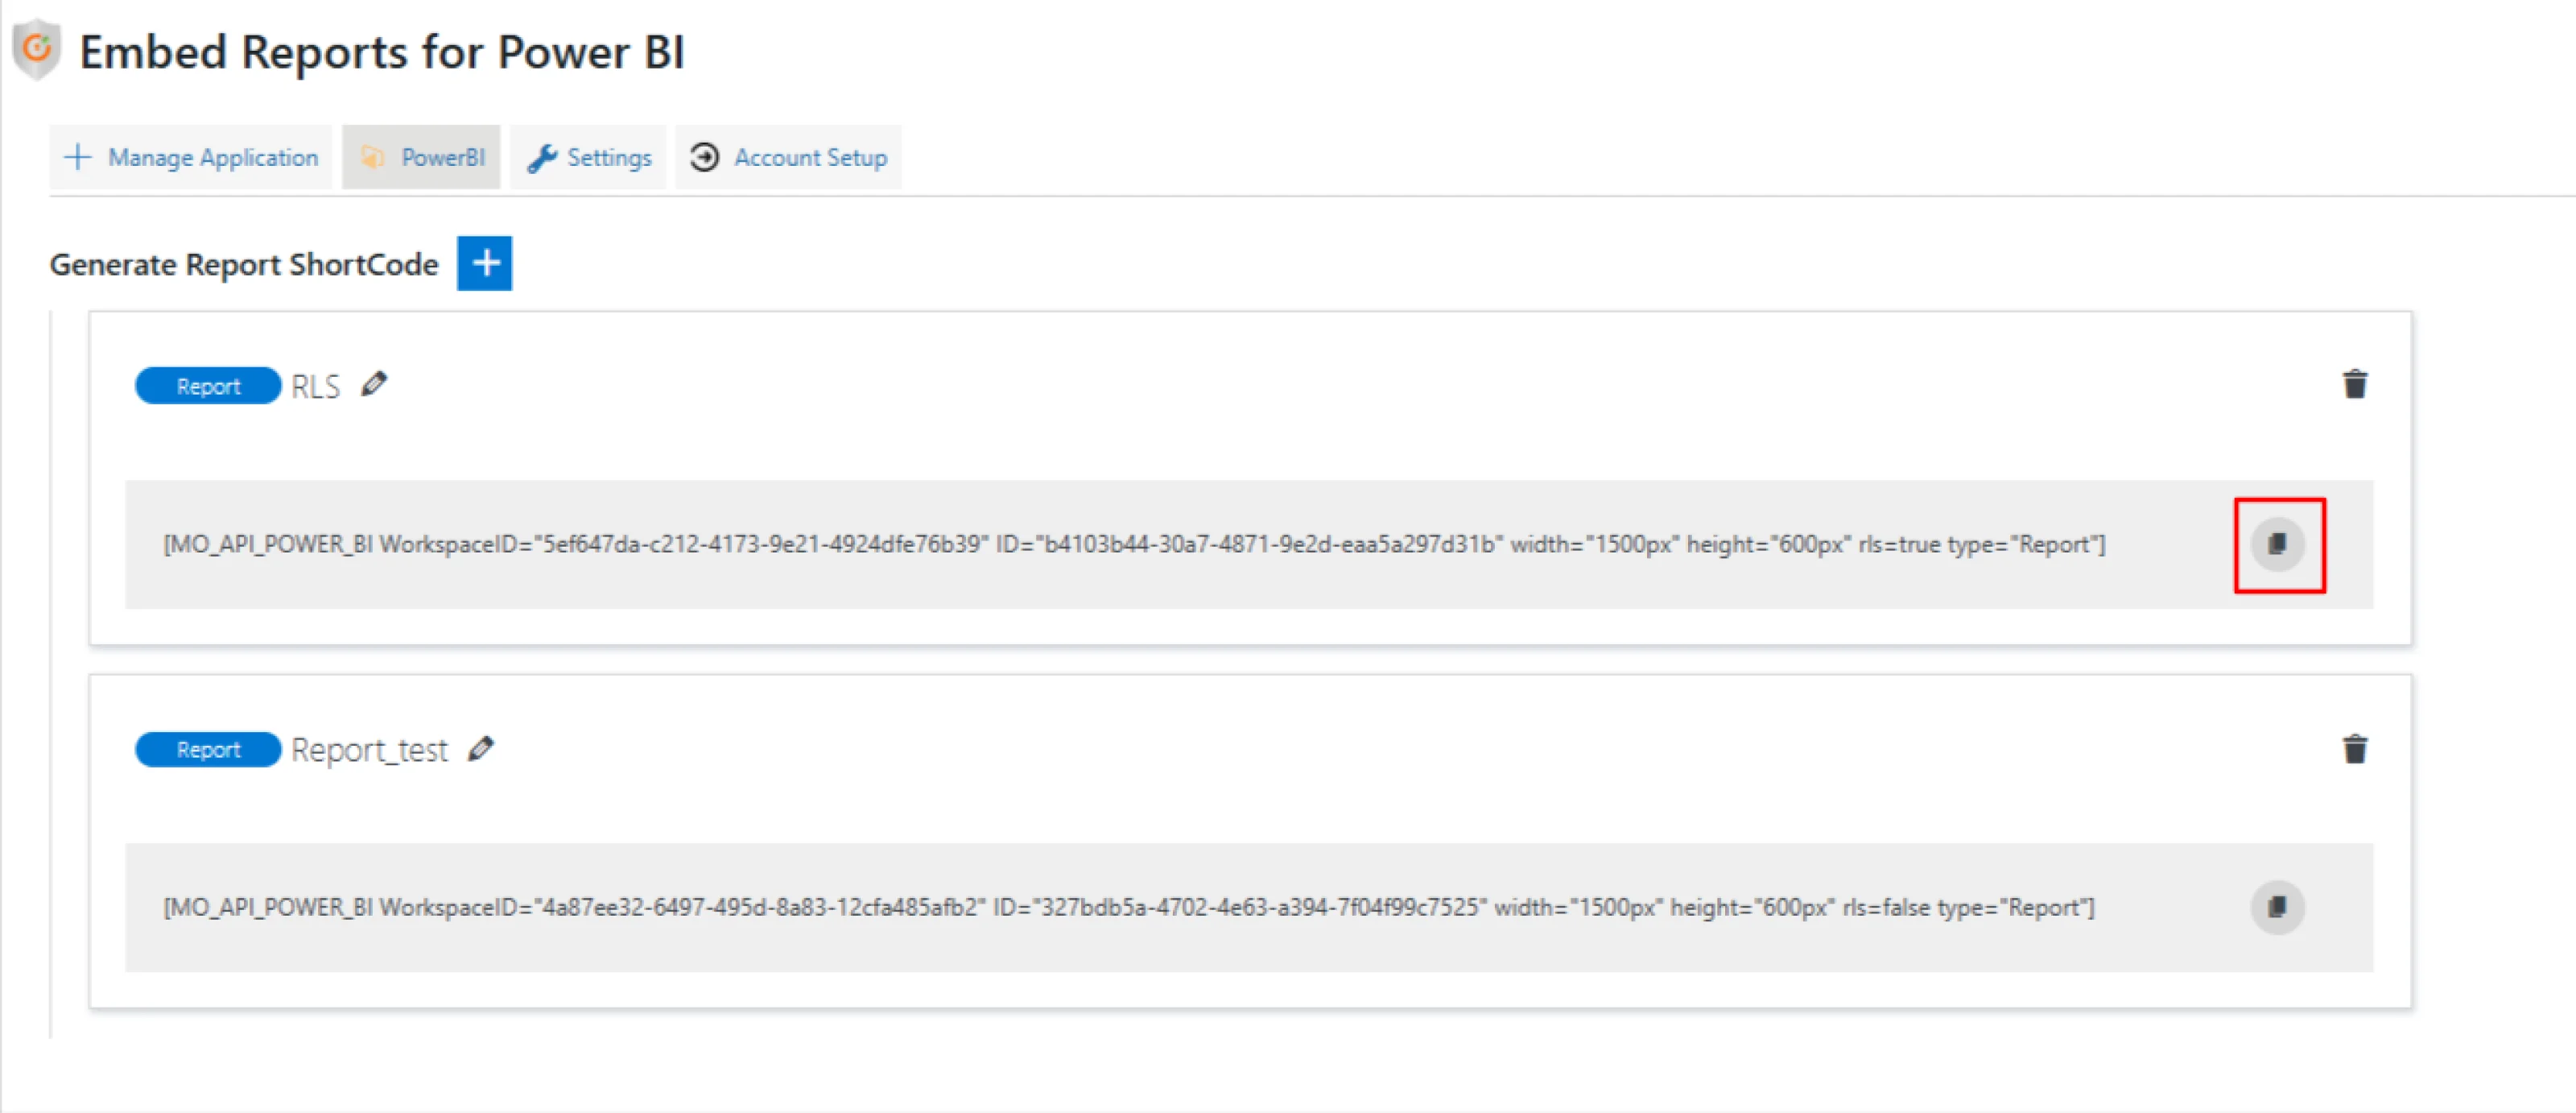
After selecting, generate the shortcode.
-
Copy and paste the shortcode onto a WordPress page or post.
-
Now, only users with the selected membership levels will be able to view the Power BI report.
-
-
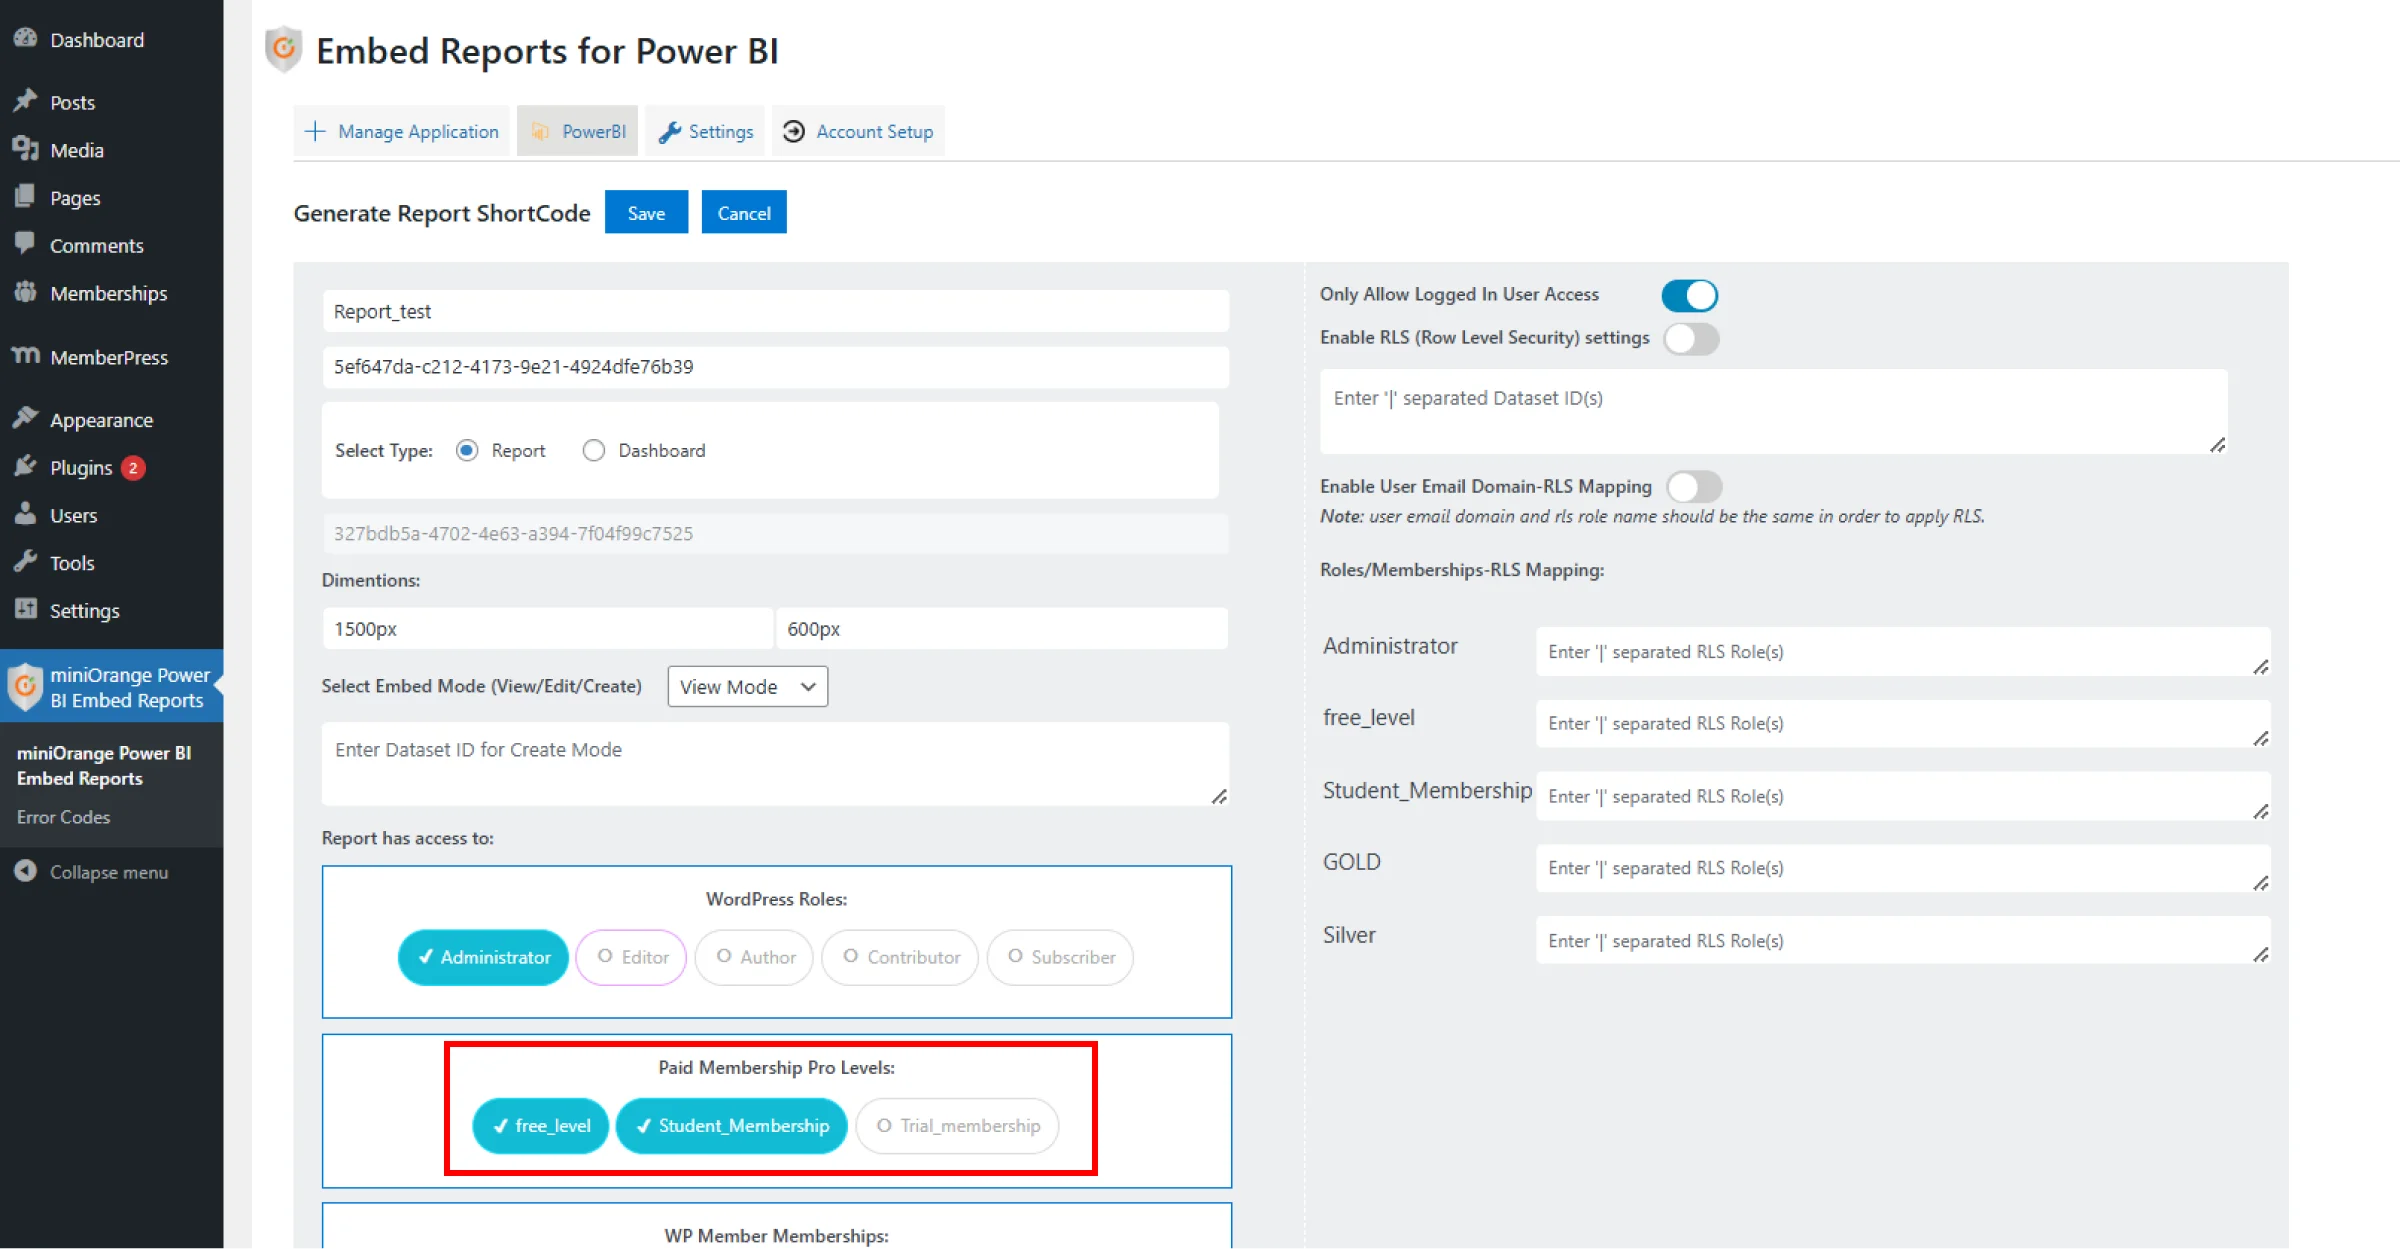
Map Membership Levels with RLS (Row-Level Security)
-
Once membership levels are selected, turn on the toggle to Enable RLS (Row-Level Security) settings.
-
You will see the Roles/Memberships-RLS Mapping input fields on the right-hand side under the section Roles/Memberships-RLS Mapping.
-
Enter the RLS roles you want to map with the selected membership levels.
-
Save the shortcode after completing the mapping.
-
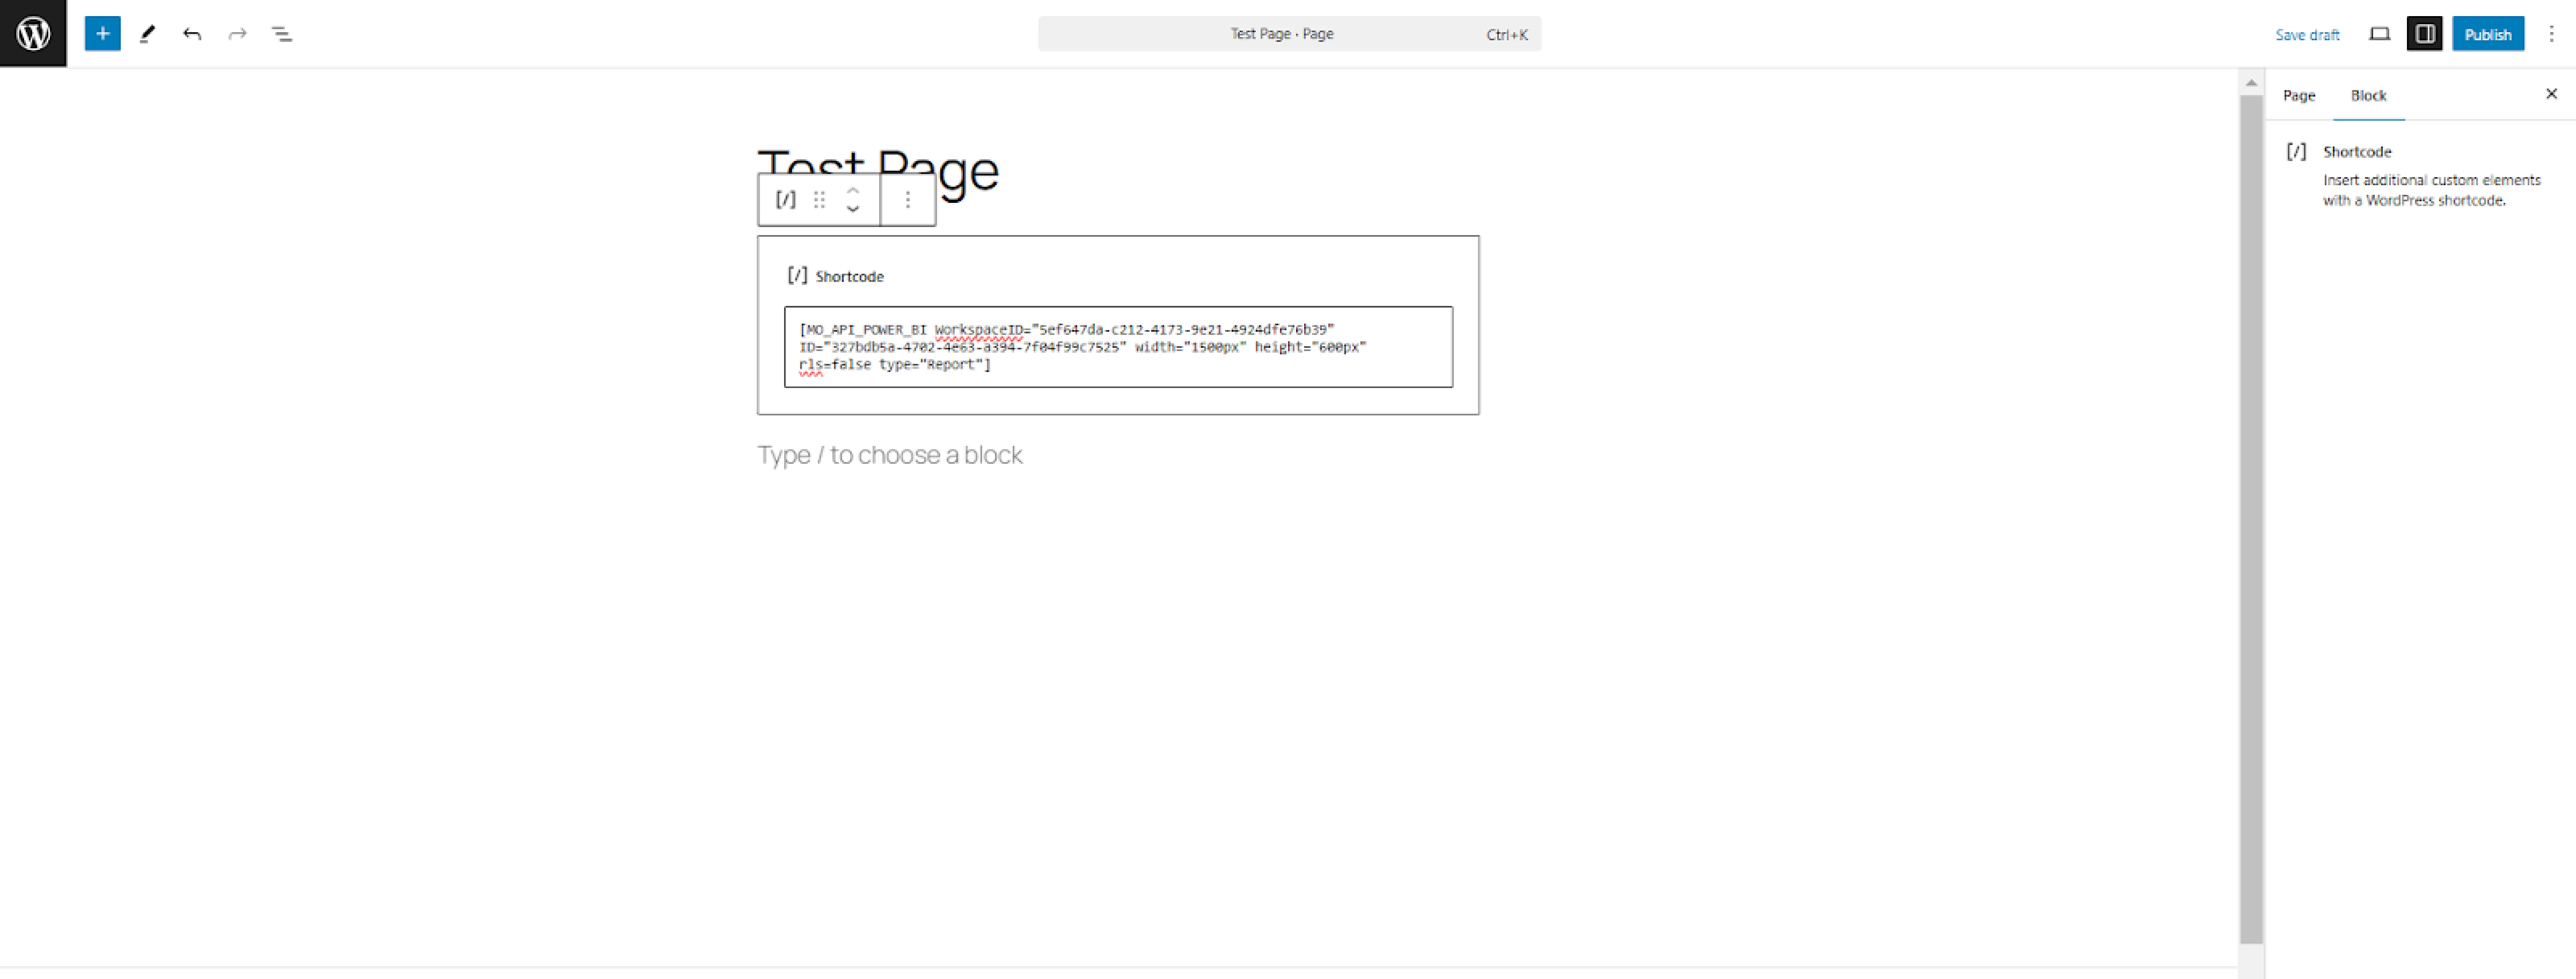
Step 2: Embed the Shortcode
-
Copy the generated shortcode.
-
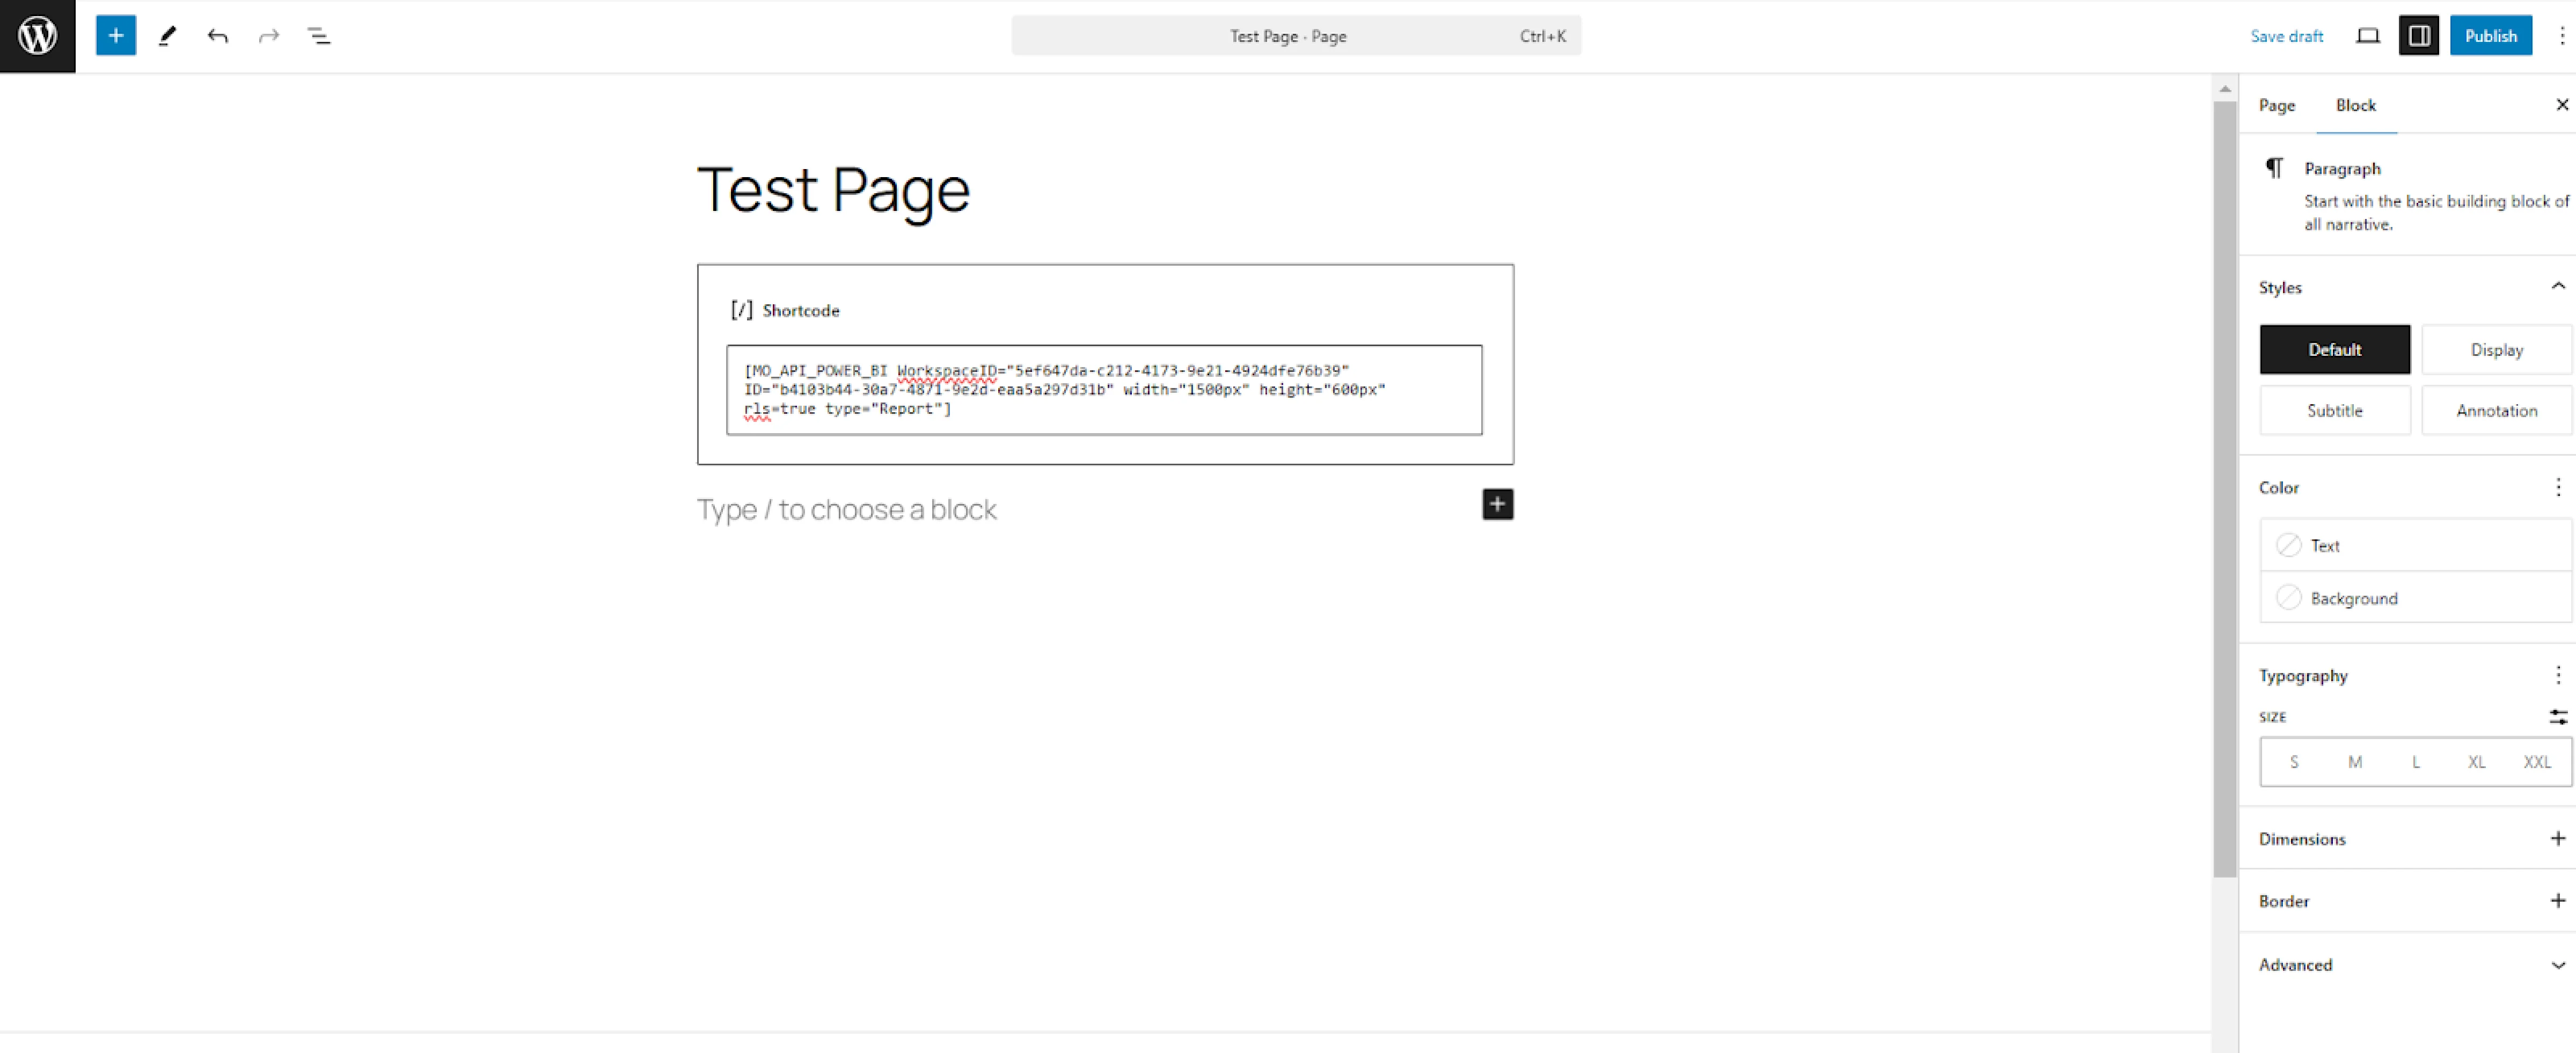
Paste it into any WordPress page or post.
-
Publish the page.
Step 3: Verify Access
- Users with the specified membership levels will now see the report with data filtered by the mapped RLS roles.
You’ve successfully restricted Power BI reports and enabled RLS mapping based on Paid Membership Pro levels!
For more information visit our Embed Power BI Reports Plugin for WordPress page or mail us at office365support@xecurify.com.