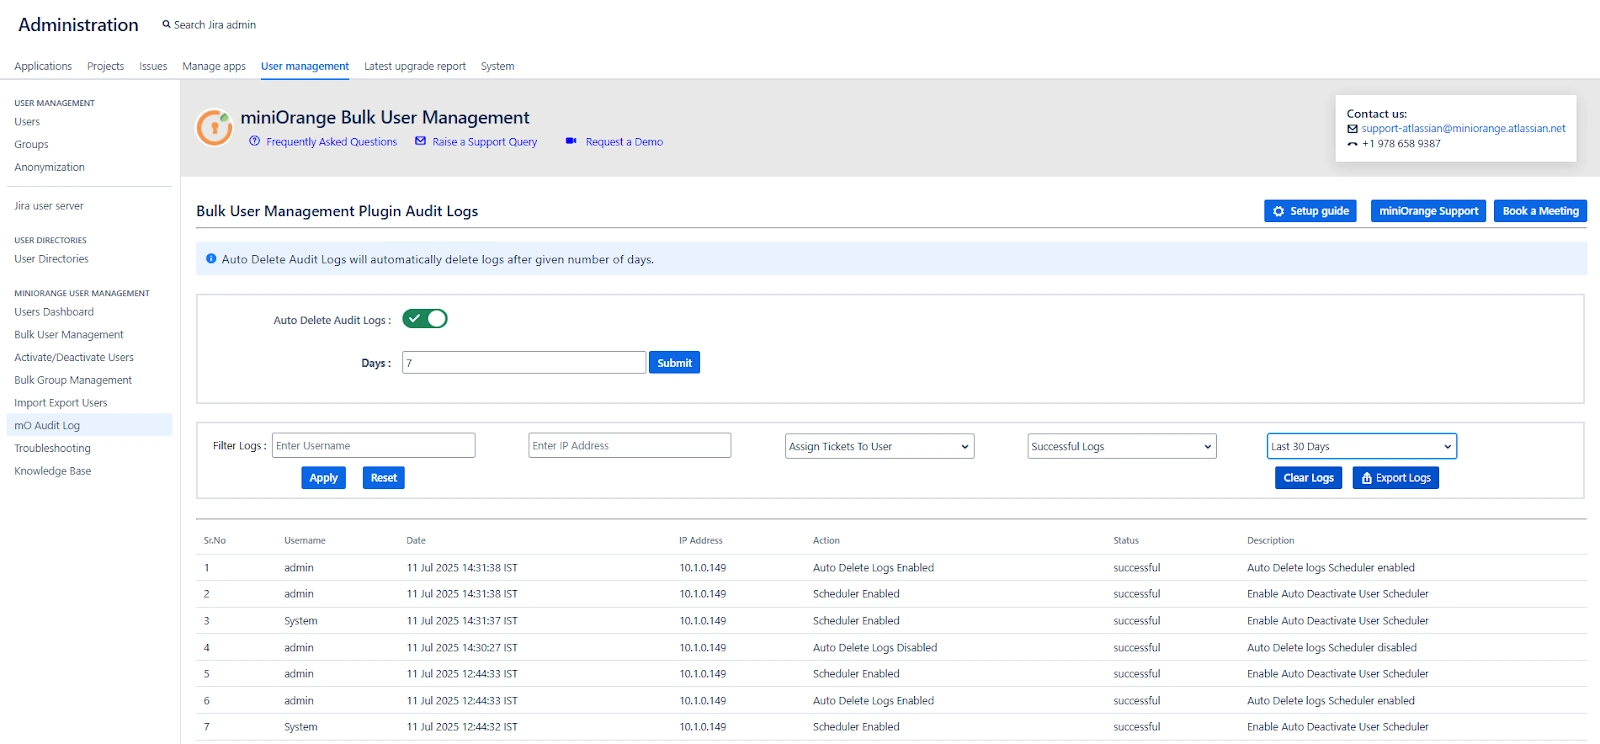
6. Audit Log Tab
The Audit Log tab in the miniOrange Automated User Management Plugin is designed to give administrators full visibility and traceability into all actions performed through the plugin. This is essential for compliance, security, and internal accountability.
It captures a detailed timeline of what action was taken, when, by whom, and on which user or group—ensuring a complete audit trail of user-related administrative activities.
Key Features
View Audit Logs
To access the audit log, go to the “ Audit Log" option from the MINIORANGE USER MANAGEMENT section in the left sidebar.
Each entry in the log includes the following details:
-
Username – Who performed the action
-
Date – When the action was performed
-
IP Address – From where the action was triggered
-
Action – What kind of operation was executed (e.g., Deactivate User, Add to Group)
-
Status – Whether the action was successful or failed
-
Description – Additional details about the action (e.g., user’s group or directory)
Export Logs to CSV
You can export logs as a .CSV file by applying filters such as action type or date range. This is helpful for sharing data with compliance teams or for long-term record-keeping.
Auto Delete Audit Logs
Enable the "Auto Delete Audit Logs" option to automatically purge logs after a specified number of days. This helps keep your logs manageable and ensures that sensitive data doesn’t persist indefinitely unless required.
You can set the number of days in the Days input field, after which all logs older than the specified duration will be removed automatically.
Filter Logs by Action Type
You can filter log records based on the following actions:
-
User Deactivated
-
User Activated
-
User Deleted
-
Removed from Group
-
Added to Group
-
Imported Users
-
Scheduler Enabled / Disabled
-
Group Created / Deleted
-
Delete Logs Scheduler Enabled / Disabled
-
User Reactivated
Example Use Cases
Example 1: Investigating Unexpected Group Removal
Scenario: A user reports they suddenly lost access to a Jira board.
-
Open the Audit Log tab.
-
Filter by Action = Removed from Group.
-
Locate the entry for the user and check:
-
Date and Time of removal
-
Admin who performed it
-
IP address to validate access location
-
-
Use this information to reverse the change or escalate further.
Example 2: Monthly Compliance Review
Scenario: Your IT security policy requires monthly validation of all user deactivations.
-
Go to the Audit Log tab.
-
Filter by Action = User Deactivated and set the Date Range to the current month.
-
Export the filtered logs as .CSV.
-
Share the report with your IT compliance team for review and approval.
Example 3: Monitoring Scheduler Configuration Changes
Scenario: You want to track when the auto-deactivation scheduler was disabled.
-
Filter by Action = Scheduler Disabled.
-
Review the logs to identify:
-
Who disabled the scheduler
-
When it was disabled
-
Follow up with that administrator if needed.
-
Example 4: Managing Audit Log Size
Scenario: Your audit log has grown too large over time.
-
Enable Auto Delete Audit Logs.
-
Set Days = 90 to retain logs for the past 3 months only.
-
Going forward, logs older than 90 days will be automatically deleted, maintaining log hygiene without manual cleanup.