Profile Module Mapping
This feature allows mapping attributes received from the OAuth Provider to the fields of the Profile module. To configure this feature you need to create profile type first.
Add Profile Type to Drupal site
- Install the Profile module and its dependencies on your Drupal site.
- After installing the module navigate to the Configuration tab.
- Click on the Profile types under the People section.
- Click the +Add Profile type button.
- Enter the label in the Label text field which is mandatory.
- Scroll down and click on Save button.
- Now, click on Manage Field button and then click on +Create a new field button.
- Select Field style from the dropdown. Enter the label in the Label text field and click the Continue button.
- Enter the Maximum length and Allowed number of values.
- Click on the Save settings button.

Configure Profile Module Mapping
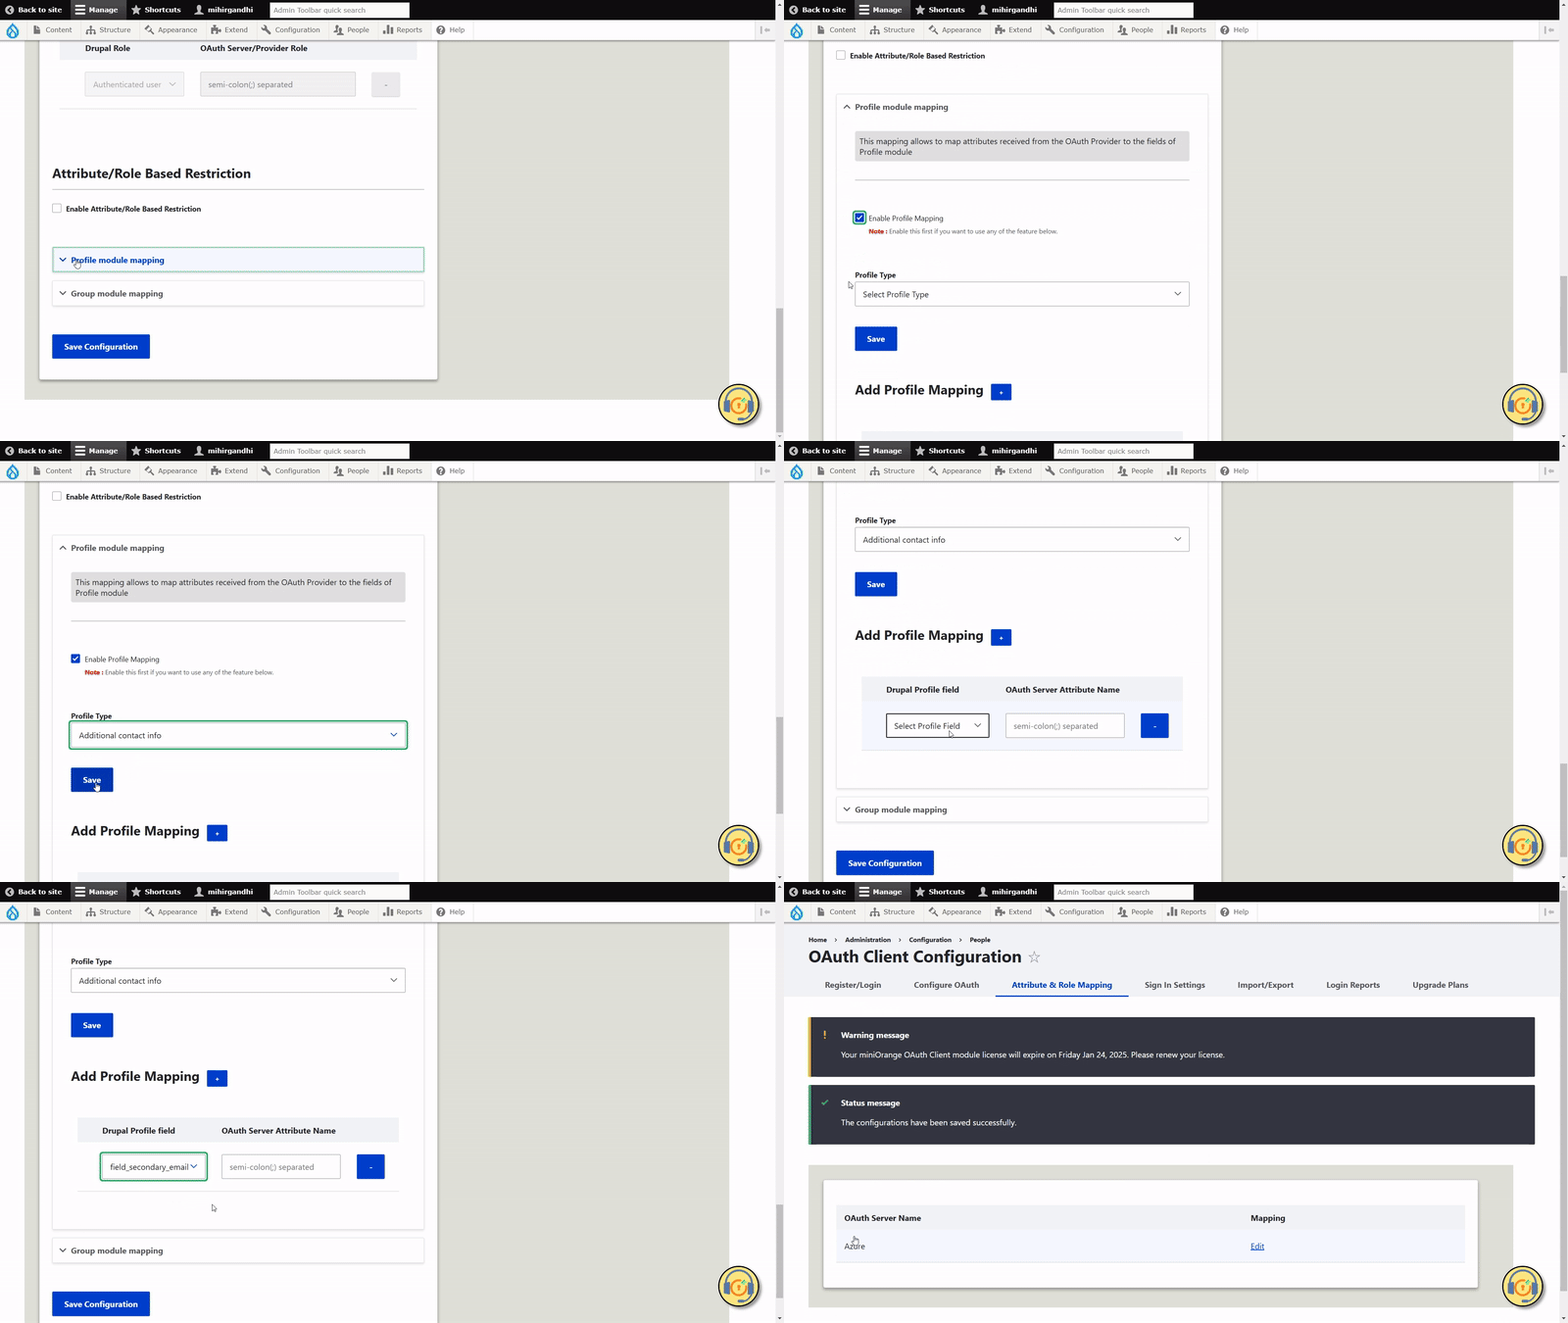
- Navigate to the Attribute and Role Mapping tab and scroll down to the Profile module mapping section.
- Check the Enable Profile Mapping checkbox. It is a mandatory action.
- Now, select the Profile Type from the drop-down.
- Click on the Save button.
- Now, select the Drupal profile field from the dropdown and enter the OAuth Server Attribute Name in the text field. Users can add multiple attributes name by separating them by ;(Semicolon).
- Click on the Save Configuration button.

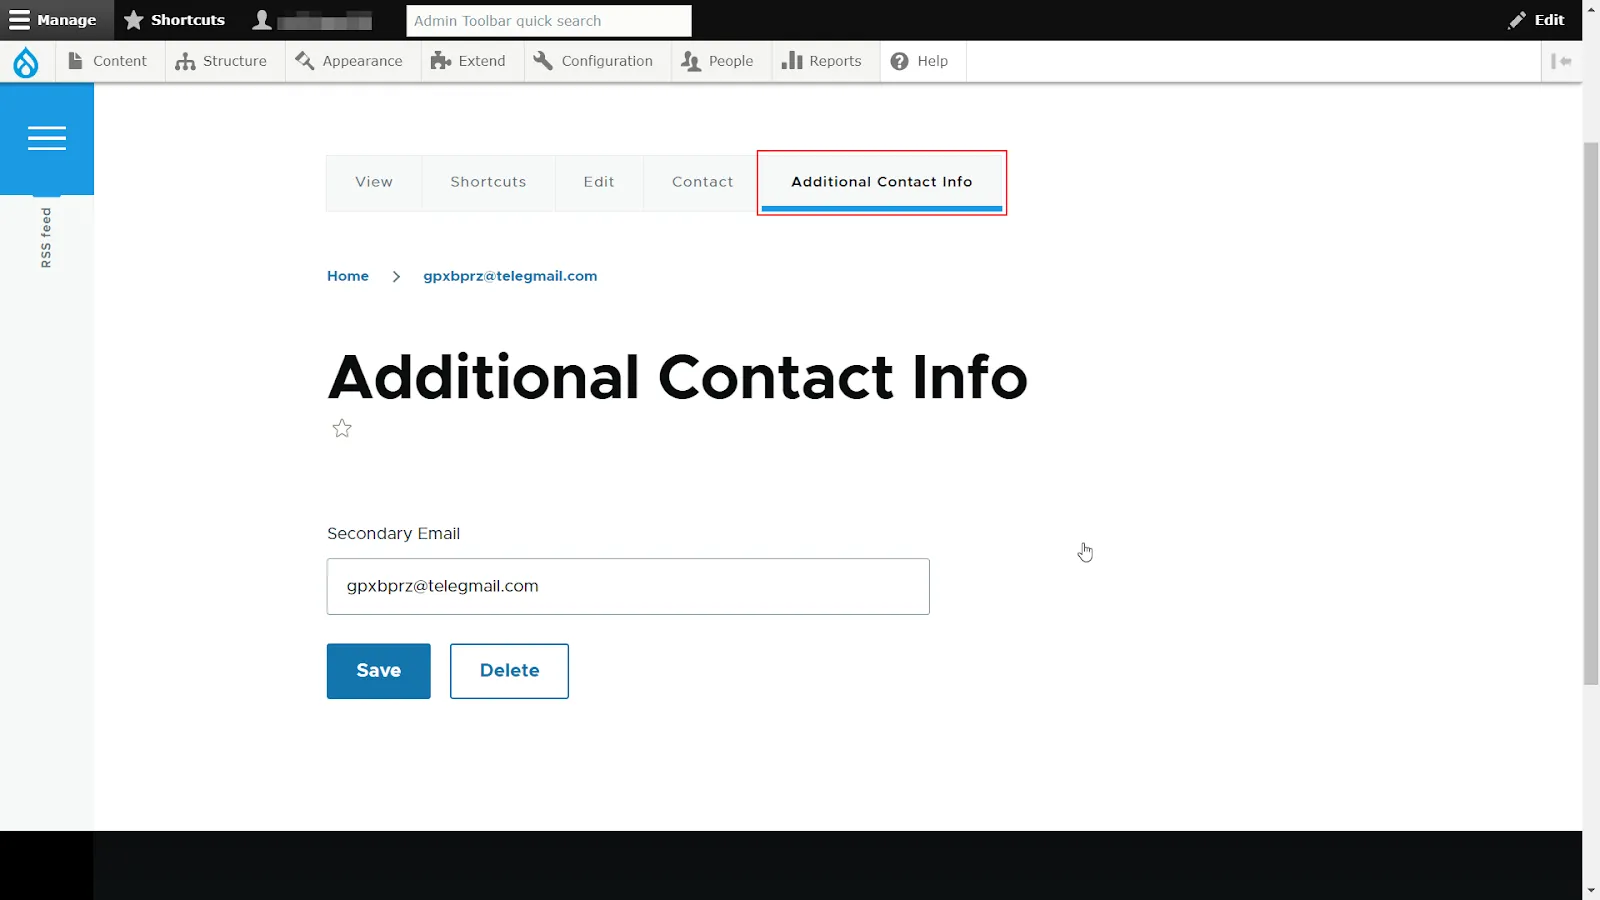
Let’s see how Profile Module Mapping works:
- Open an incognito window / new browser. Navigate to the Drupal site login page and log in using the provider name link.
- Navigate to the People tab and click on the user link.
- You can see the Additional Contact Info tab that was created.
