Setup IP Restriction
Using this feature, you can Implement IP Restriction for your web applications and websites.
-
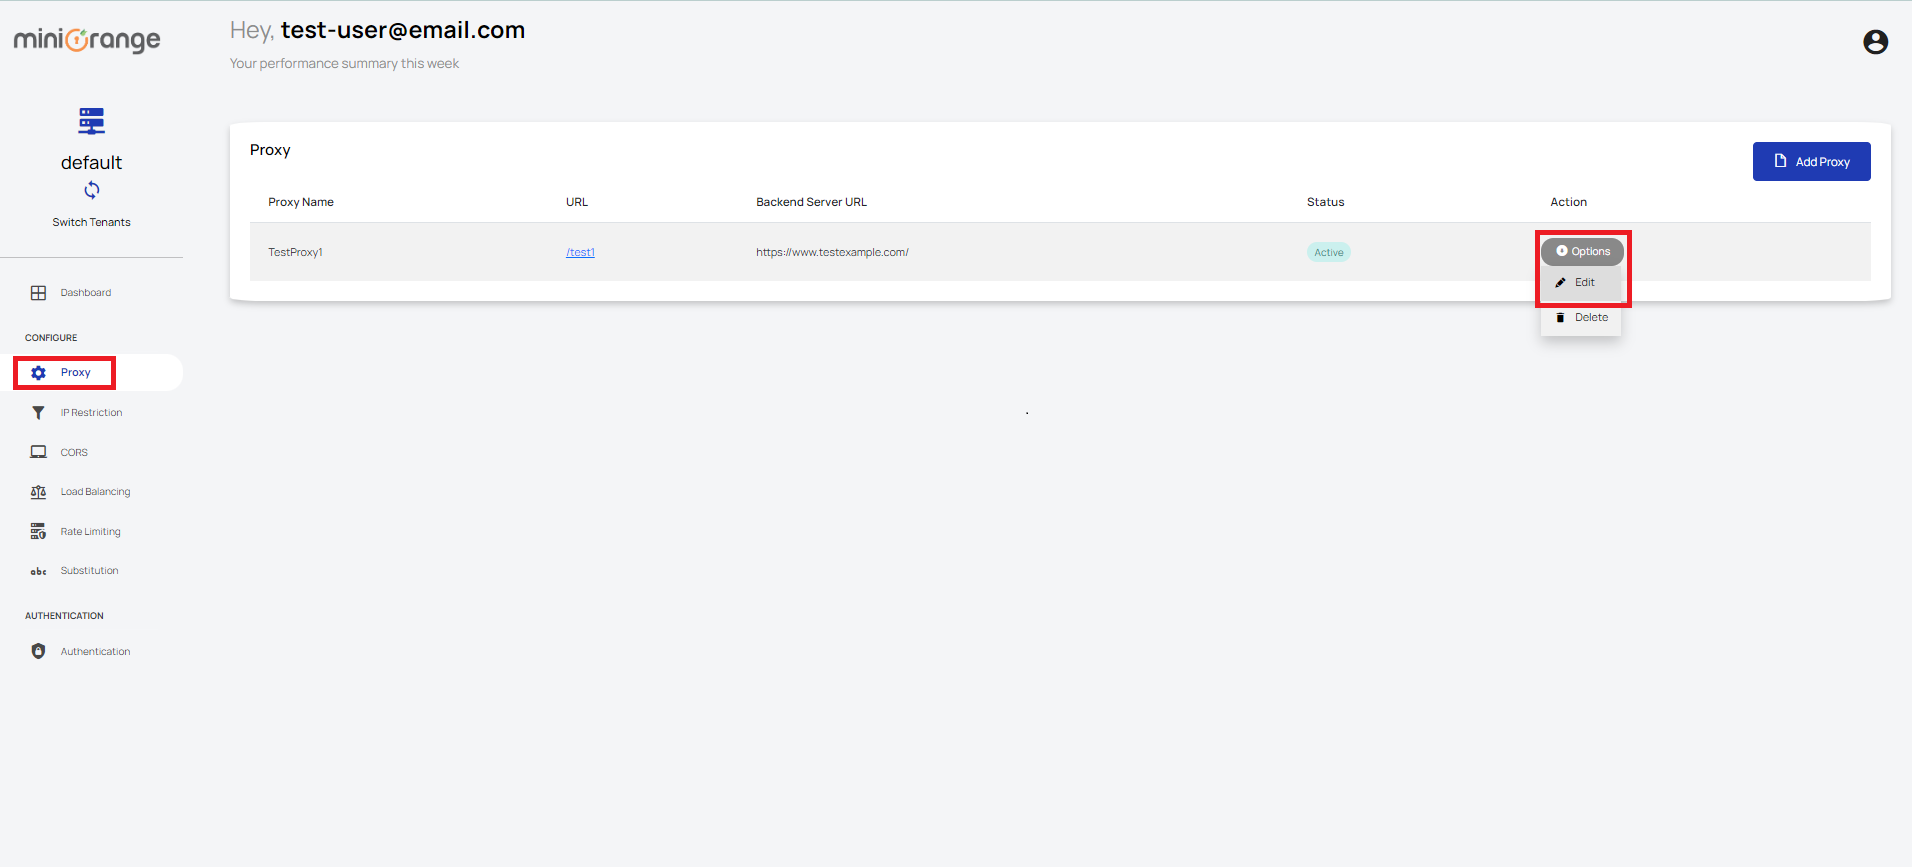
To set up IP Restriction on an existing proxy you've created, navigate to "Proxy" under Configure. Click on "Options", under Action. Select "Edit", and you can now configure your IP restriction rules. If you have already set up a proxy, you can skip Step 2 and go directly to Step 3.
-
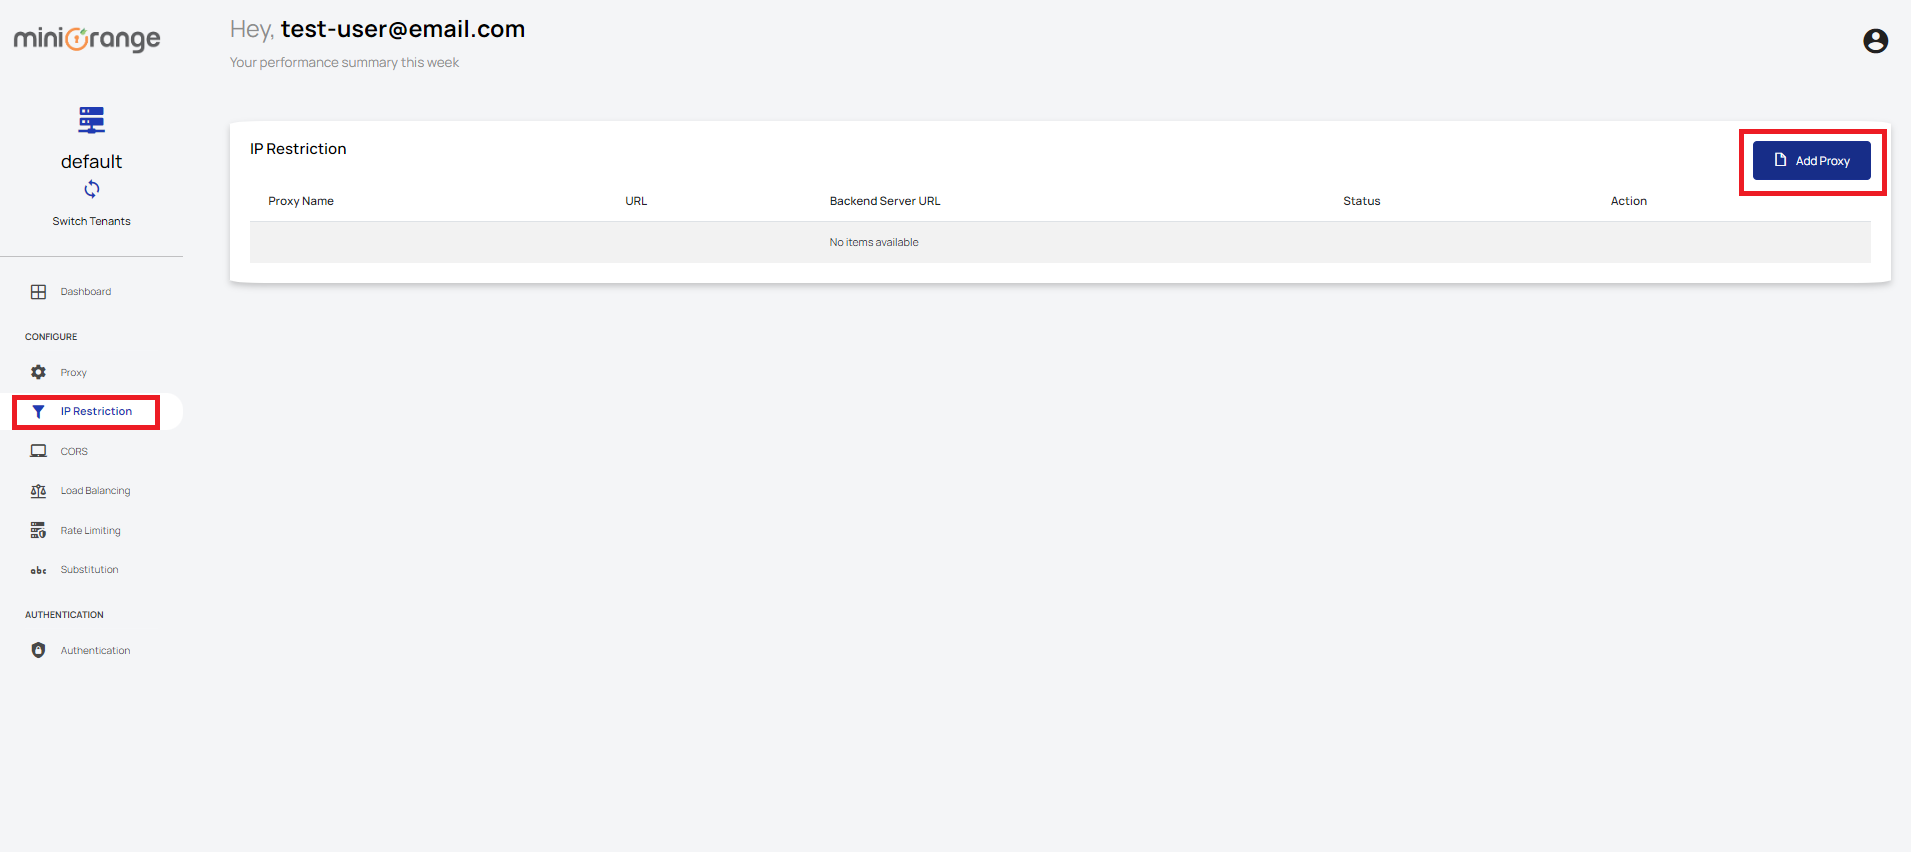
If you want to create a new Proxy with IP Restriction, click on "IP Restriction" under Configure. And then click on "Add Proxy". Enter all the required details and click on Submit button.
-
Under IP Restriction,
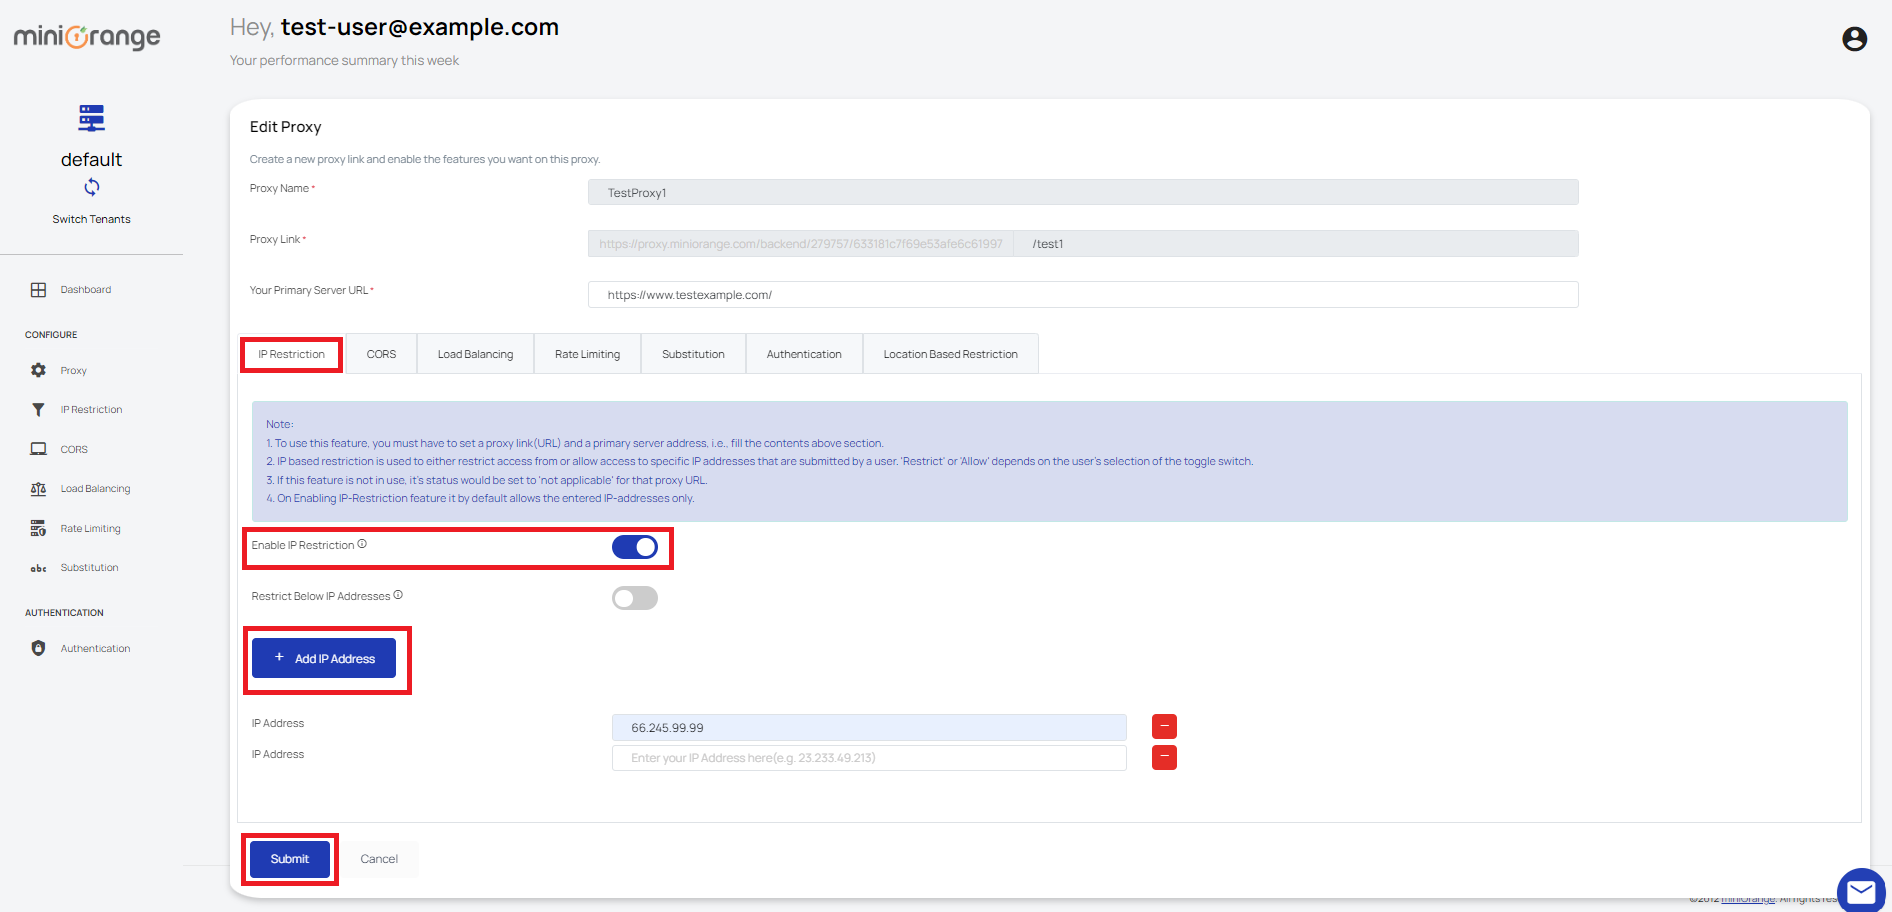
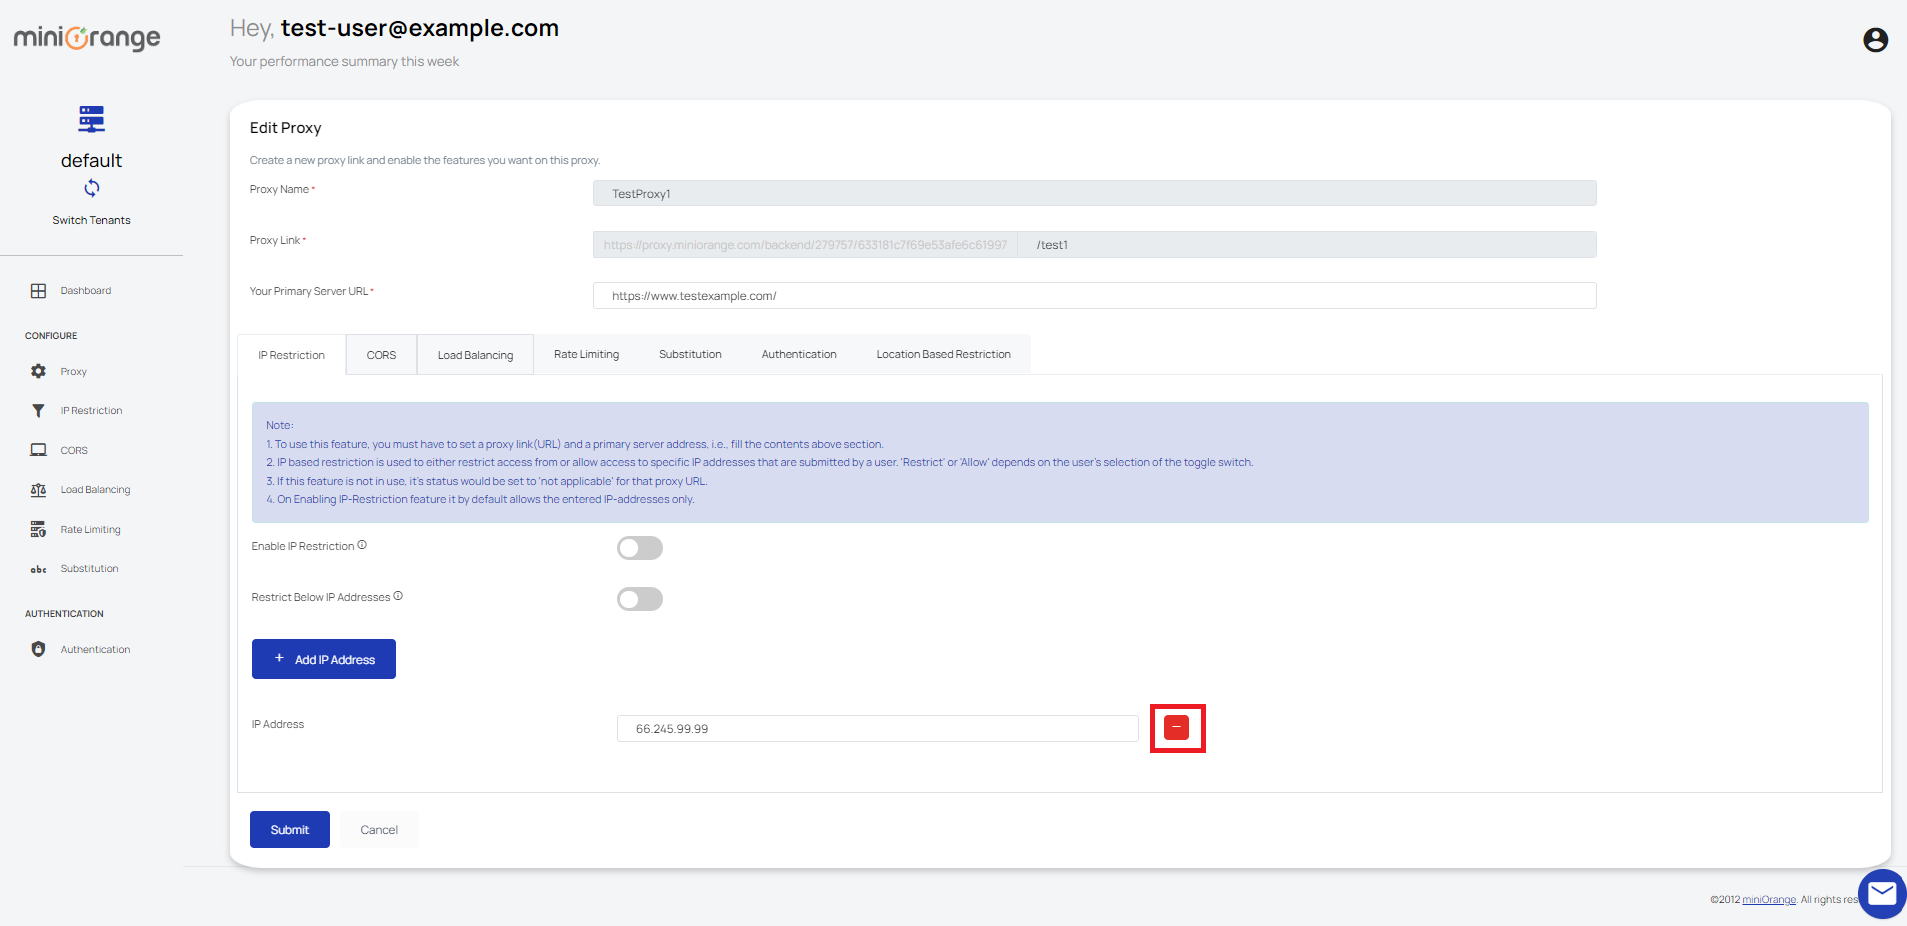
A) If you want to enable a specific number of IP addresses or a range of IP addresses, go to "Enable IP Restriction" and then click the "+ Add IP Address" button to add more IP addresses. Then click "Submit" to save the changes.
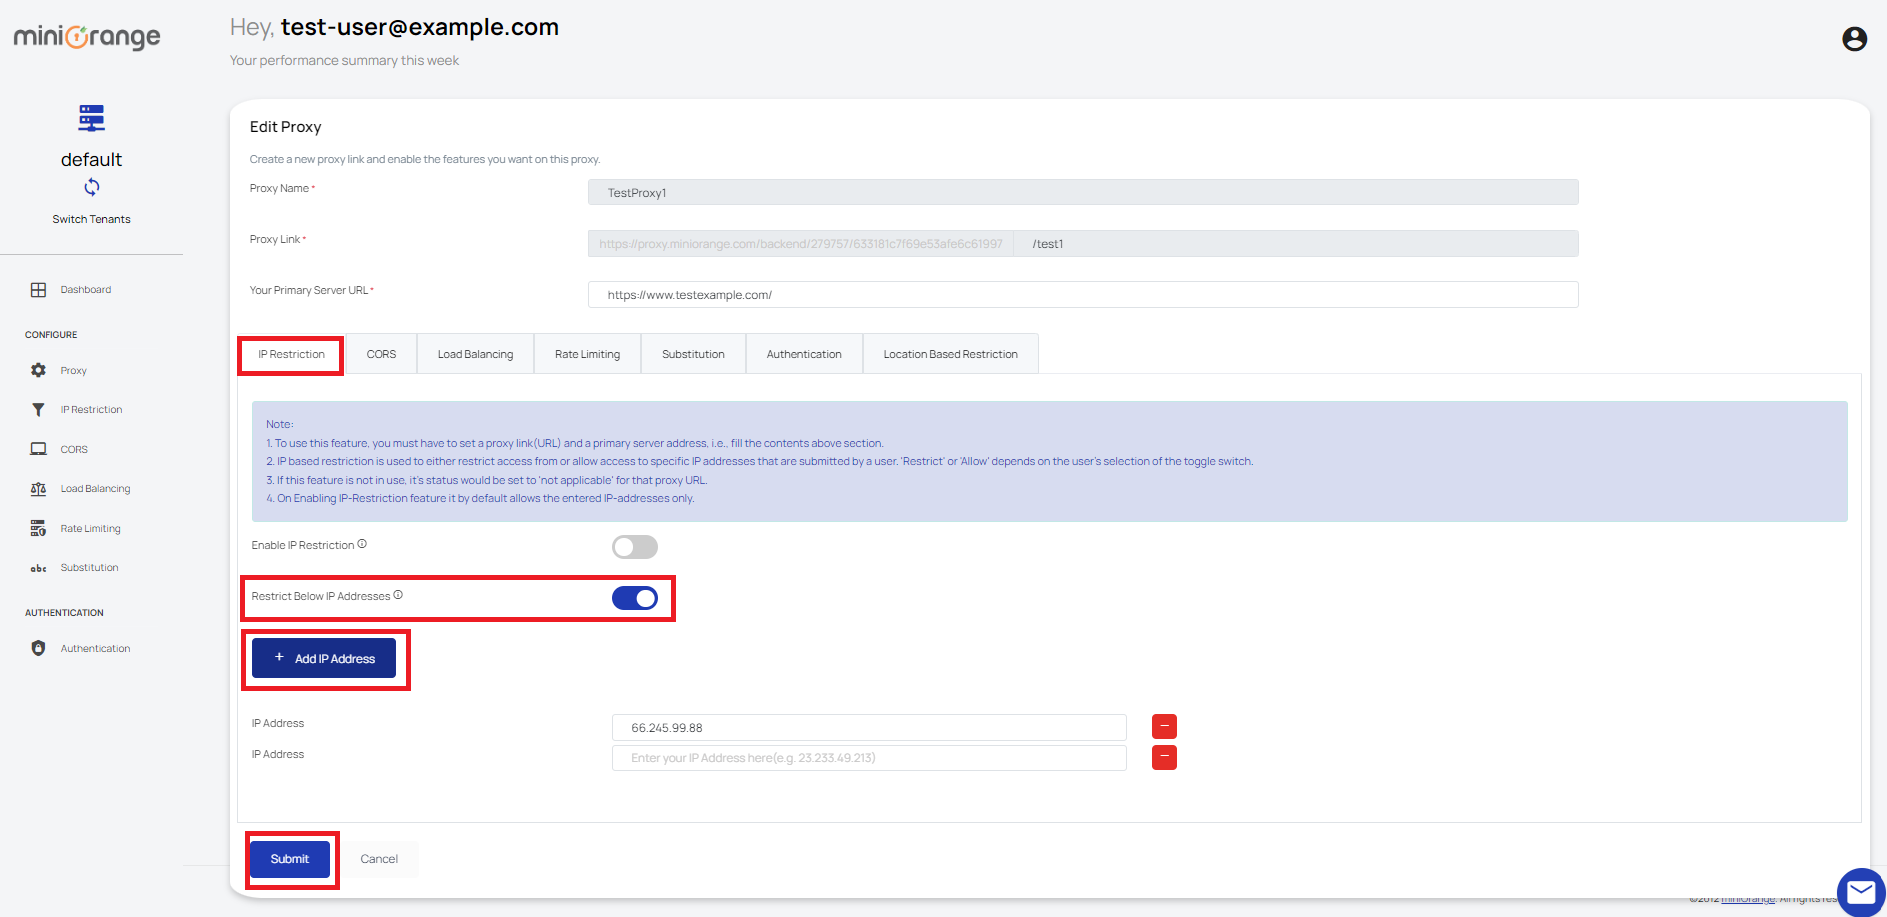
B) In order to restrict a specific number or range of IP addresses, toggle on "Restrict Below IP Addresses" and click on "+ Add IP Address" to add an IP address. Then click on Submit button to save your changes.
-
You can delete any IP Address by clicking on the red minus (-) on the right.
-
You have now successfully set up IP Restriction to secure your website and web applications.