Collection List
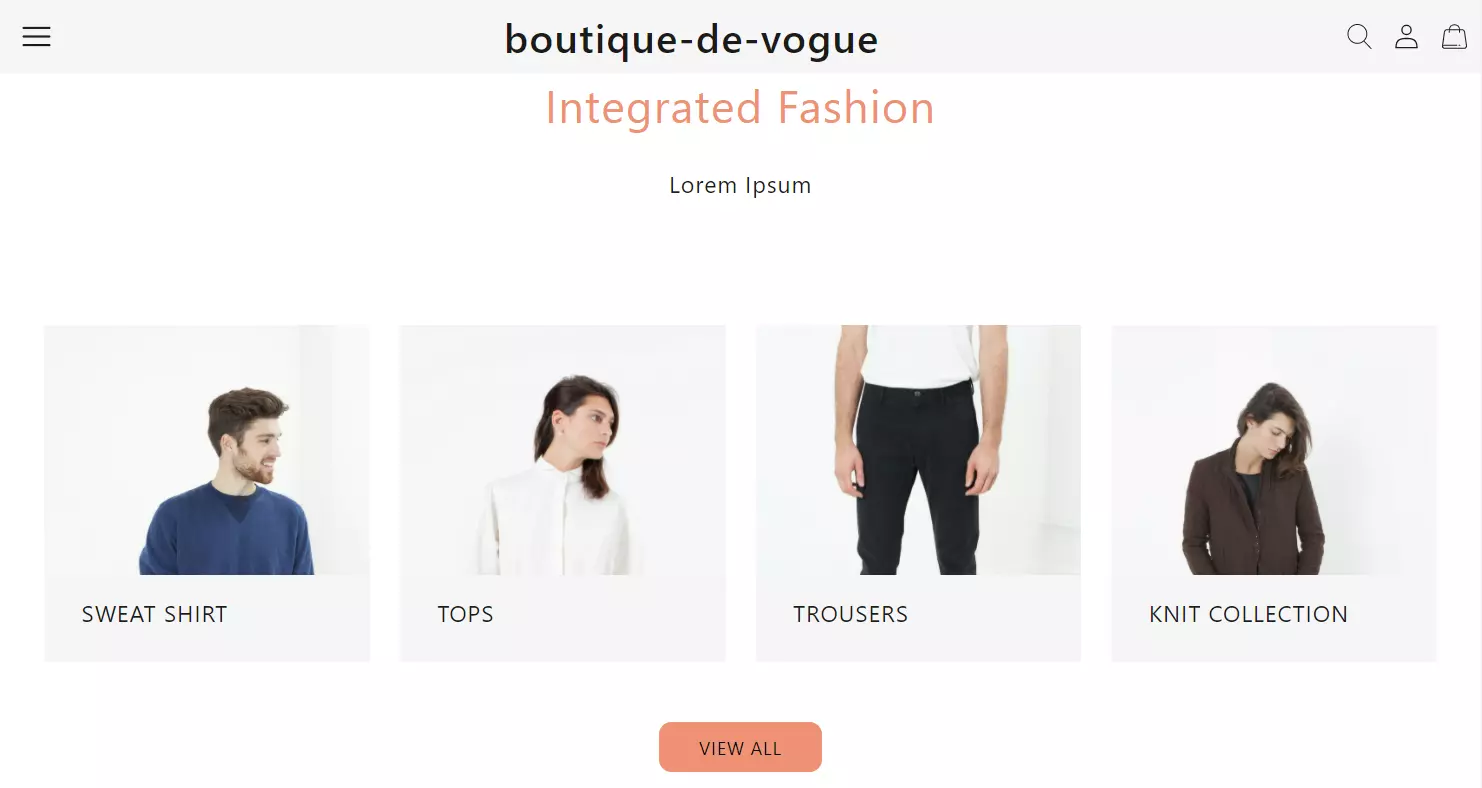
In this section, you can add as many feature collections you'd like on your homepage. At laptop screen size, 4 feature collections are visible adequately. Although, the design/structure of the page will change according to the number of collections.
Below is an example of how a collection looks like.
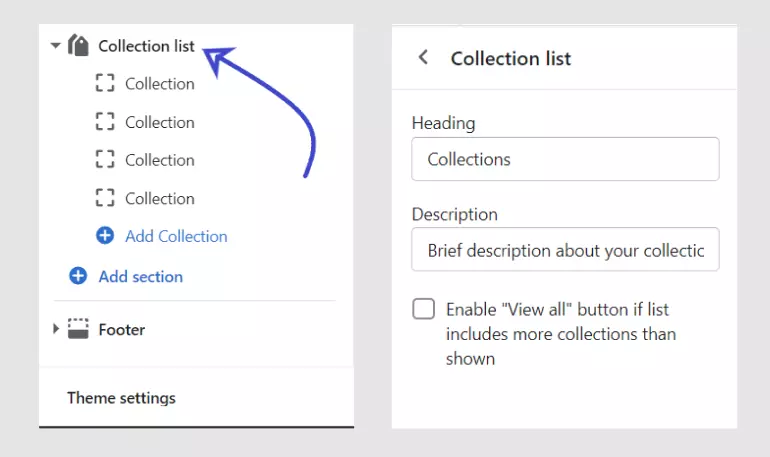
- Firstly, add a Collection List to your page.
- Click on the Collection List, you will find a Heading, Description and a checkbox.
- Insert a title using the Heading field.
- Give a brief description about your collections using the Description field.
- If you have 4 or more collections, click on the checkbox which will redirect the customers to the Collections’ page. Also, on having more than 4 collections, the structure would turn into a slider.
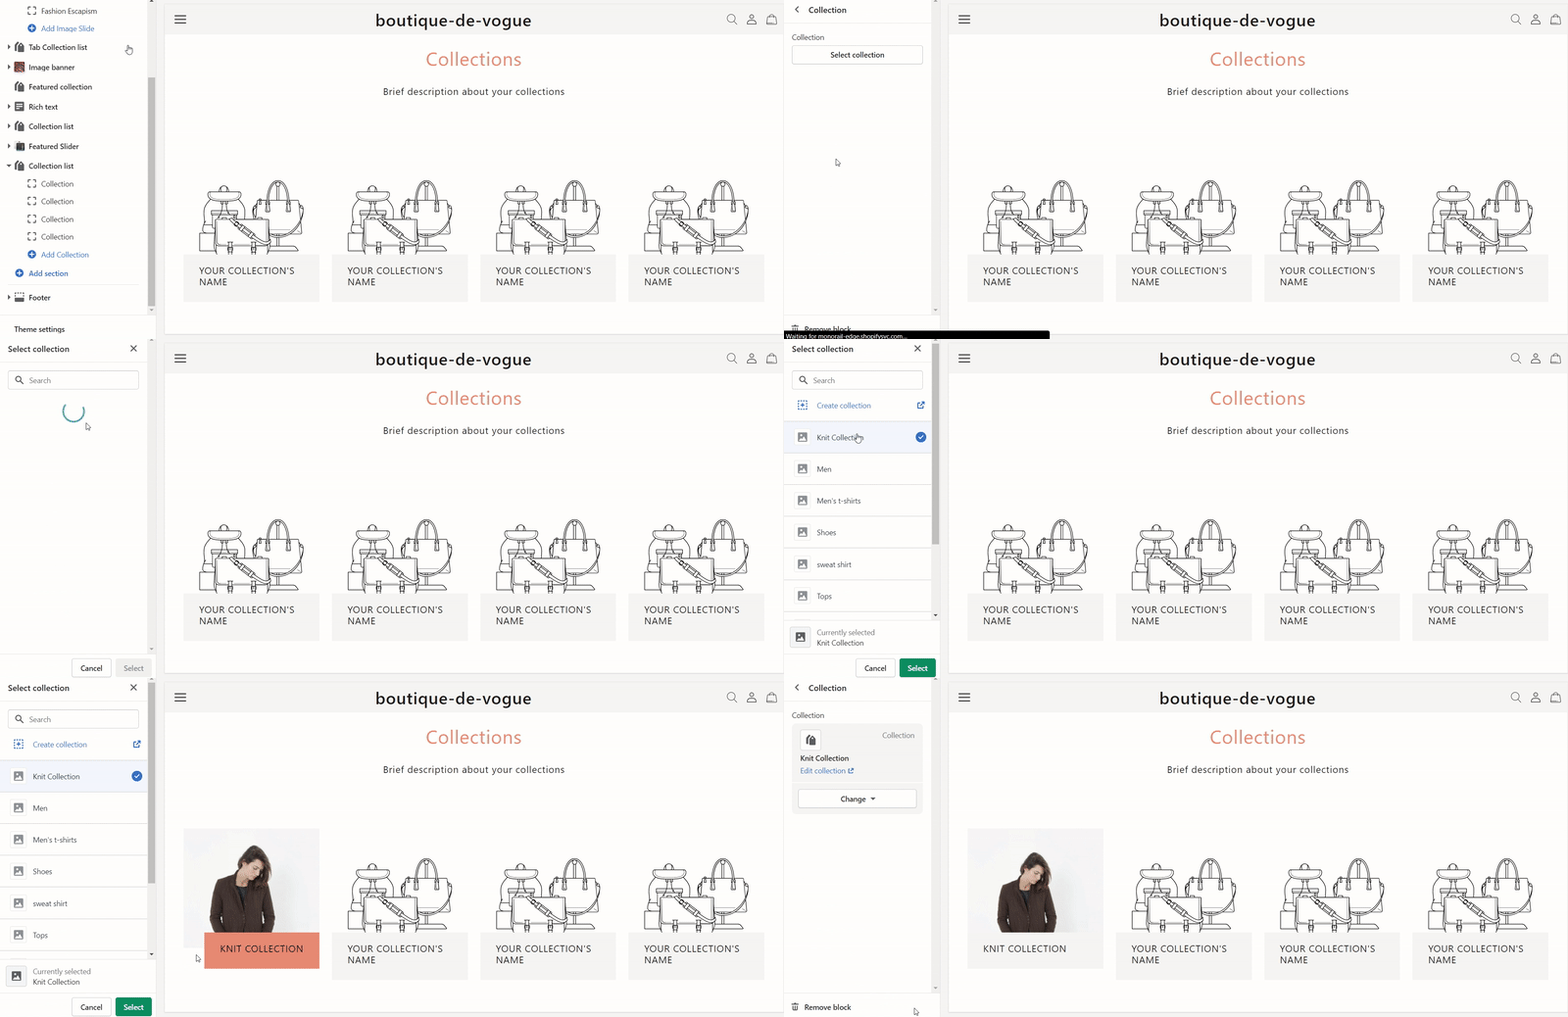
Below you'll find a clip, which demonstrates how to add a collection to the collection list.
To indicate that a specific line of products are available on discounts, you can make use of Sale tags. Use of Sold Out tags will come in handy, to show that a product is currently not available.
Sale Tag
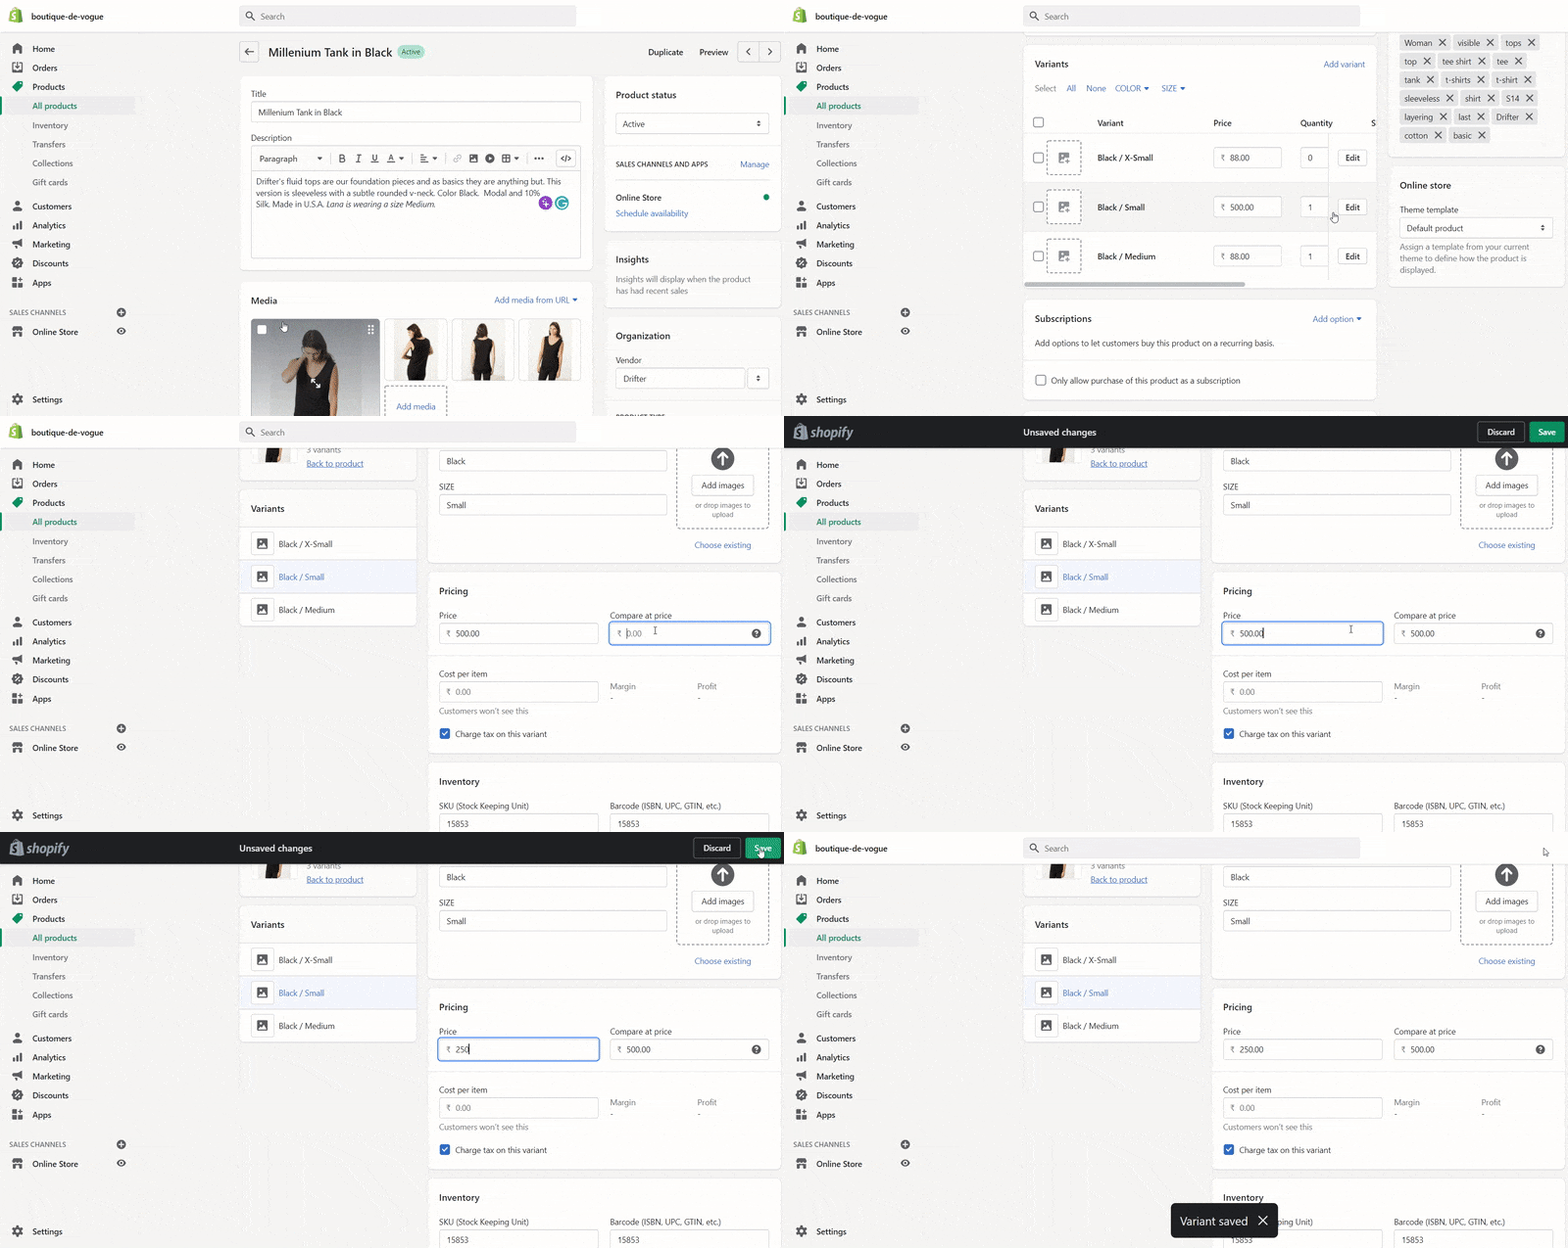
- Under the Products section, choose the product which requires a sale tag. For example, here we are adding the sale tag based on size.
- You can add the Sale Tag based on parameters available under the Variant tab, like Color, Size and so on.
- Scroll down to the Pricing tab, enter the desired cost of product.
- Compare at Price is the value which will be striked off (for example,
Rs 500), hence it will always be greater than Price. - Hit Save.
Sold Out Tag
- Under Products section, choose the product which requires this tag.
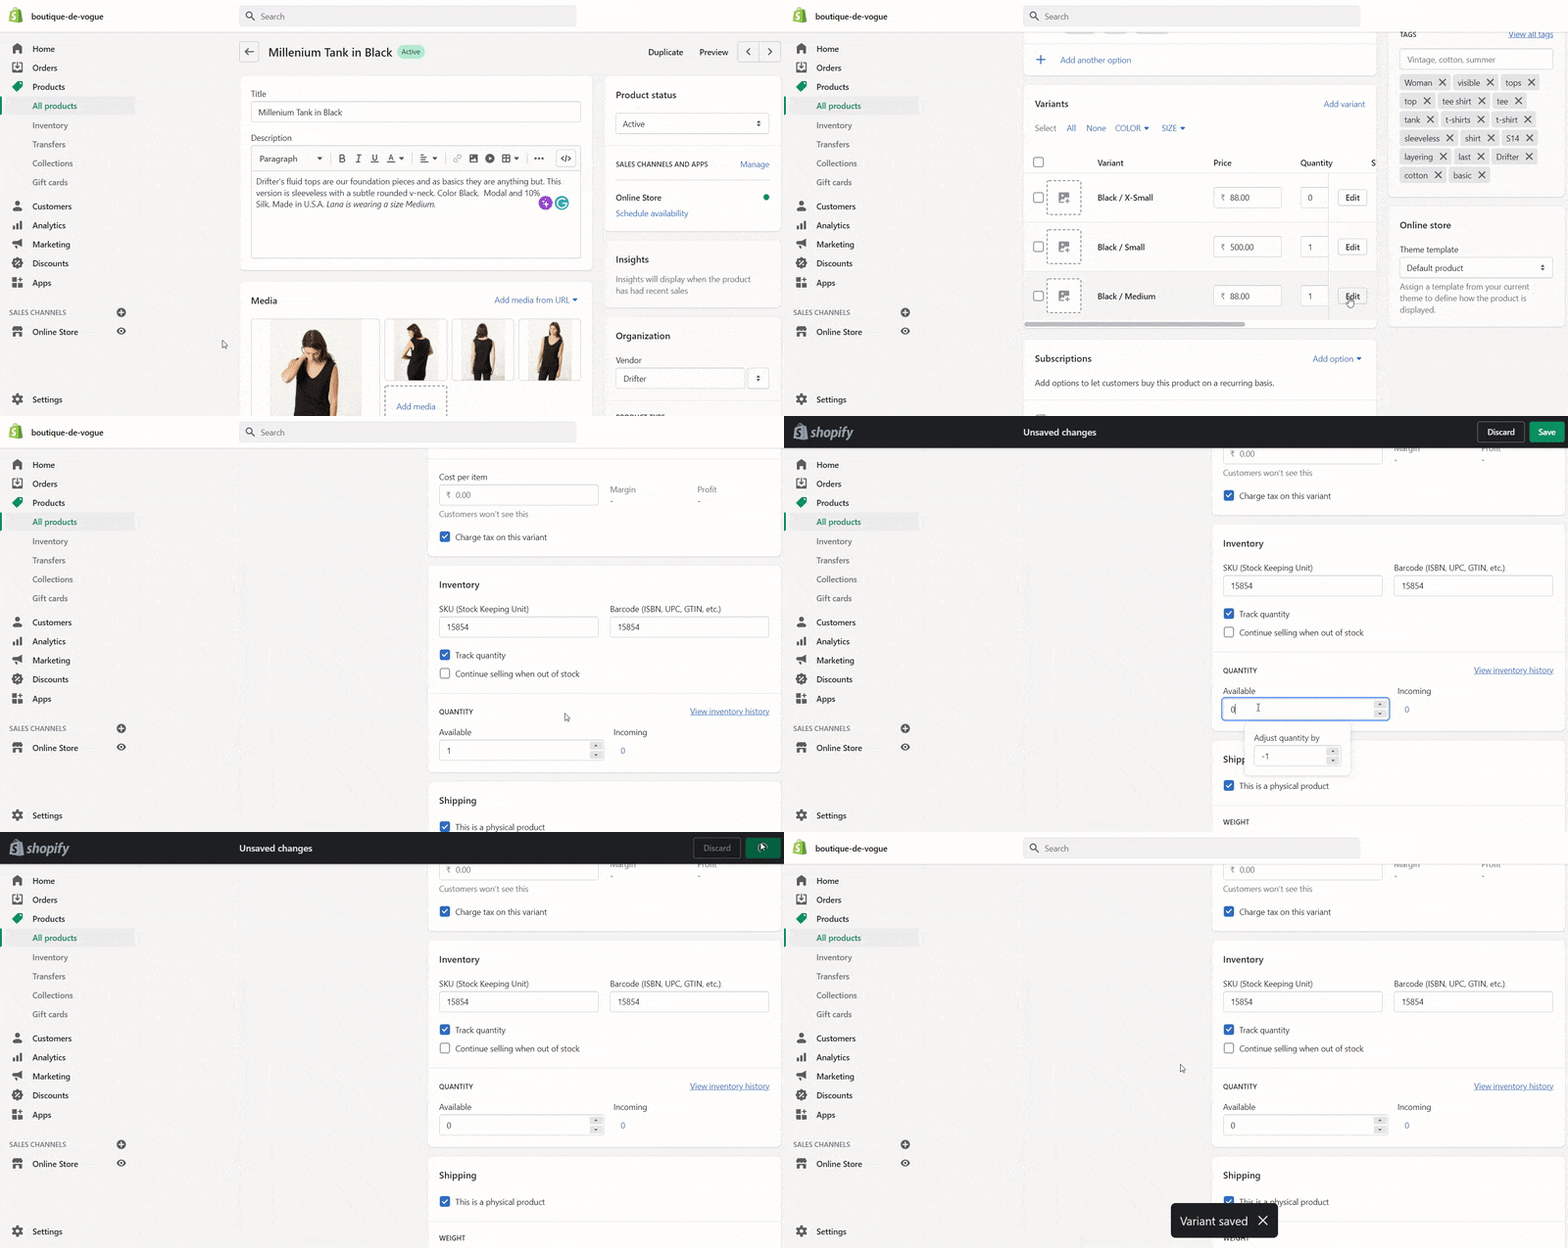
- Scroll down to Quantity tab and set the Available field to 0.
- Hit Save.
If you have enabled Track Quantity, the sold tag will automatically appear on out-of-stock products.
You could also set the inventory of products manually to enable the sold out tag as shown below,
Here is an example of both Sale and Sold Out Tag,
