Service Provider Setup
This tab allows you to configure your Identity Provider.
- This tab gives you the feature to configure your Identity Provider. Here you have to provide your IdP’s metadata URL. The Premium Plugin even gives you the options of SAML Logout URL, NameID Format and HTTP Binding type which are not there in free version plugin.
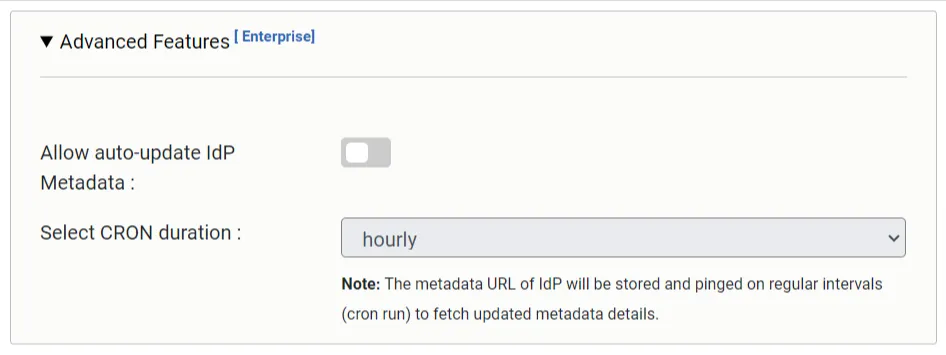
Auto-sync IdP Configuration from metadata: Few IDPs change their certificate regularly due to security reasons like Azure AD. In this case, if you enable this feature then it will automatically sync the IDP configuration based on metadata provided after a specific time interval.

1) Upload IDP Metadata
There are two ways to configure your Identity Provider with miniOrange:-
i) Auto Upload Metadata
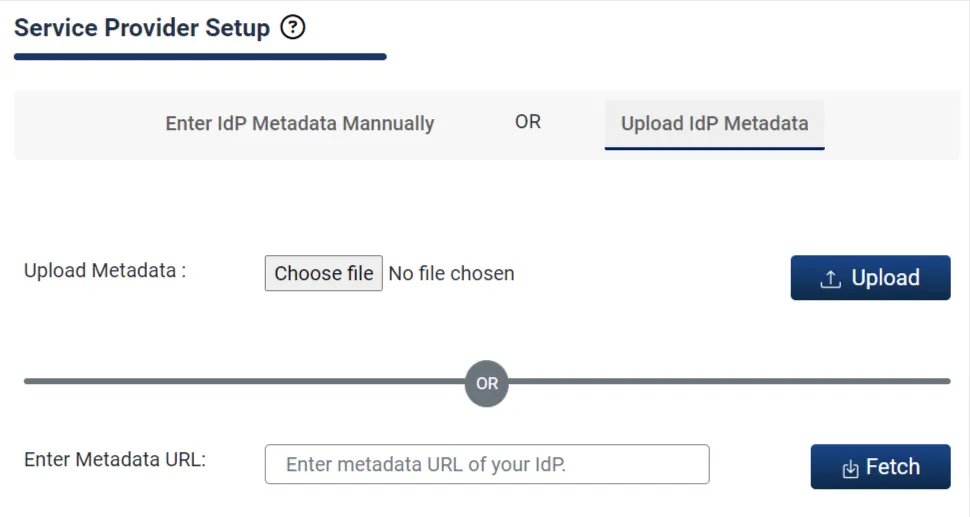
To upload your IDP metadata, you have to click on the Upload IDP Metadata‘ button which will again give you two options :-
You can upload your IdP Metadata with using any one of the below options.
-
Choose your IDP metadata .xml file containing the metadata from your device and Upload it.
-
You can enter the metadata URL of your IdP and click on Fetch Metadata.

Here, you are provided with an option to update IdP settings which will ping the metadata URL at regular intervals if there are some changes. Both the above methods will automatically store the required settings to configure the IdP.
ii) Manual Configuration
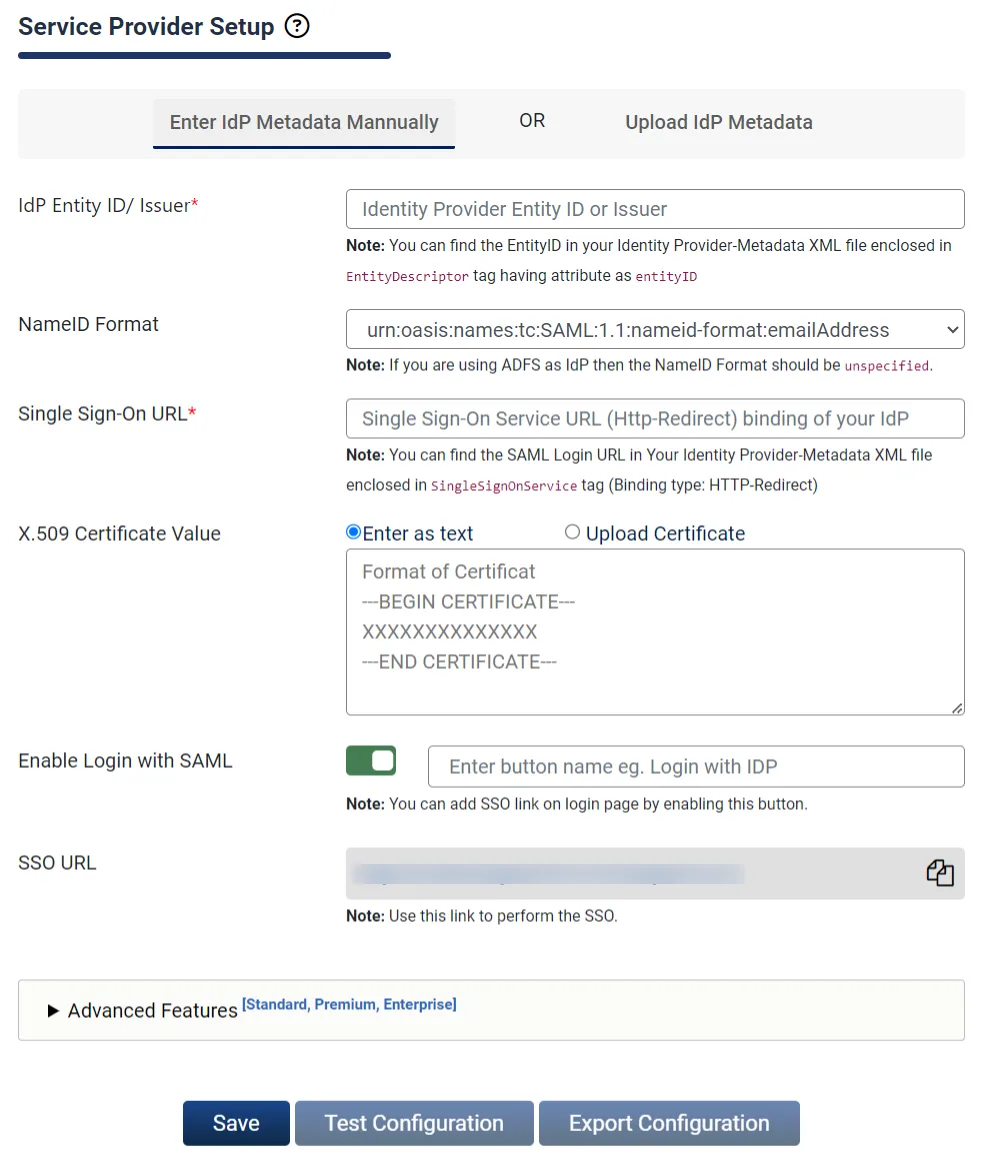
You can manually provide your IdP credentials where you need to provide the required settings and click on the SAVE button
-
IDP Entity ID or Issuer: The unique ID that identifies your application to the SAML SP plugin. This value must be unique across all applications in your SAML SP plugin.
-
SAML Login URL: The URL is where the SAML SP plugin sends the SAML request when SSO is initiated on the Joomla site.
-
X.509 Certificate: X.509 Certificate is used for signing SAML responses and encrypting SAML requests.
-
SSO Binding Type: When you are configuring your IdP, you will be given two options to send your SAML request. You can select any of these options to send your SAML Request.
HTTP-Post binding type
HTTP-Redirect binding type -
NameID Format: Identifies the SAML processing rules and constraints for the assertion's subject statement. Use the default value of 'Unspecified' unless the application explicitly requires a specific format.
-
Sign SAML Request: You can make your SAML request more secure after signing it. You can enable this checkbox if you want to sign the request
-
Select Signature algorithm: We support SHA1, SHA 256, SHA 384, and SHA 512 signing algorithm
-
Single Logout URL (If you want SLO): This URL is used to send the SAML logout request to your IDP at the time of logout. But, this feature will only work if your IdP supports Single logout. Here also you can select the option of binding type to send your request.
-
Authentication context class: The authentication context indicates how a user is authenticated at an Identity Provider. You can select any of PasswordProtectedTransport, Password, Unspecified, TLS Client, X.509 Certificate authentication context class according to your requirements.

-
After you provide your IdP’s metadata URLs, you Save it and go to Test Configuration. There a new window will open which will display either of the following configuration status:-
- Configuration successful – with user attributes.
- Error message – if any configuration error is sent by IdP.
-
It also gives an option of Export Plugin Configuration where you can download a .json file which contains the following things:
- Complete configuration of your plugin
- Version Dependencies
You can take the backup of your plugin configuration on Single Click.