Audit Logs
The audit logs of the plugin are designed to track all plugin synchronization activities between Salesforce and WordPress. They provide a detailed record of each sync operation, making it easier to debug issues and monitor the sync process effectively.
If any errors occur during synchronization, they will be captured and displayed in the Response column of the logs, helping you quickly identify and troubleshoot problems.
How to Enable and Access Audit Logs?
To enable and access the audit logs, follow these steps:
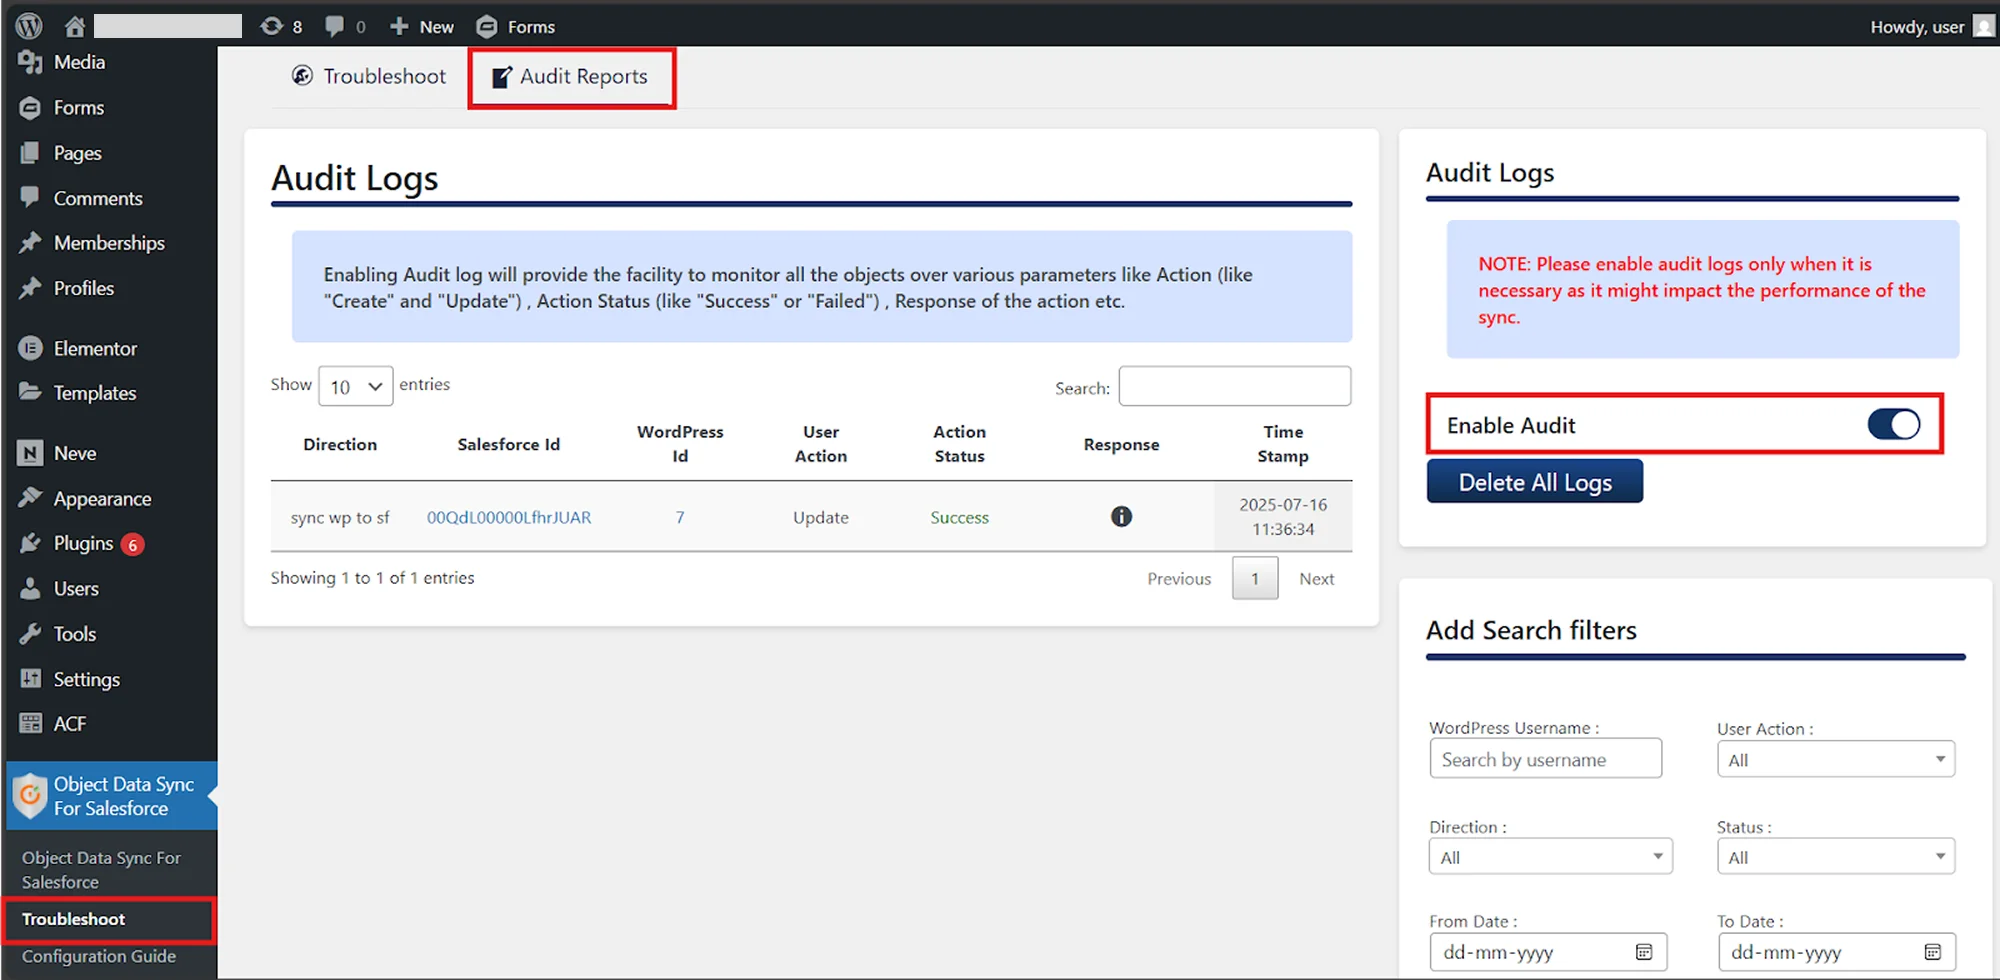
- Navigate to the Troubleshoot submenu located under the plugin name in the left side menu on the WordPress Admin Dashboard.
- Click on the Audit Reports tab.
- To enable audit logging, enable the Enable Audit toggle found under the Audit Logs section.
- Once the toggle has been enabled, the plugin will start logging all sync activities.
Understanding the Audit Logs Table:
The audit logs will be displayed in a table format, providing the following information for each sync event:
- Sync Direction: Indicates whether the sync was from Salesforce to WordPress (SF to WP) or WordPress to Salesforce (WP to SF)
- Sync Status: Shows whether the sync was a Success or Failed
- Salesforce ID: The Salesforce record ID involved in the sync
- WordPress ID: The WordPress record ID involved in the sync
- Response: Displays the response message received from the respective platform (WordPress or Salesforce), depending on the sync direction
- Timestamp: The system time when the sync activity occurred
When to Use Audit Logs for Troubleshooting?
Use Audit Logs to troubleshoot when you're experiencing any of the following issues:
- Records are not syncing on creation or update, even though the configuration is complete
- Sync was previously working, but has suddenly stopped
- The latest records are not appearing on the target platform
- You want to verify that your sync configuration is working correctly
How to Debug Using Audit Logs?
Follow these steps to troubleshoot sync issues using Audit Logs:
Step 1: Prepare for Testing
- Navigate to the Audit Logs section following the access steps above
- Enable Audit Logs if they are not already enabled
- If there are existing log entries, click the Delete All Logs button to clear them (this gives you a fresh start for testing)
Step 2: Test the Sync
- Trigger the sync process again by creating or updating a record in either Salesforce or WordPress
- Wait a few moments for the sync to process
Step 3: Check the Results
- Review the Audit Logs Table for any new sync entries
- Look at the Sync Status column to see if the sync was successful or failed
- If there are failures, check the Response column for error messages that can help identify the issue
If you're still experiencing any issues, please take a screenshot of the Audit Logs Table and send it on salesforcesupport@xecurify.com along with your query for further assistance.
For more information visit our Object Data Sync for Salesforce page or mail us at salesforcesupport@xecurify.com.