IDP Configuration
IDP Configuration tab allows a user to add a SAML Identity Provider to enable SAML Single Sign-on in your Atlassian Application. You will get all the required information from the SAML Metadata URL/file provided by the Identity Provider.
You can setup the miniOrange SAML plugin using one of the ways given below
1. Manual Configuration
2. Import From Metadata
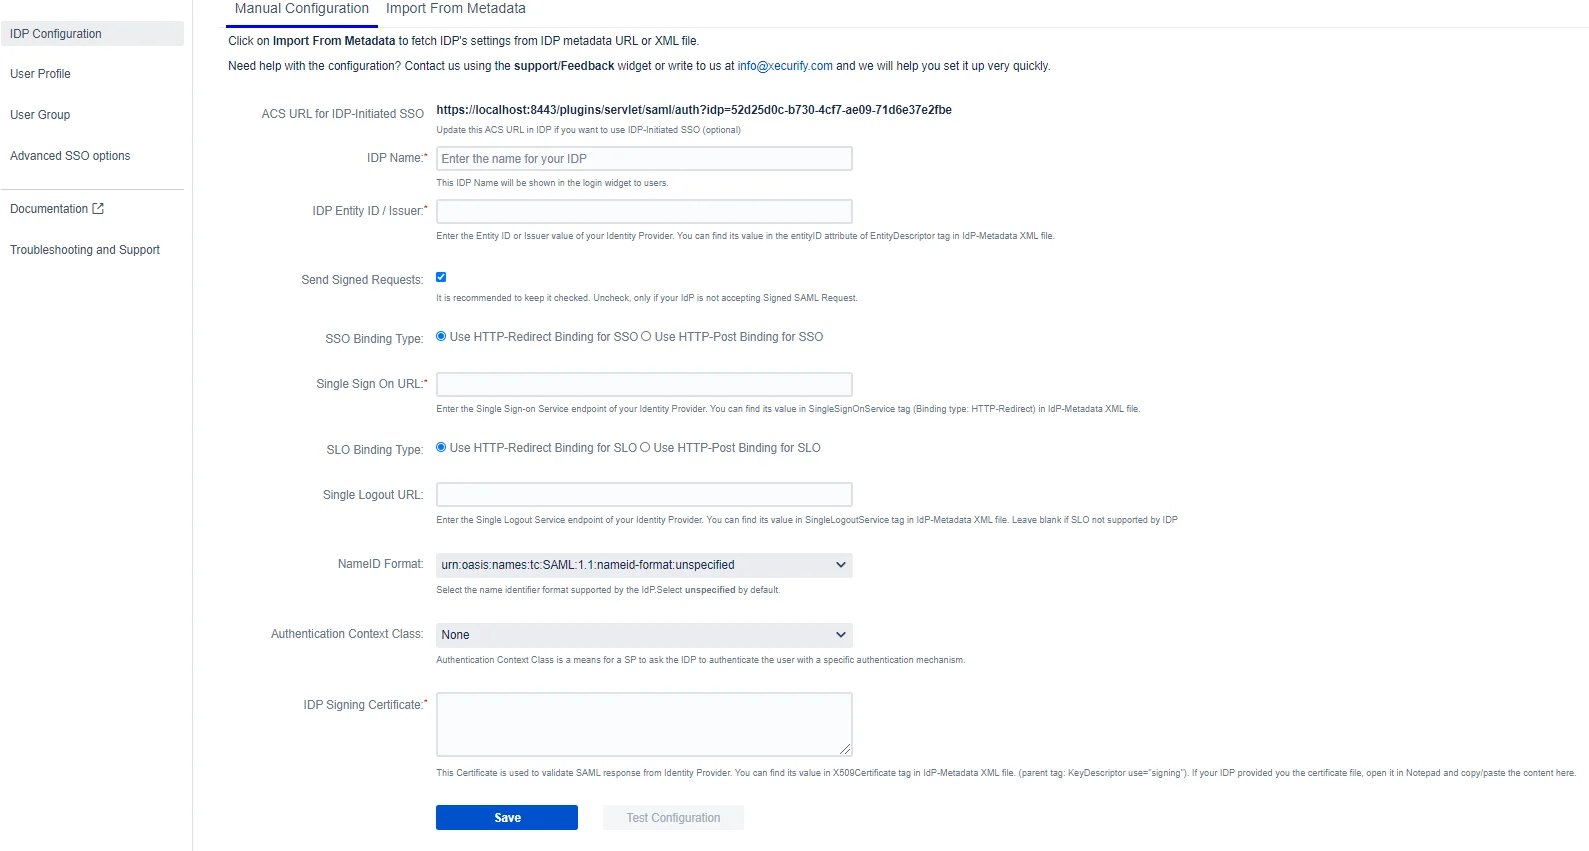
Manual Configuration
If you have the following information from your IDP, you can configure the plugin by manually adding this information in the respective field. Here are the required fields:
IDP Name (required)
You can enter a name for your IDP in this field. This field will be useful if you have configured multiple SAML IDPs.

For example, if you configure 2 IDPs namely IDP1 and IDP2, you manage them easily from the list as shown in the image below

The IDP name that is entered in this field will be the name that will be displayed on the login button for this IDP. This login button will be used by end-users to initiate SSO for this IDP.
IDP Entity ID/Issuer (required)
A unique URI/name used to identify the Identity Provider. This ID is provided by all SAML 2.0 compliant IDPs. Also, this is required for SAML SSO to work properly. The app uses IDP Entity ID to validate SAML Response.
Send Signed Request (optional)
The plugin will send signed SAML Authentication Request to the SAML IDP during SSO. Most of the IDPs verify the signature of the SAML request before performing SSO. You will need to add the public certificate of the app as the signing certificate in the IDP to use this feature.
This public certificate is available for download in SP Metadata tab of the app. You can also change it and add your own certificate in Certificates tab.
Single Sign-on URL (required)
An endpoint from IDP responsible for parsing the SAML Authentication request. The plugin sends SAML Request to this endpoint after initiating SSO. The SAML SSO URL might change according to the binding type selected in the app. Refer to the binding type section to know how to determine the binding type and SSO URL.
Single Logout URL (optional)
If you want the user to be logged out from the IDP as soon as they logout from the Atlassian application, you can set this URL. A Single Logout URL is provided by most of the SAML 2.0 Compliant IDPs. The plugin sends SAML Logout Request to this endpoint after the user logs out from the application and this endpoint is responsible for parsing the SAML logout request.
The SAML SLO URL might change according to the binding type selected in the app. Refer to the binding type section know how to determine the binding type and SLO URL.
This is an optional field. Configure it, only when you want to logout users from IDP after they log out from the application.
SSO and SLO Binding Type (required)
The app sends XML Messages to IDP to perform Single Sign On and Single Logout. These SAML Messages are called SAML Request and Logout Request respectively. The Binding Type defines how the app will send these messages.
HTTP Redirect:
The SAML Request message is sent as a GET request to IDP when HTTP redirect is selected. This means that the app will send SAML Request in URL parameters. This increases the length of the URL significantly. The URL length is even larger if a signed request is sent.
Some IDPs have a limit on the length of the URL, hence we recommend not using this method if your IDP supports HTTP-POST.
HTTP Post:
The SAML Request message is sent as a POST request to IDP when HTTP Post is selected. This allows you to send SAML Request to IDP without increasing the length of the URL and hence it is recommended to use this binding type.
How to know which Binding Type your IDP supports?
You can find this information in IDP’s metadata file.
- Open IDP’s metadata
- Search for SingleSignOnService.
- Check the value of Binding attribute. You can see in the image below that this sample IDP supports both Binding Types

- The value of Location attribute is the Single Sign-On URL for that binding type.
NameID Format (required)
NameID is considered as a unique identifier of the user performing SSO. Some IDPs require SP to request a specific NameID format for SSO to work properly. Keep the value of this field Unspecified if your IDP doesn’t require any specific NameID format.
Authentication Context Class (optional)
The authentication context indicates how a user authenticated at an Identity Provider. The Identity Provider includes the authentication context in an assertion at the request of a Service Provider or based on configuration at the Identity Provider.
IDP Signing Certificate (required)
This is the public signing certificate provided by the IDP. IDP signs the SAML Response before sending it to the app. The app uses this public certificate to verify the signature in the SAML Response.
Configure Multiple IDP Signing Certificate
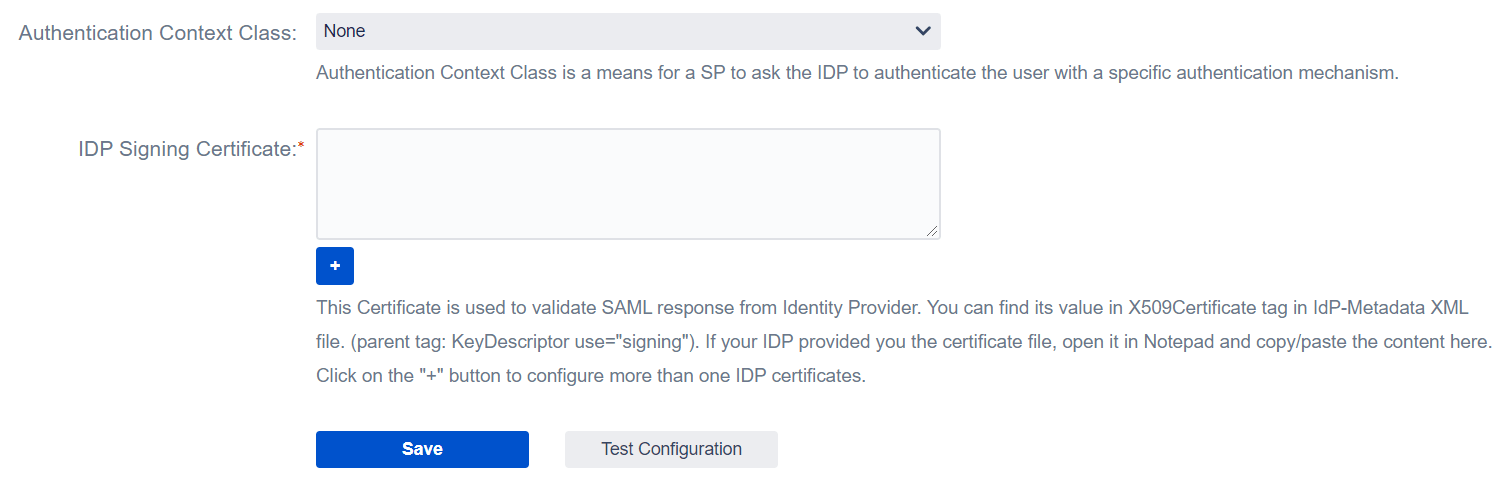
The IDP Signing certificate (public key) is used to validate signatures in the SAML Response, and if the certificate changes on the IDP side, it must be updated as soon as possible on the plugin, or the app will not be able to verify the SAML Response and the user will be unable to access the application.
Some IDPs, such as Azure AD, roll over the certificate on a regular basis, and it can be rolled over immediately in an emergency. This is a critical situation that prevents users from accessing the application, and in this case Atlassian administrators should request updated IDP Metadata (Certificate) and manually update the certificate in the plugin.
This feature allows you to configure the upcoming certificate that the IDP will use to sign the SAML Response in advance so that even if the certificate on the IDP changes, the end-user login will not be affected.
This option is available in the Configure IDP tab of the plugin. You can create a new text field and configure an additional certificate or In case IDP metadata contains the additional certificate then you can simply configure the add-on by uploading the IDP metadata file (or fetching information from metadata URL) and along with the SSO configuration additional certificate will get configured automatically.
Manual Configuration Fields image
Other Features/ Troubleshooting Options
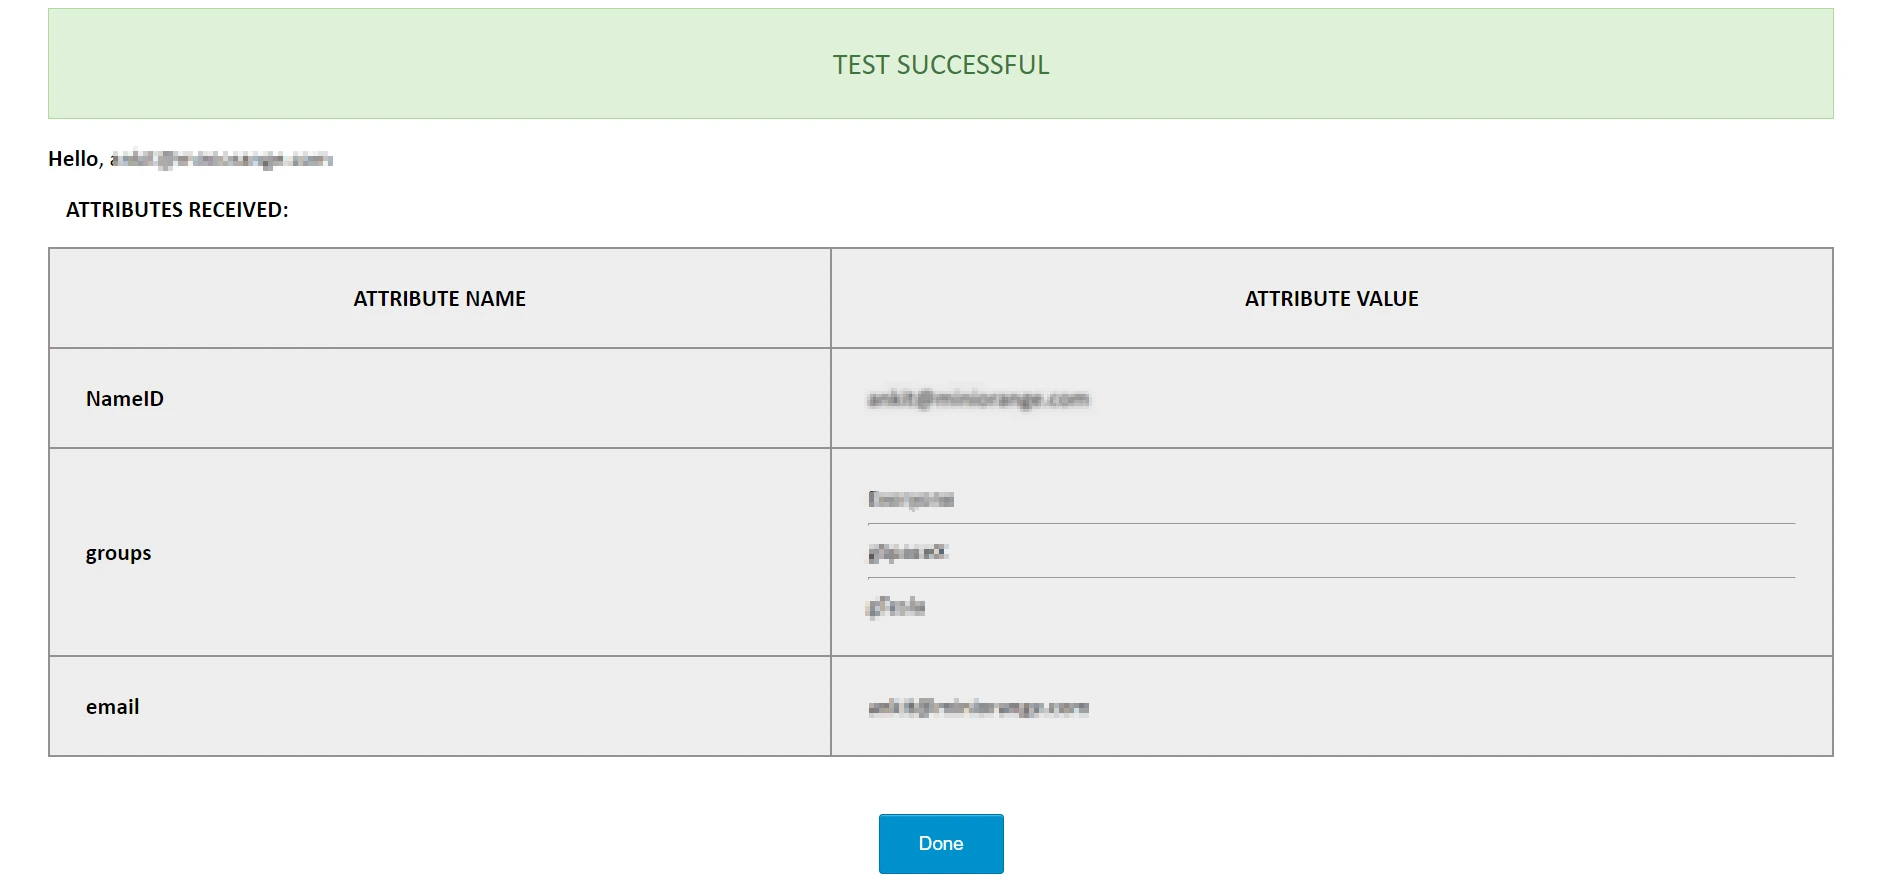
Test Configuration
You can use this button to verify your configurations. Once you click on this button,
- a popup window will open.
- This will initiate an SSO flow and you’ll need to log in to the IDP. If you’re already logged into the IDP, this step will be skipped
- Once you log in, you’ll see a test status window.
If,
- Configurations are correct: You’ll see a Test Successful message with a list of attributes from the IDP as shown below.
- Configurations are incorrect: you’ll see a Test Failed message with the cause of the error and resolution as shown below.

- Test Failed: You can refer miniOrange SAML App troubleshooting page to fix it.
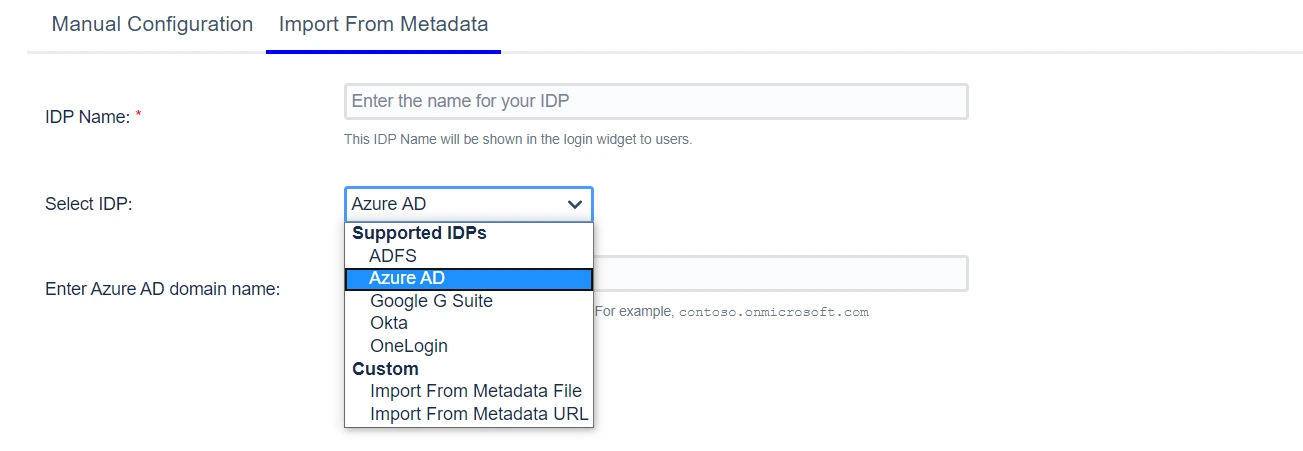
Import From Metadata
If your IDP provides a SAML Metadata file/URL, you can configure the plugin SSO settings by uploading the metadata file or configuring the metadata URL.
The Select IDP dropdown has a few pre-configured IDPs like ADFS and Azure AD. Each IDP has a unique method of making the metadata available – some can be configured to fetch the metadata URL and some only have the option of uploading a file. For example, if ADFS is your IDP, you will be asked for the hostname of your AD server. The metadata URL will then be generated based on the hostname and the plugin will retrieve IDP metadata from this URL. For IDPs like Okta, G Suite or One Login, the process for getting metadata is standard. For example, if you choose G-Suite, you will be asked to upload a metadata file.
For IDPs other than the ones mentioned in the drop-down, you may choose whether to upload a metadata file or to give a metadata URL depending on what your IDP supports. Custom options will be relevant here.