User Role Management
Feature Description
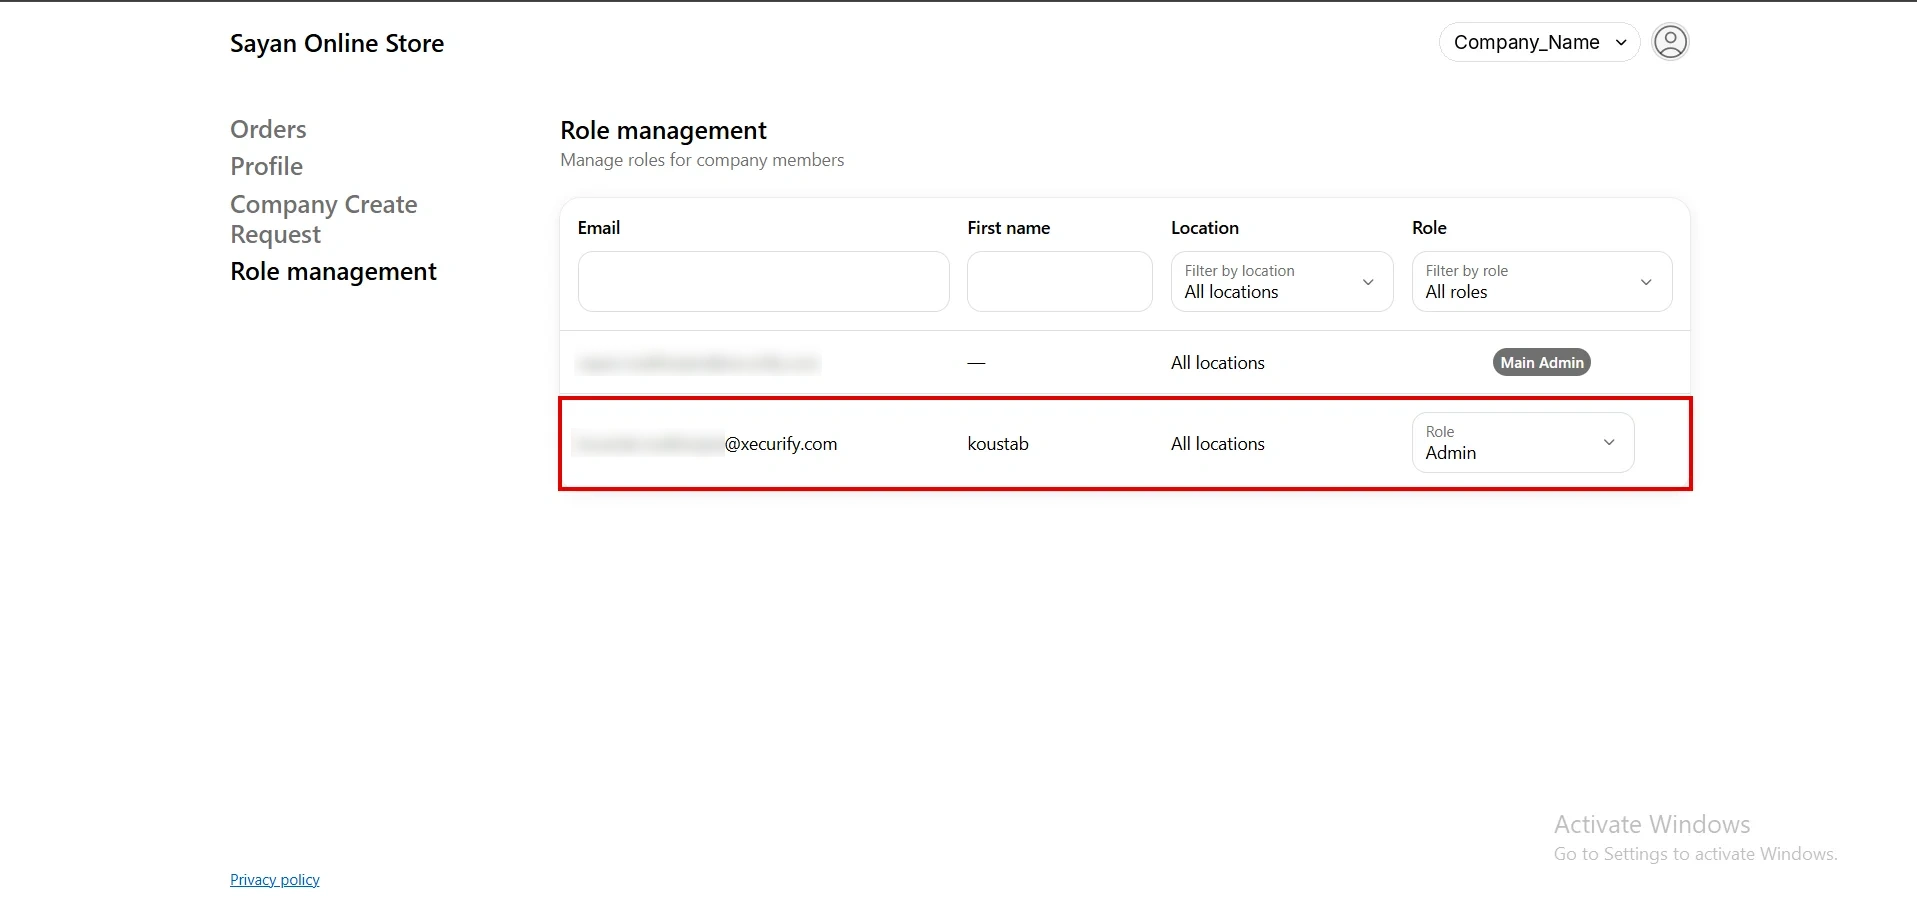
User role management lets you control what each member of a B2B company can do on your storefront. The company’s main contact is assigned the Main Admin role automatically, and store admins can assign the Admin, Location Admin, or Ordering Only role to other members from the app. Company admins can view members and their roles from a dedicated Role management page in their customer account, so permissions stay consistent as companies add more buyers, without managing every user manually.
Note: Before you begin, complete Step 1 and Step 2 from the Shopify B2B company onboarding setup guide.
Setup Instructions
-
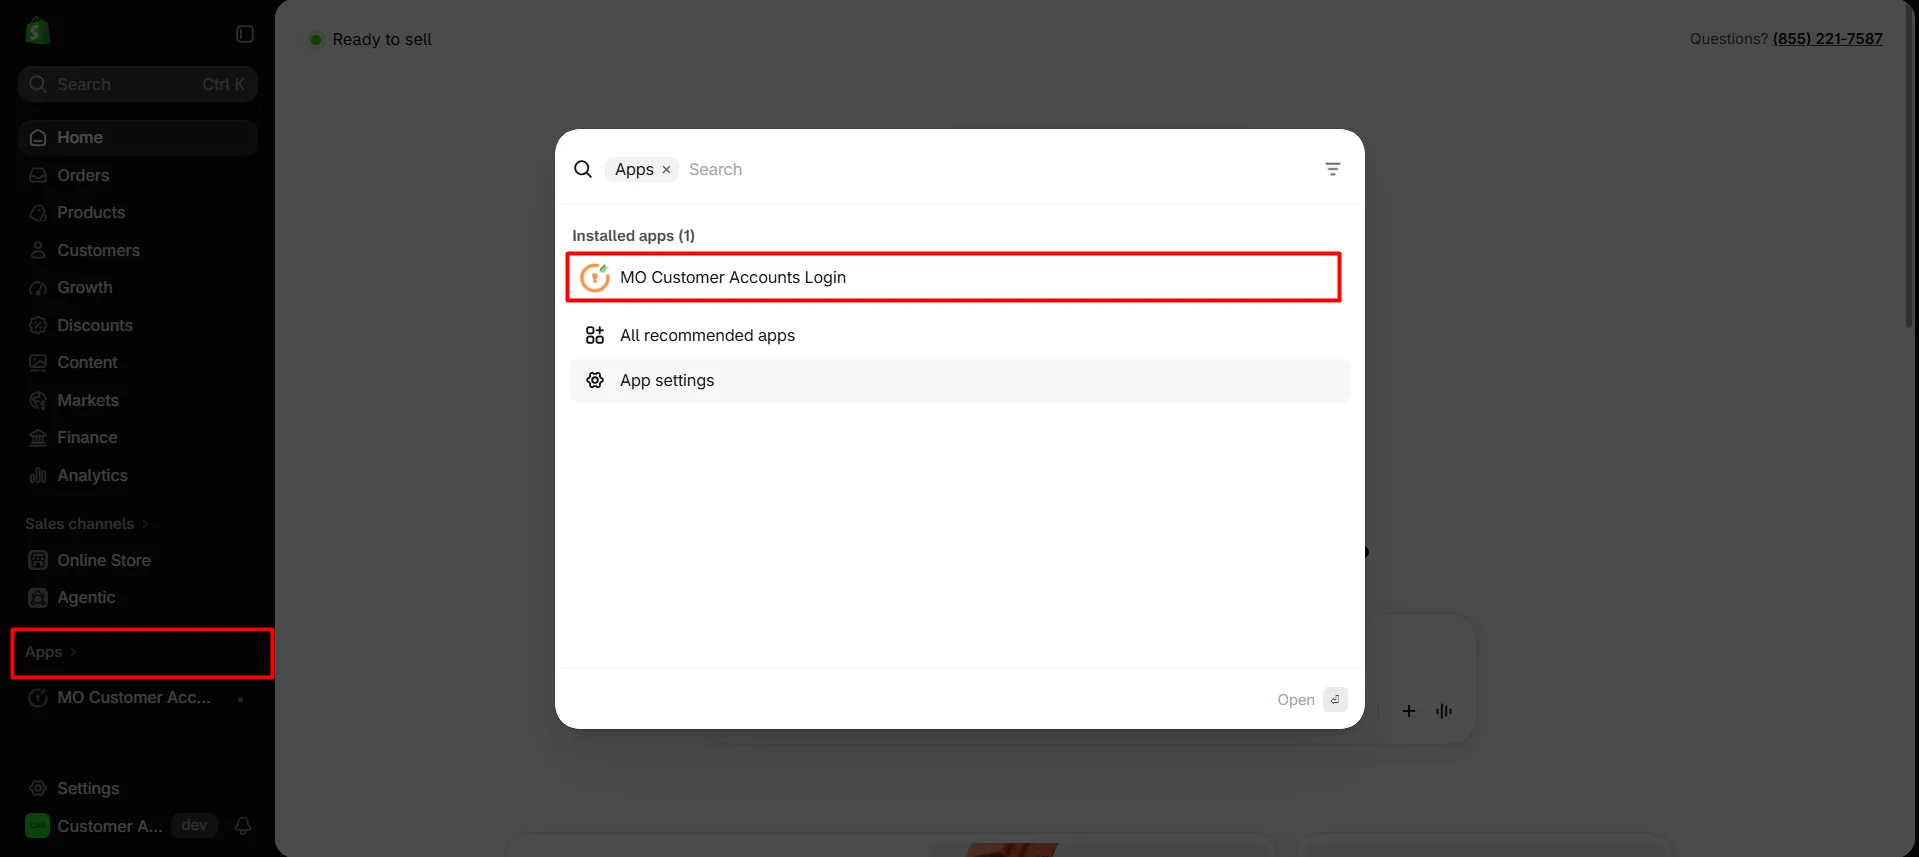
Navigate to the Shopify Dashboard, open the Customer Accounts Login application.
-
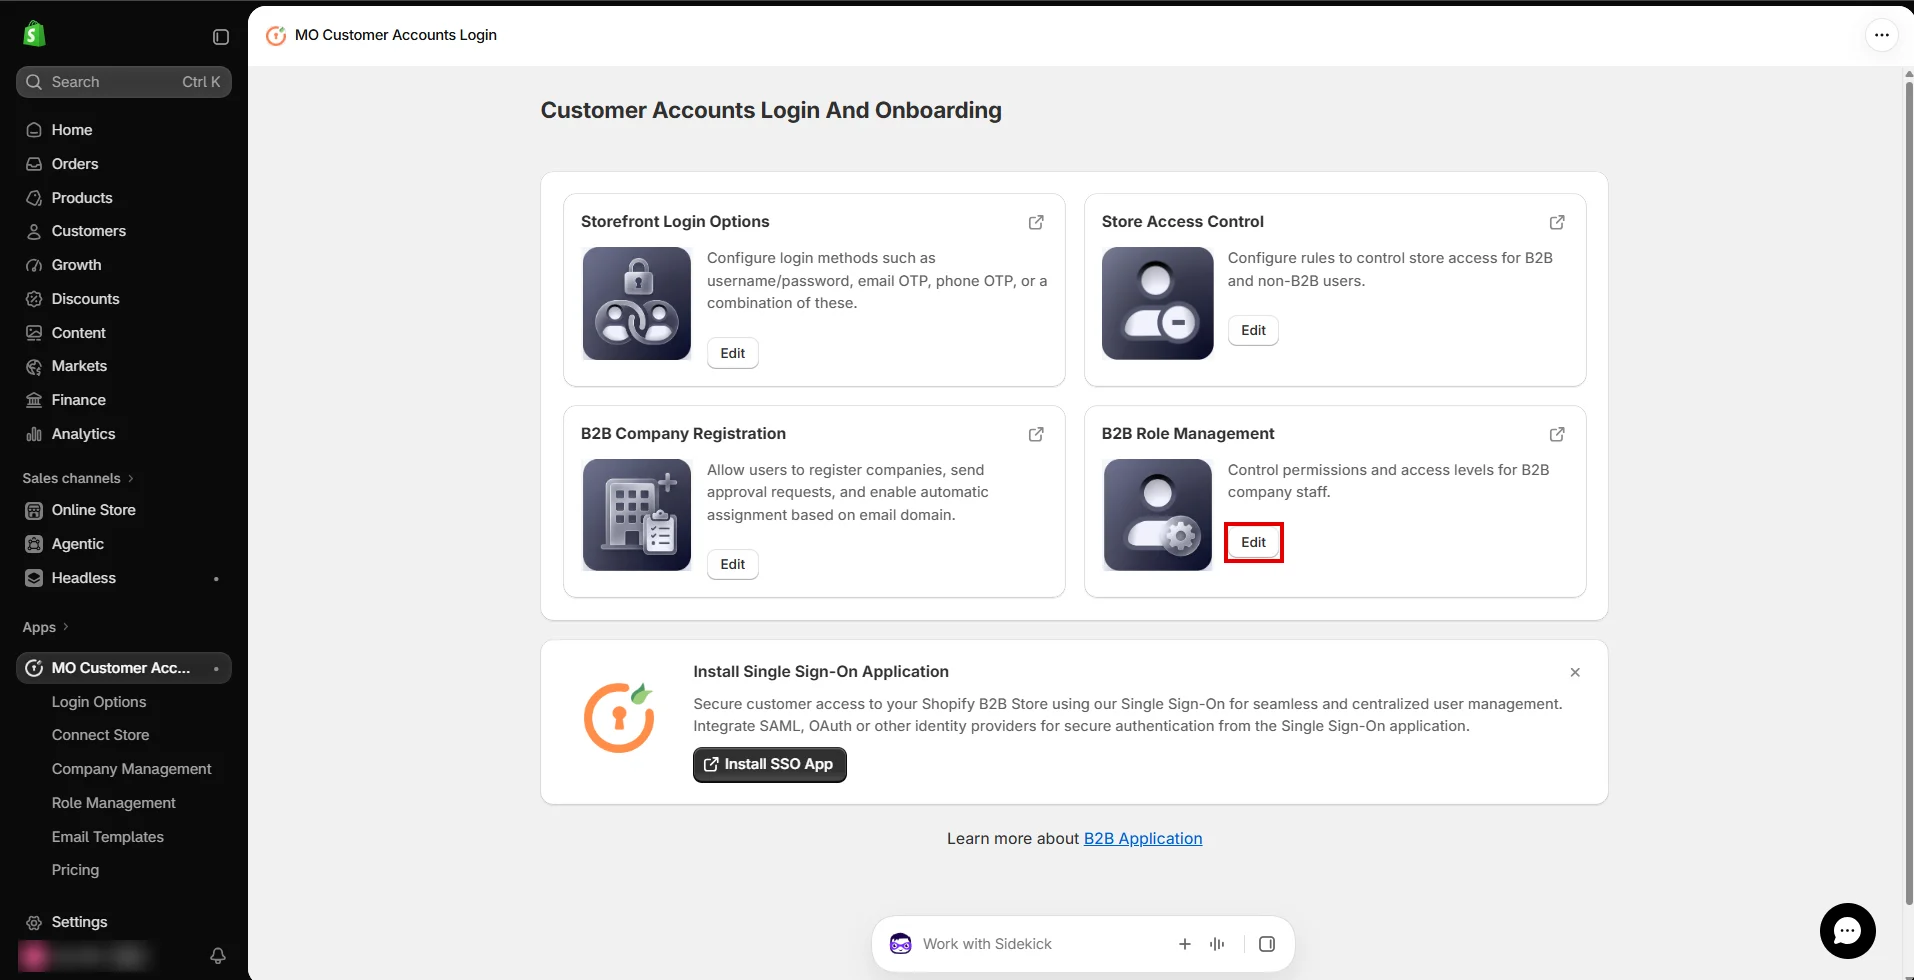
Click Edit on the B2B Role Management card.
Enable Role Management
-
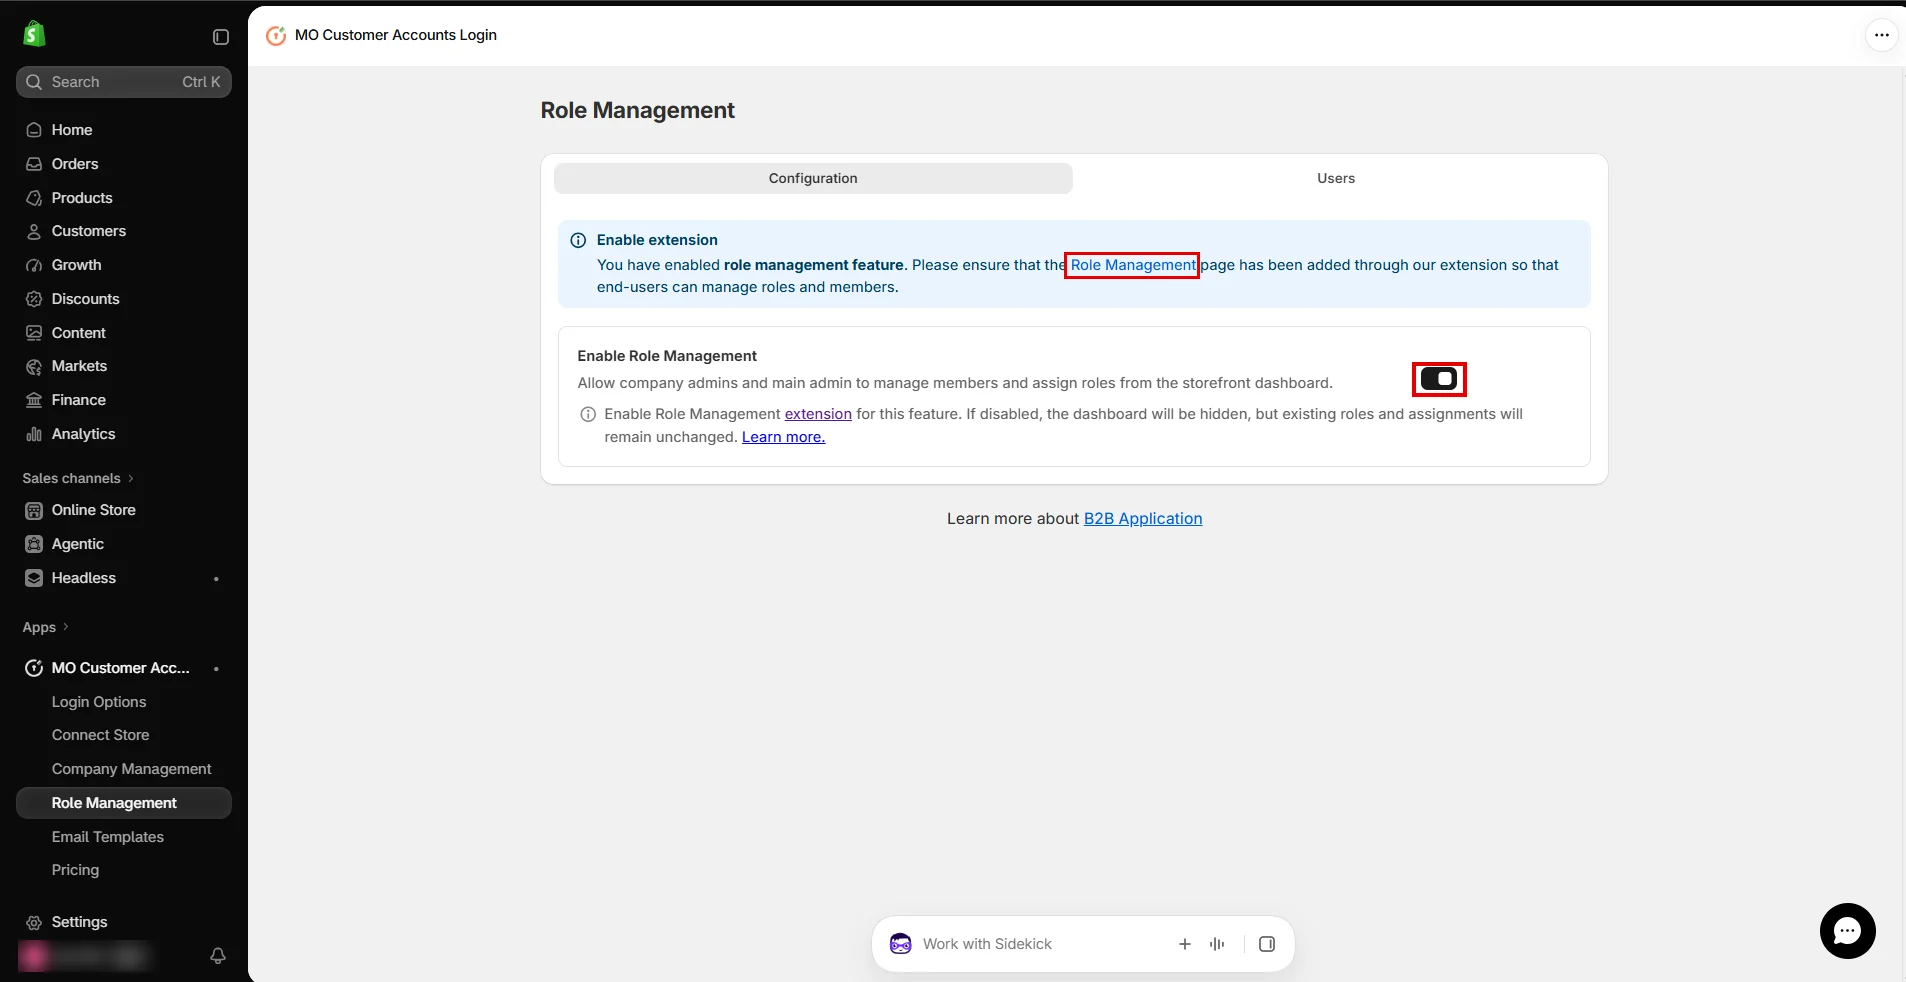
Under the Configuration tab, enable the toggle of Enable Role Management.
-
Click the Role Management link to open the extension and add the Role Management page so end users can manage roles and members.
-
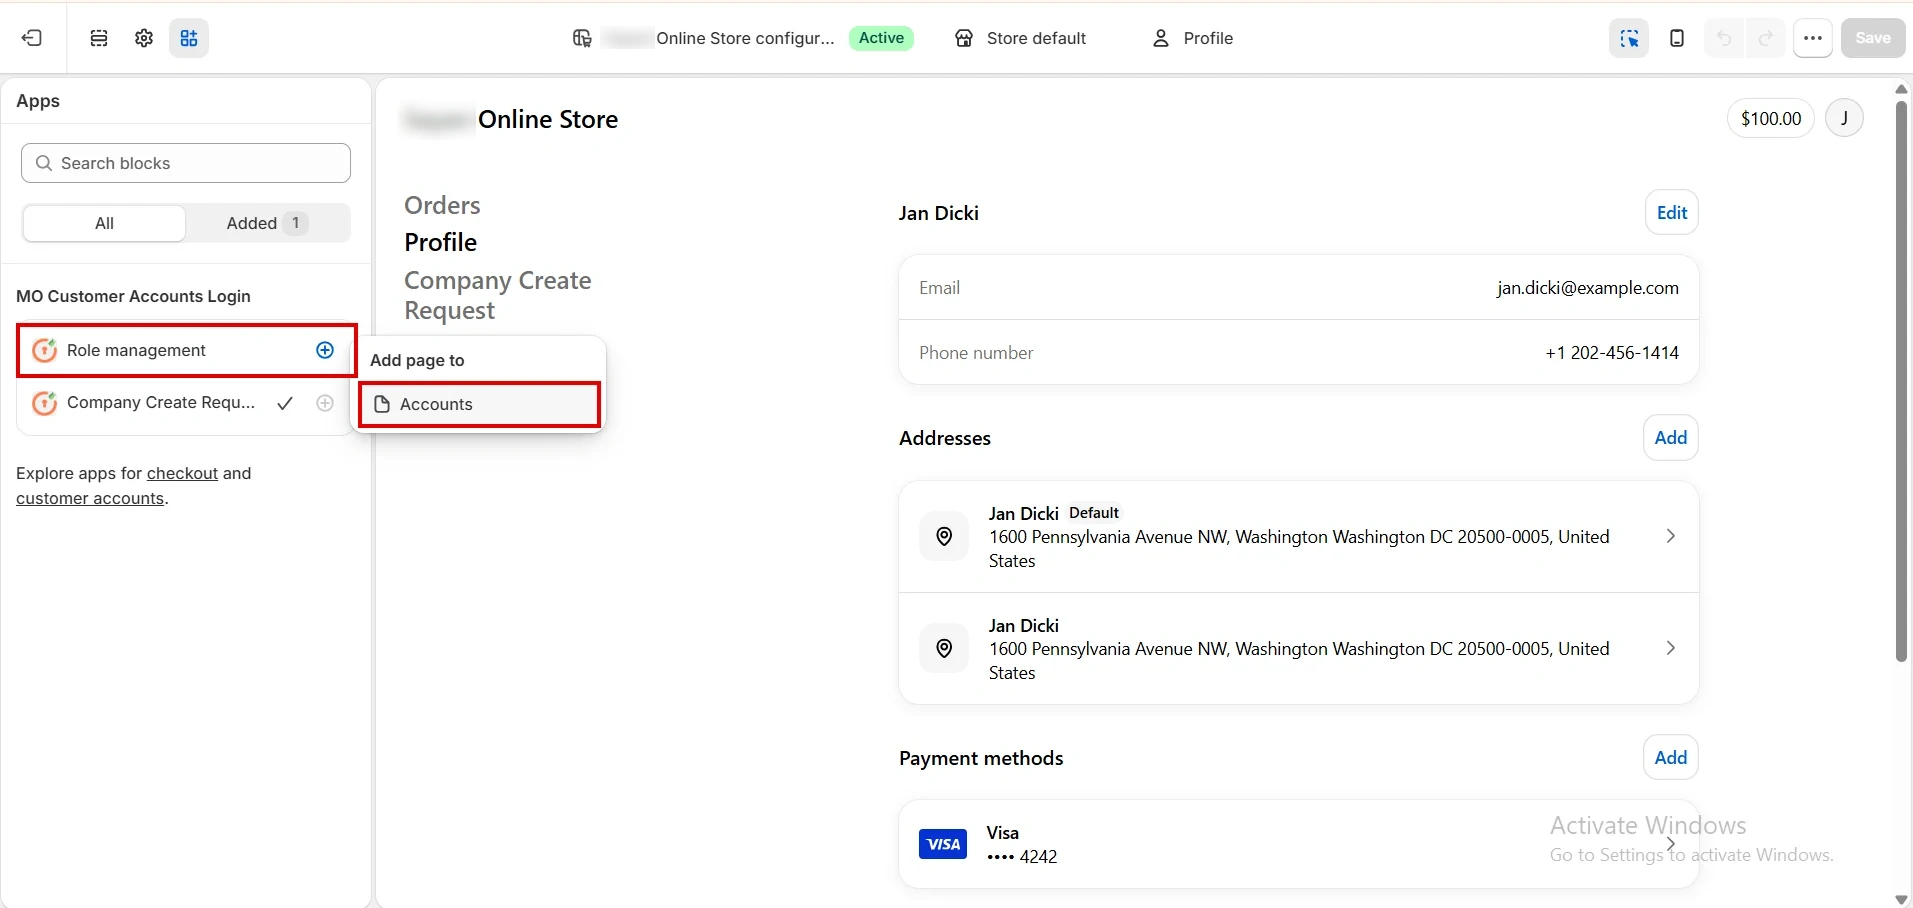
Click the plus (+) icon next to Role management and select Accounts.
-
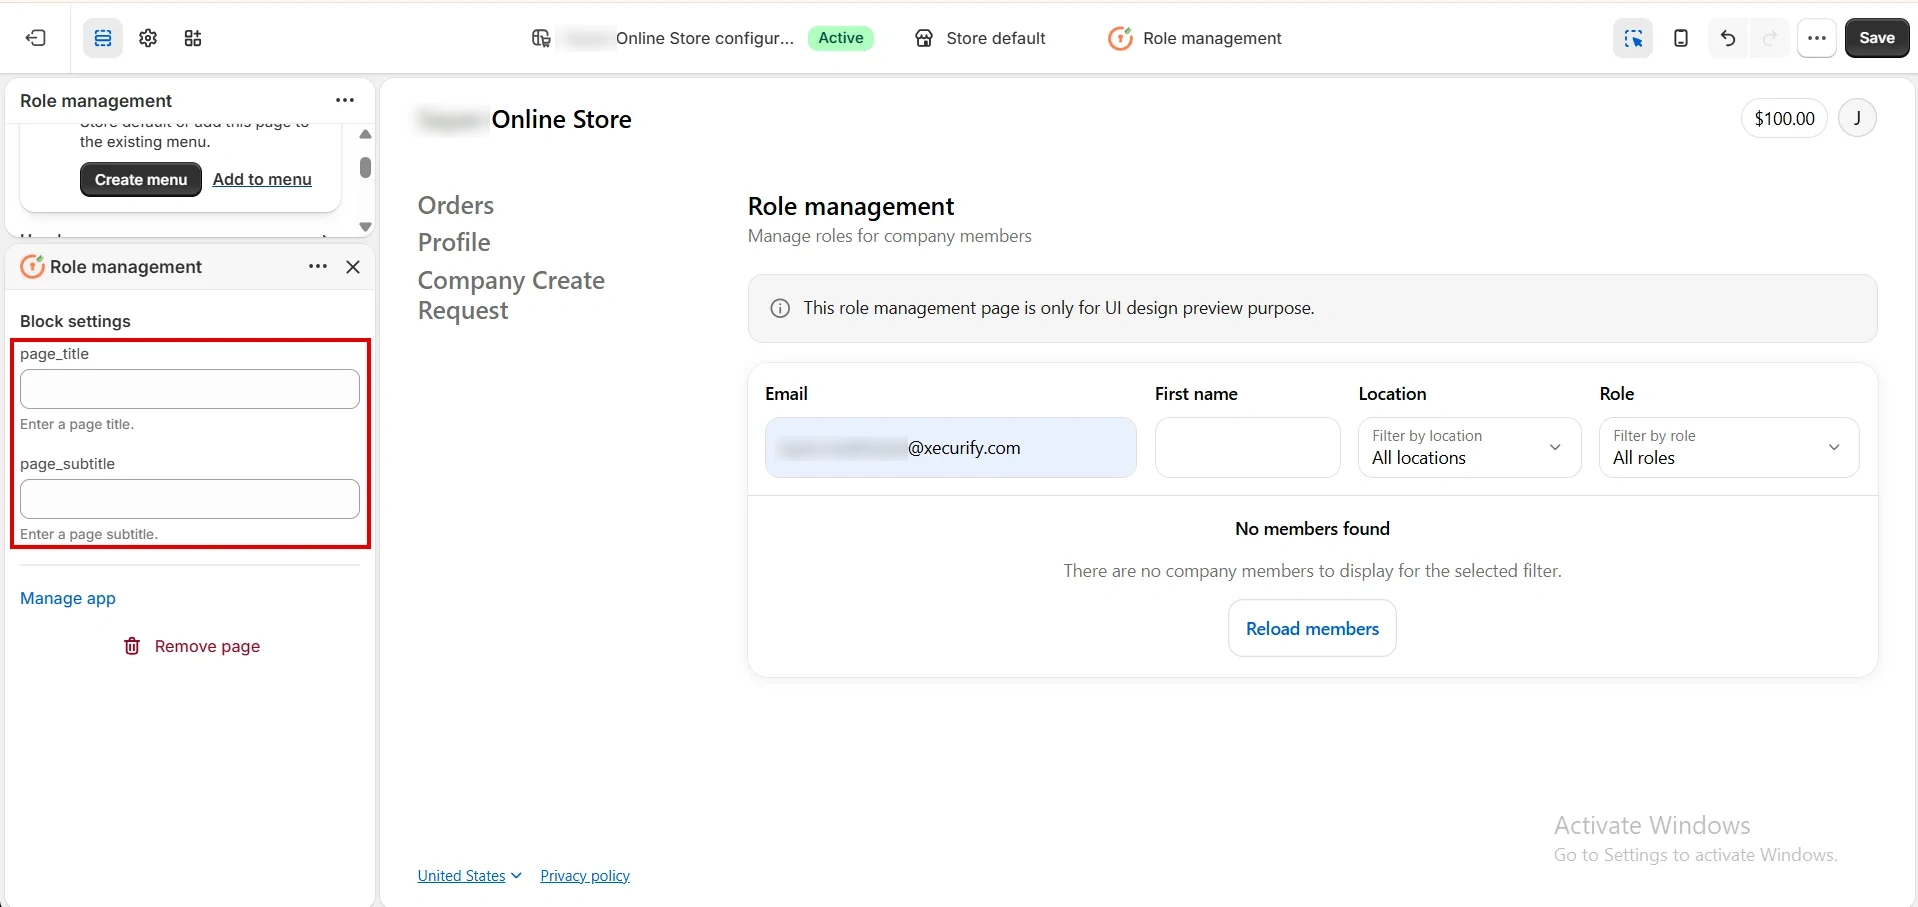
Optionally enter a page_title and page_subtitle under Block settings.
-
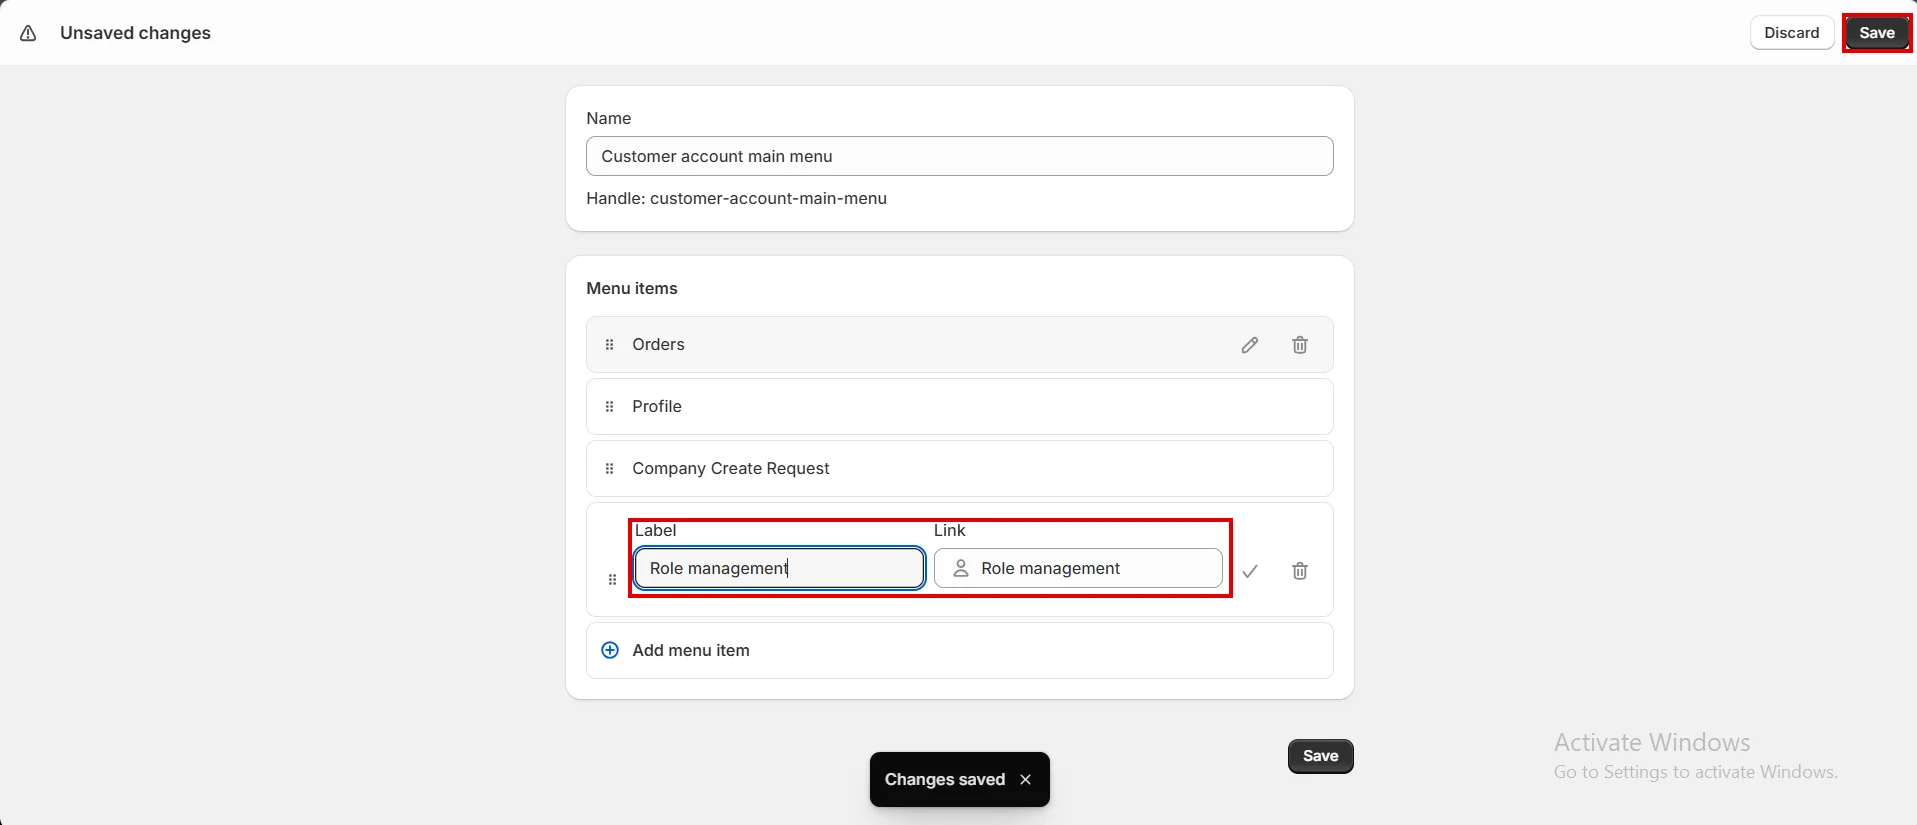
To show the page in the customer account navigation, click Add to menu. When the Save changes dialog appears, click Save.
-
Enter a label, say Role management and Link as per your setup, and click Save. A confirmation message “Changes saved” appears.
-
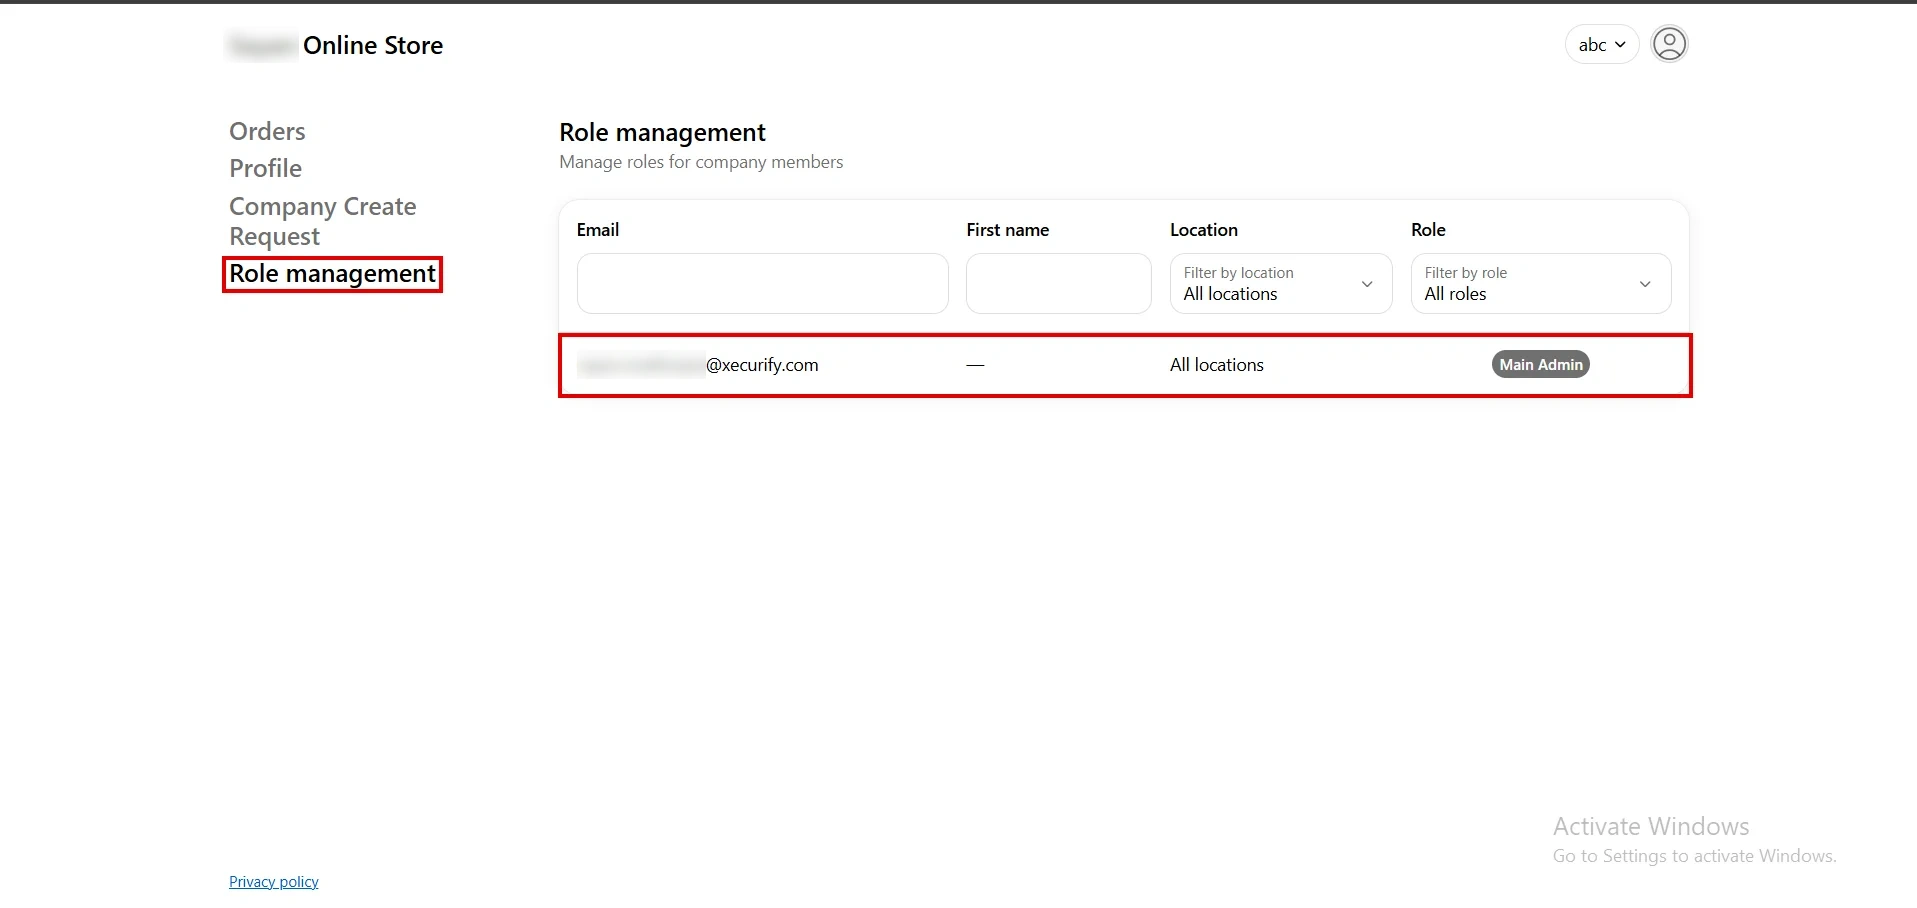
Log in to your storefront as the company’s main contact and open Role management from the account menu. The main contact is listed with the Main Admin role.
Add Members to the Company
-
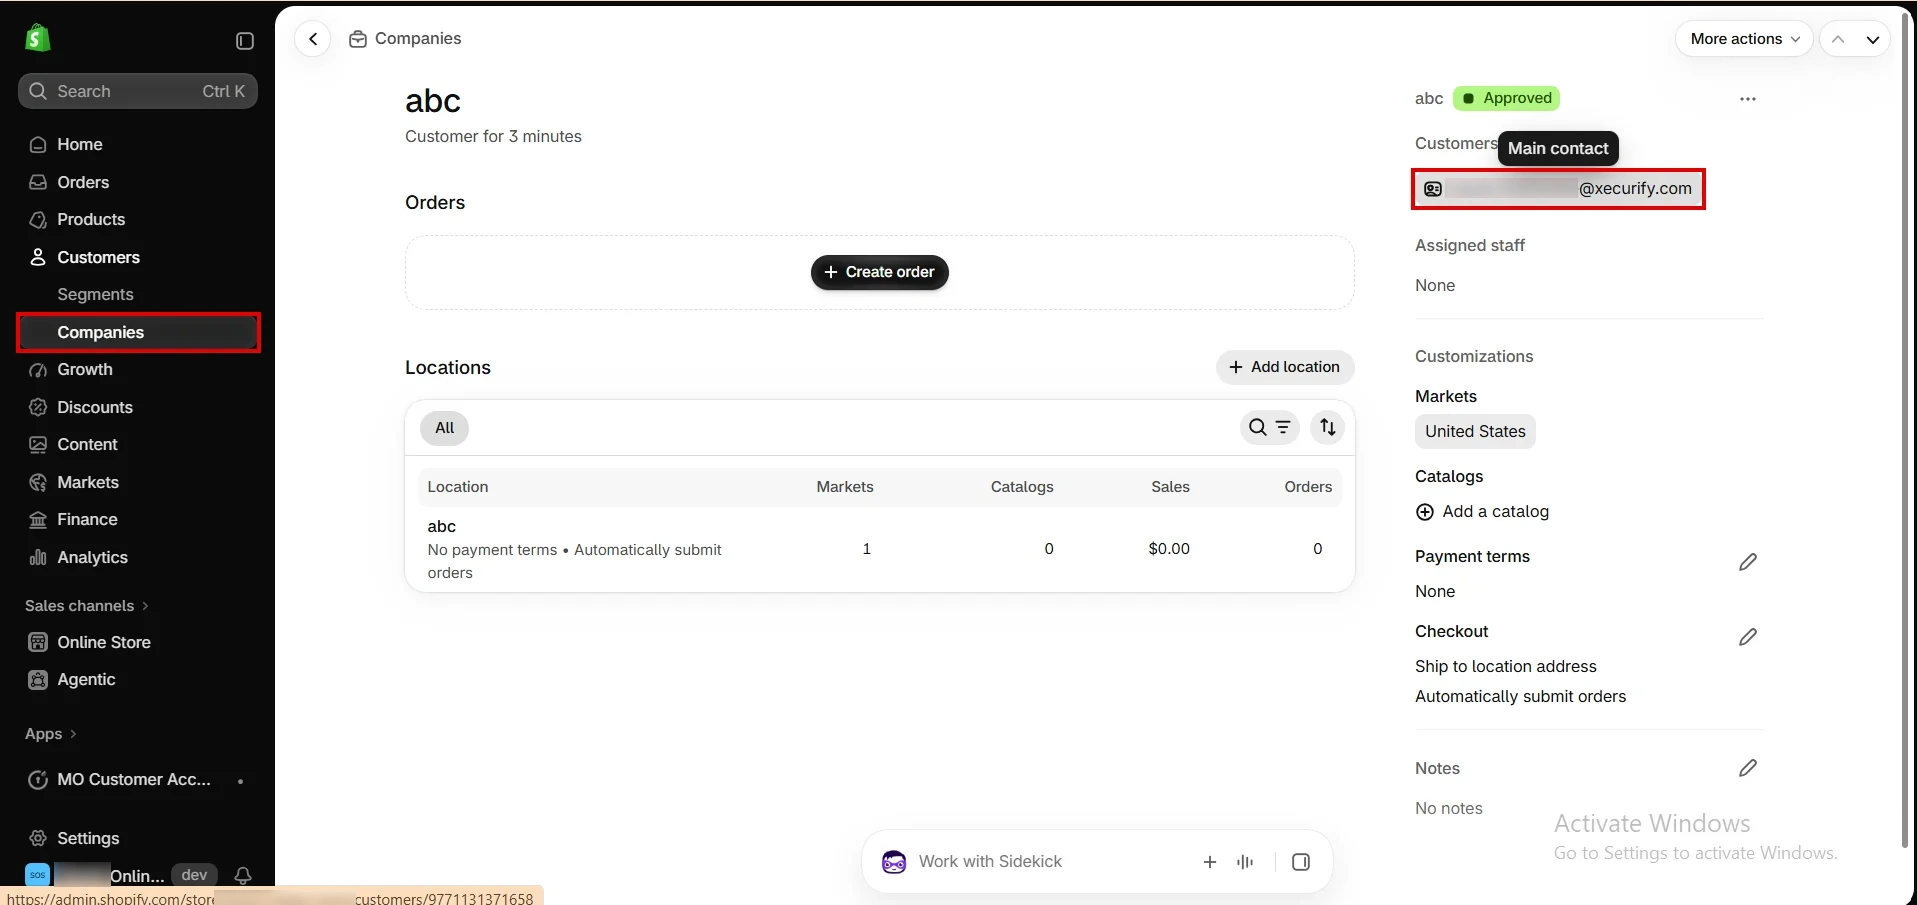
Go to Shopify Admin → Customers → Companies and open the company. The main contact is listed under Customers.
-
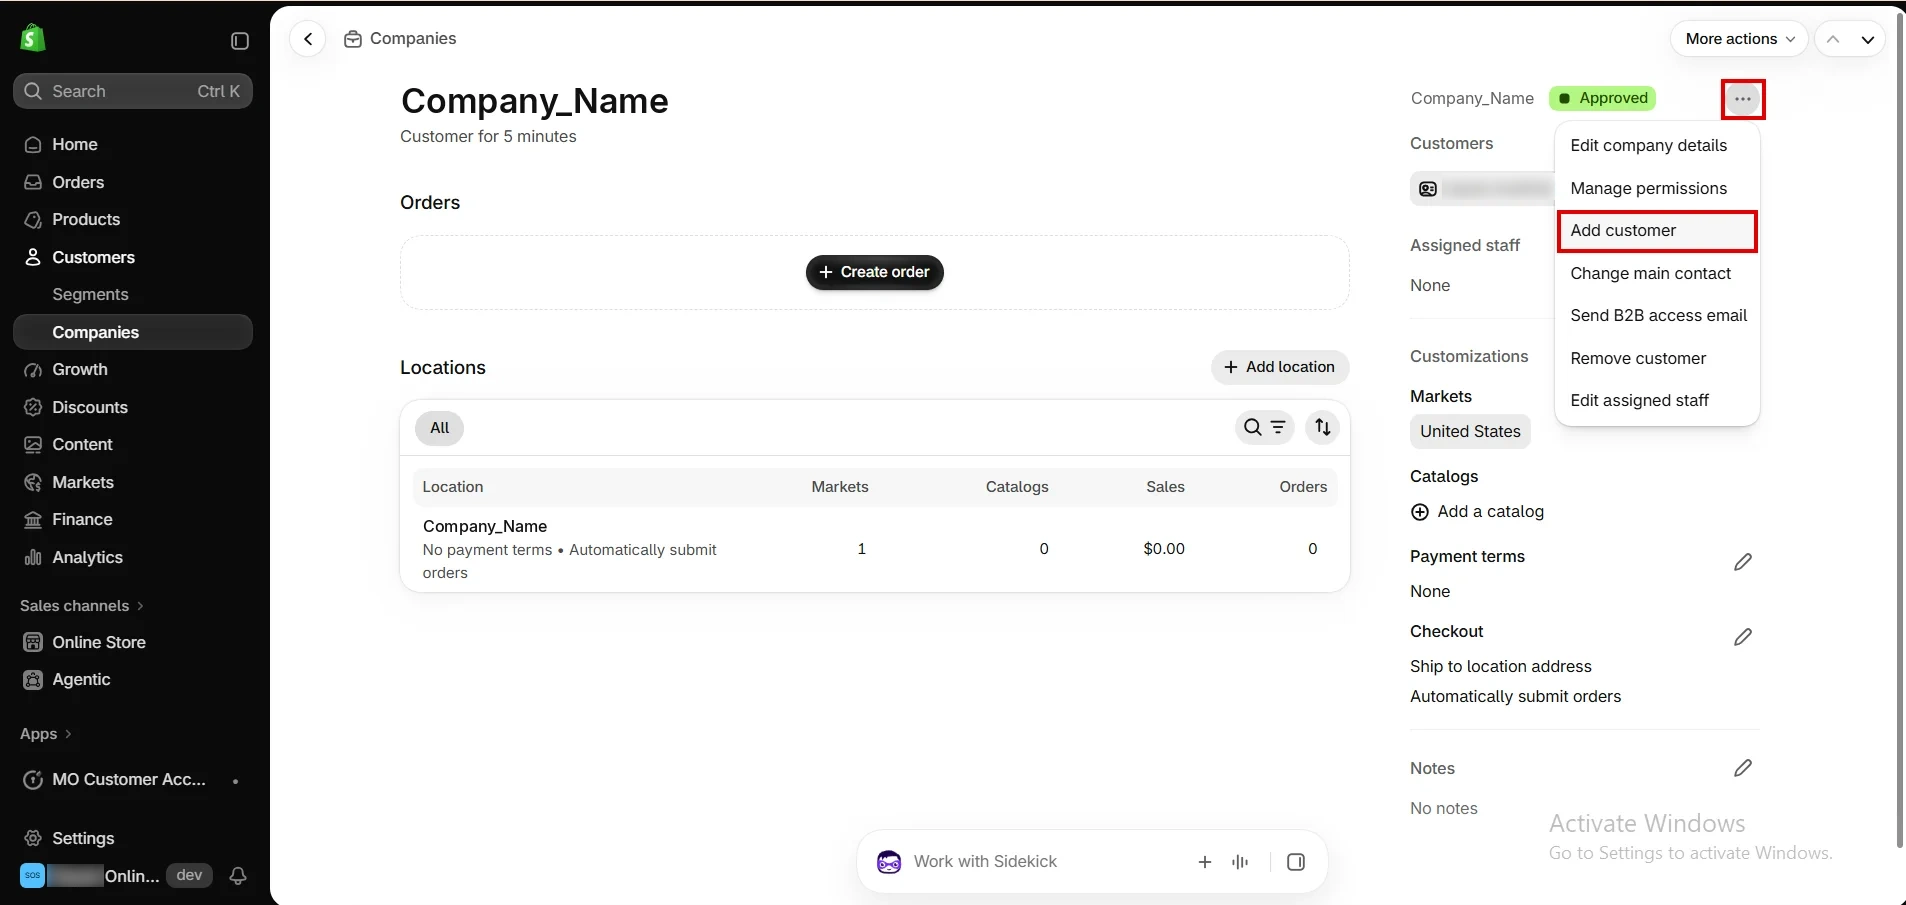
Go back to the company page, click the more actions (⋯) icon, and select Add customer.
-
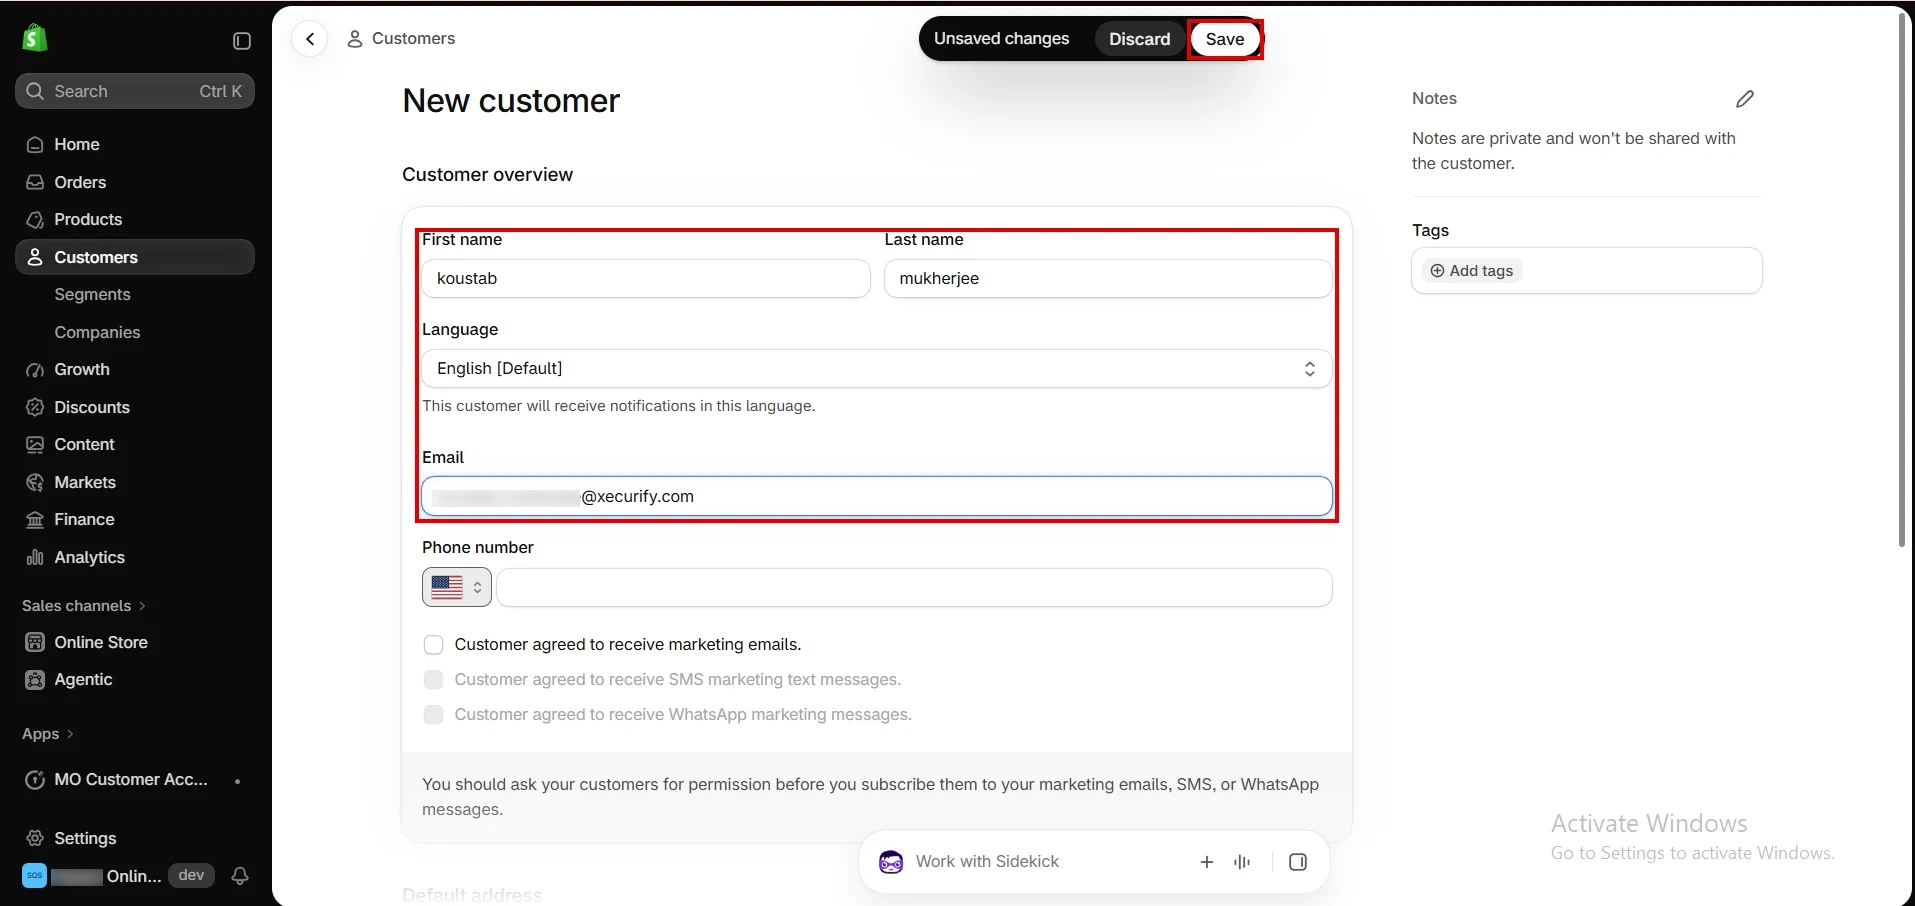
Enter the customer’s First name, Last name, and Email, then click Save.
-
Search for the customer you want to add, select them, and click Next.
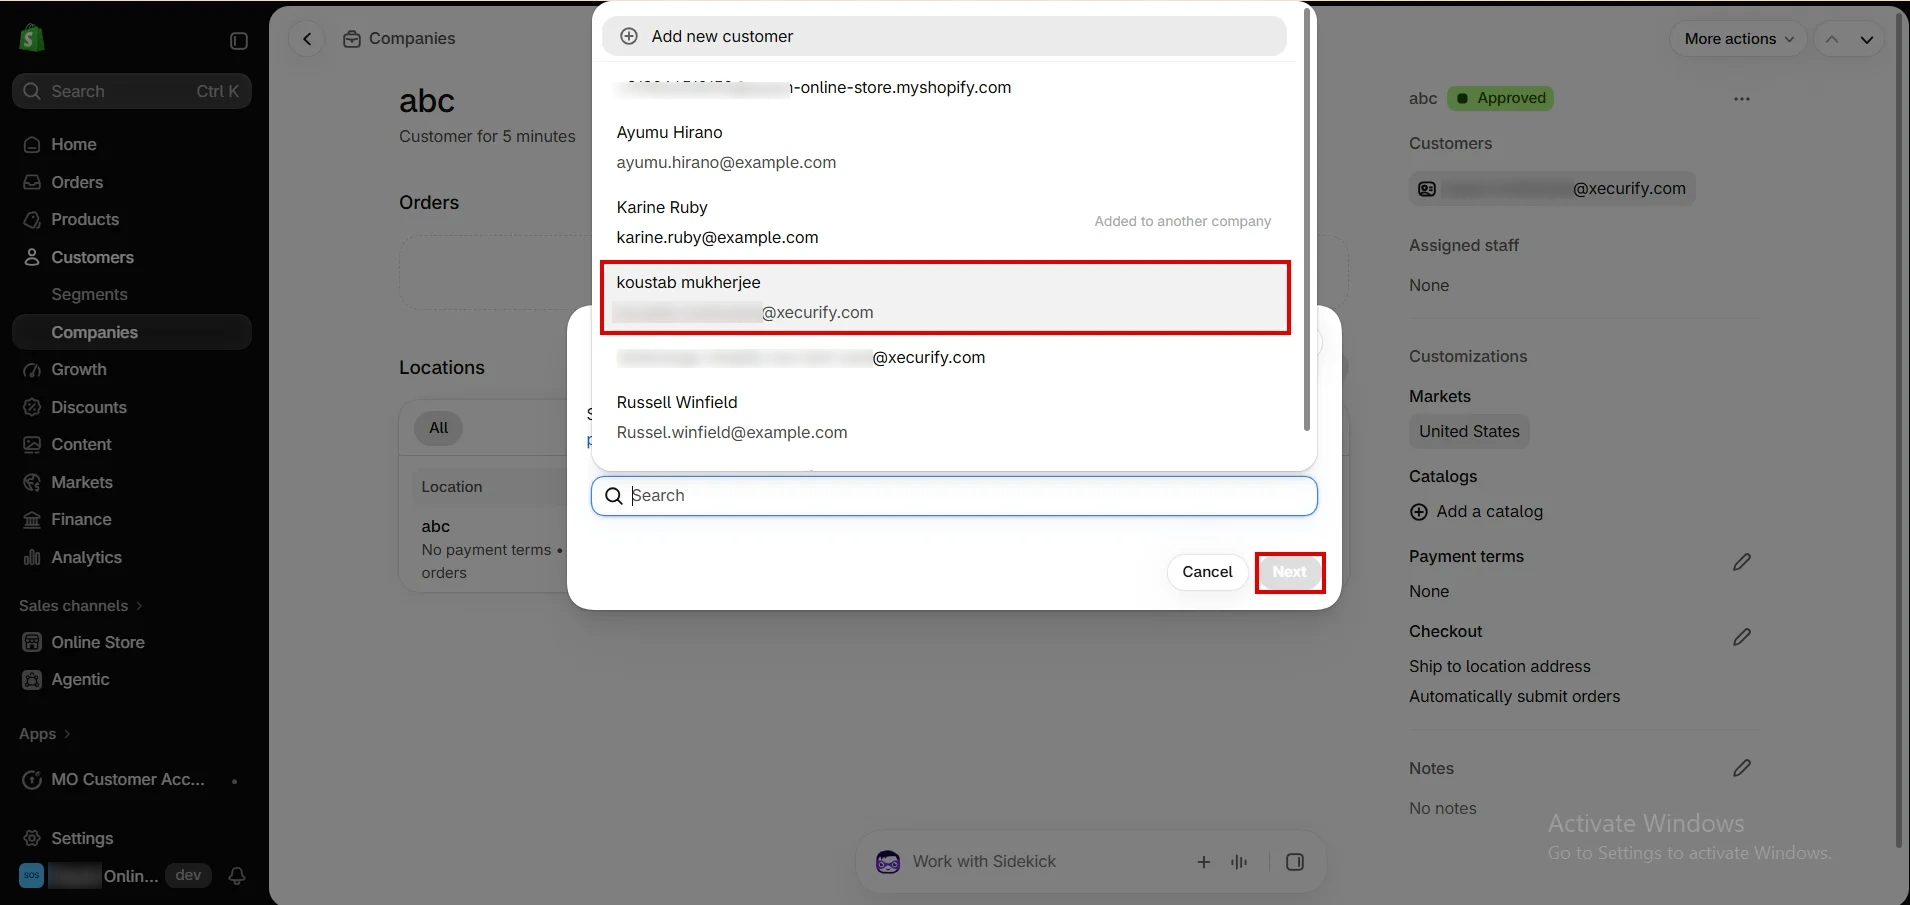
Note: Customers marked Added to another company already belong to a different company and can’t be selected.
-
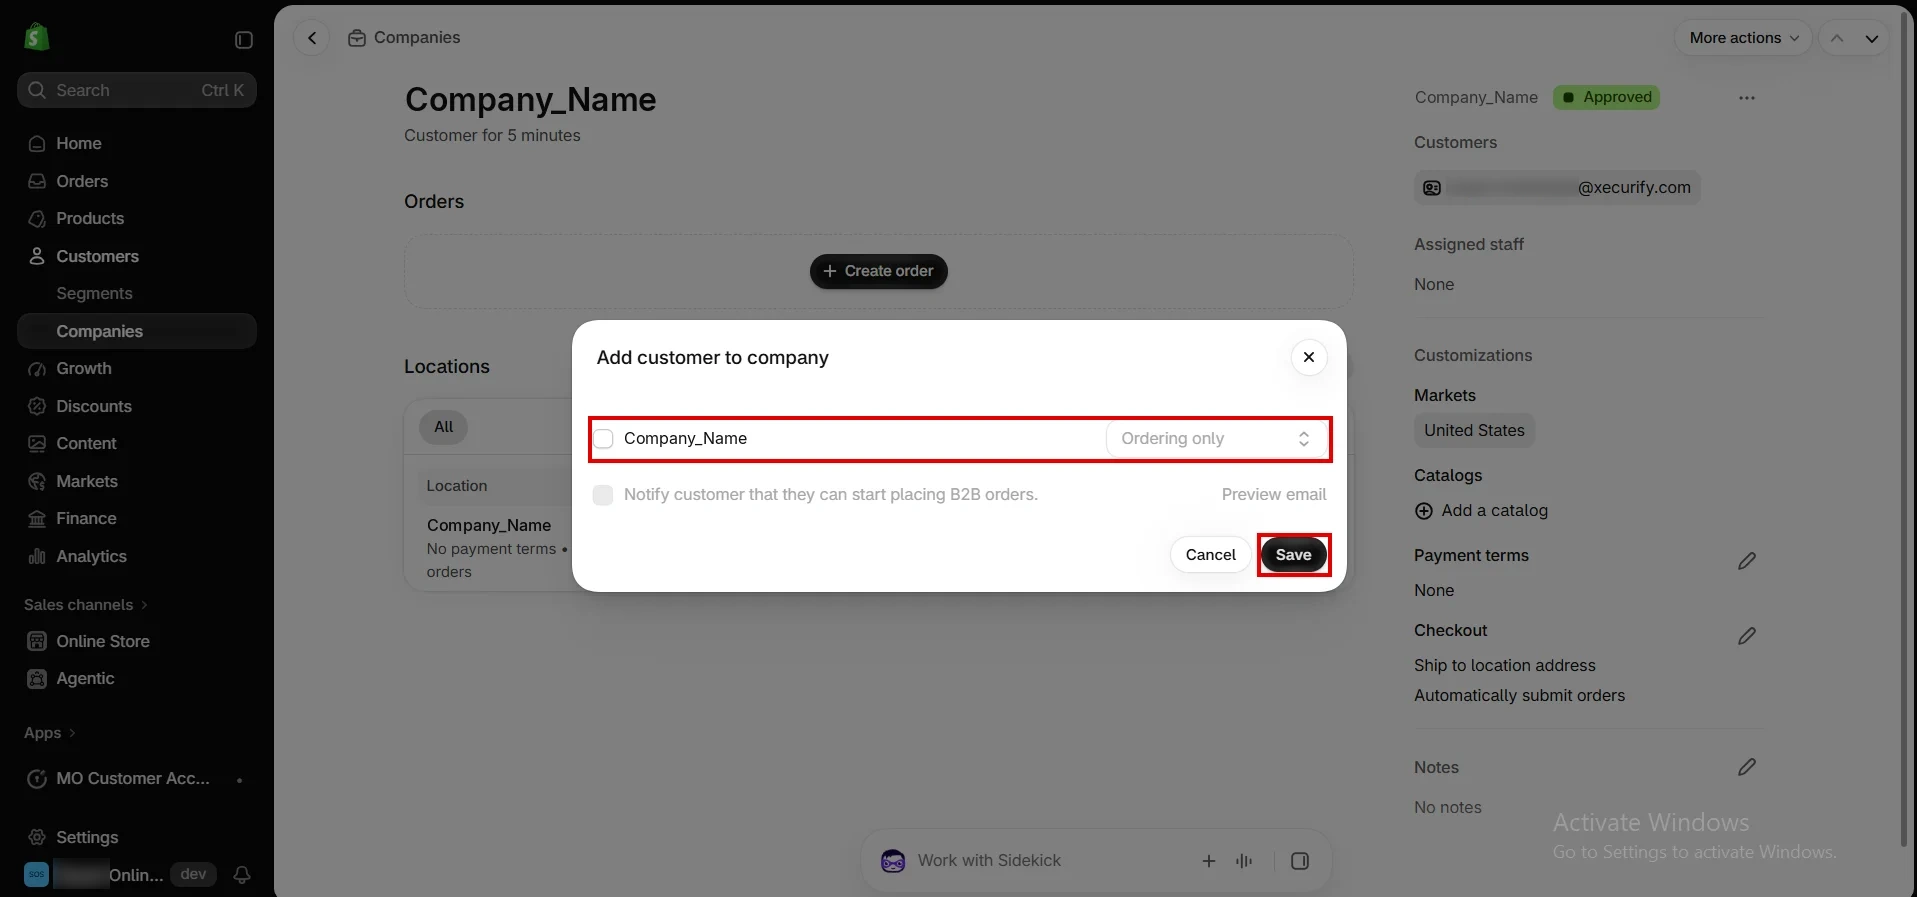
In the Add customer to company dialog, select the company location, set its permission (for example, Ordering only), and click Save.
Assign a Role to a Company Member
-
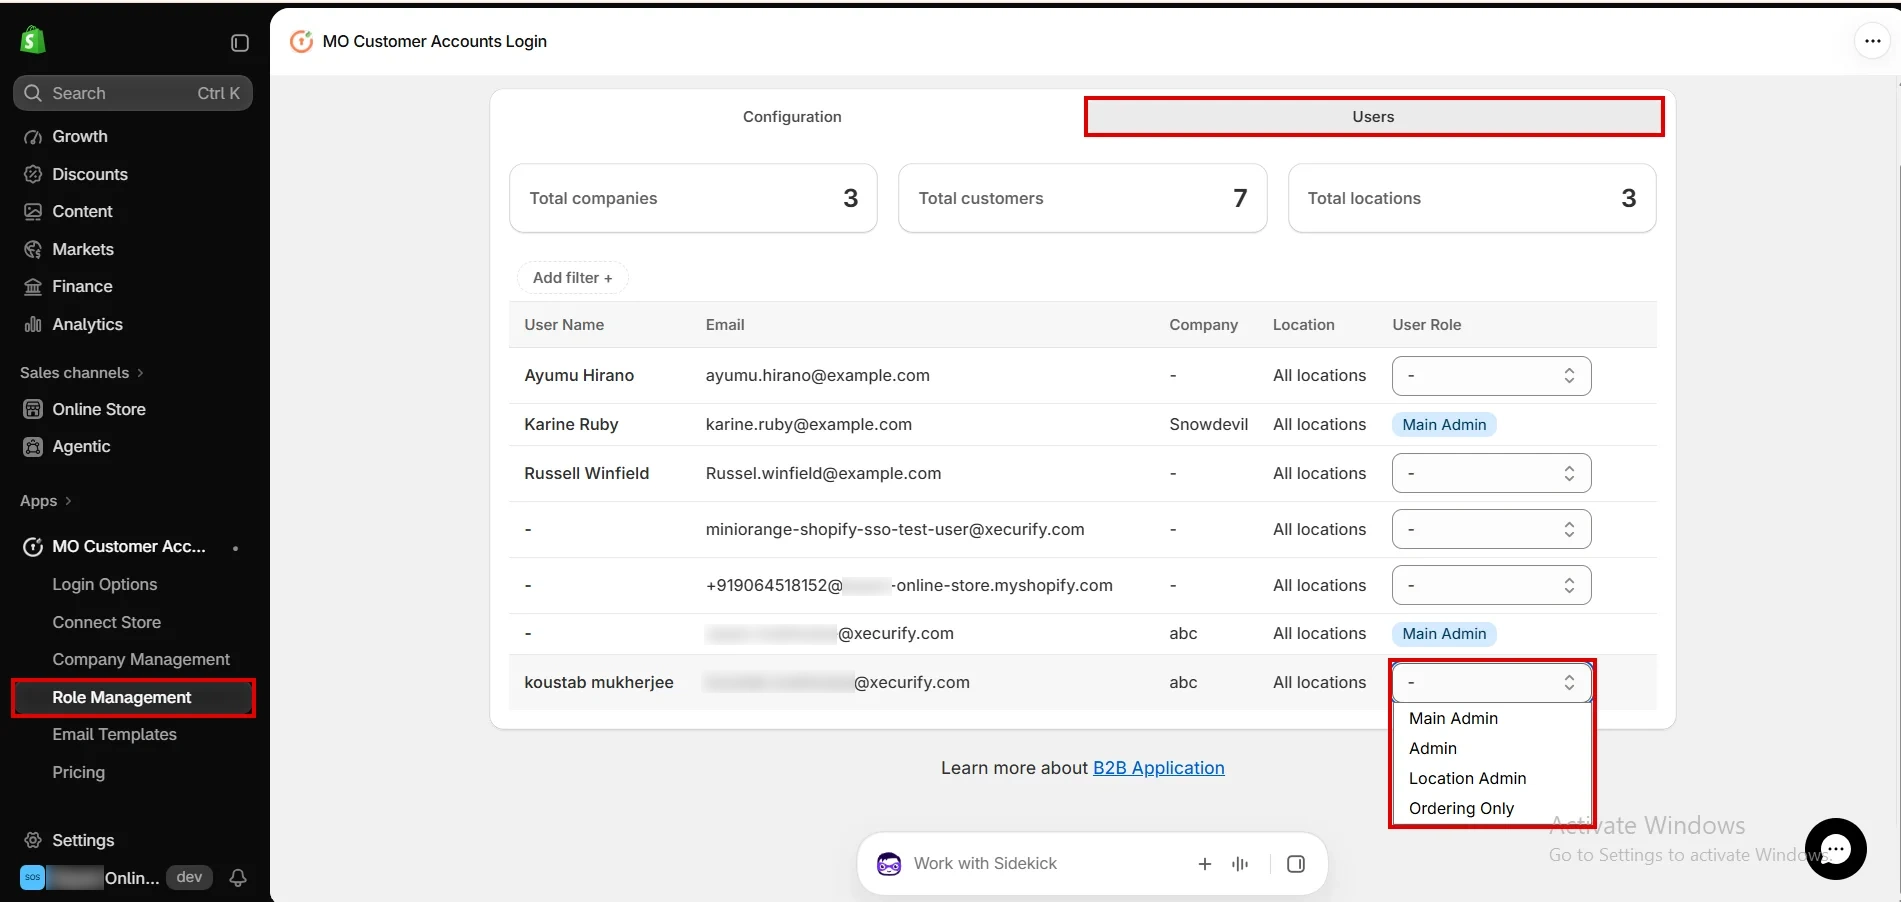
Click Role Management in the app navigation, and select the Users tab.
-
Find the member and choose a role from the User Role dropdown: Main Admin, Admin, Location Admin, or Ordering Only.
-
The member now appears on the storefront Role management page with the assigned role. Company admins can filter members by Email, First name, Location, or Role.