How to Configure Attribute Mapping?
Basic Attribute Mapping
Applies to : Standard or Higher version
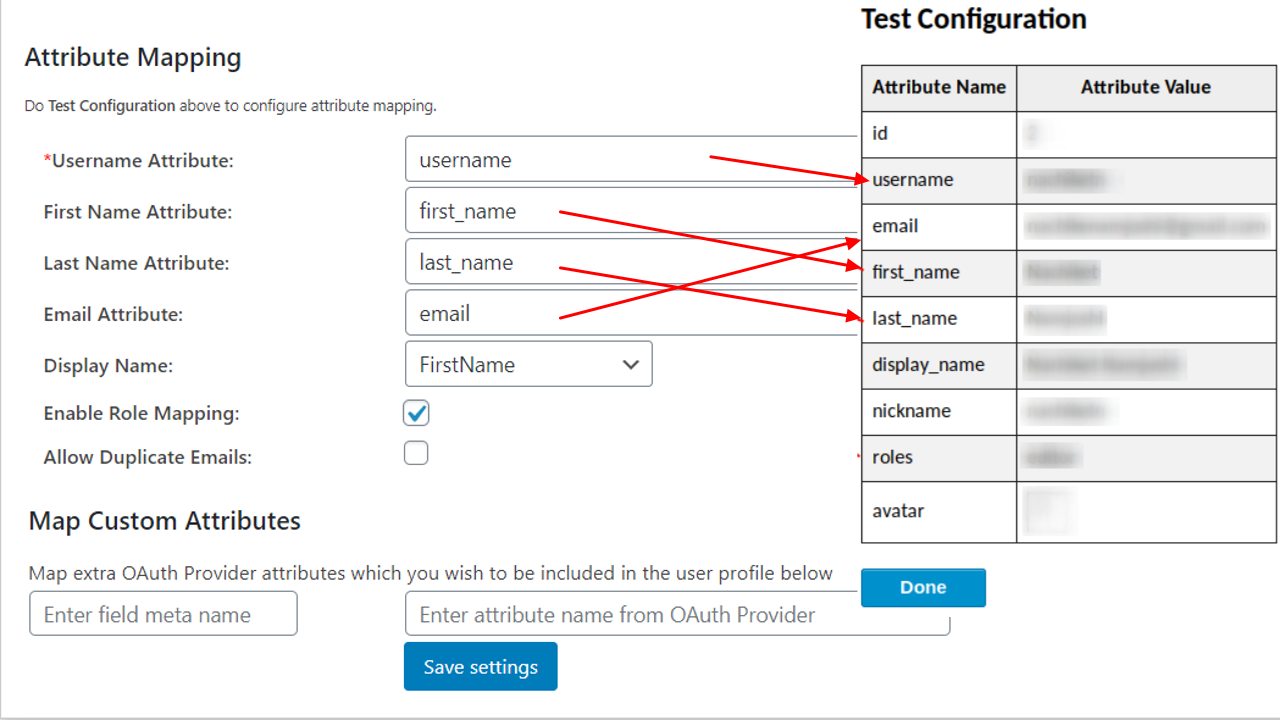
- After successfully configuring your OAuth/OpenID application, click on “Test Configuration” Button.
- You will be shown a table containing the user attributes. You can use the values in the column of “Attribute Name” to map the attributes.
- Everytime users perform sso into your WordPress site, then their Wordpress profile will be updated based on attributes received from the IDP.
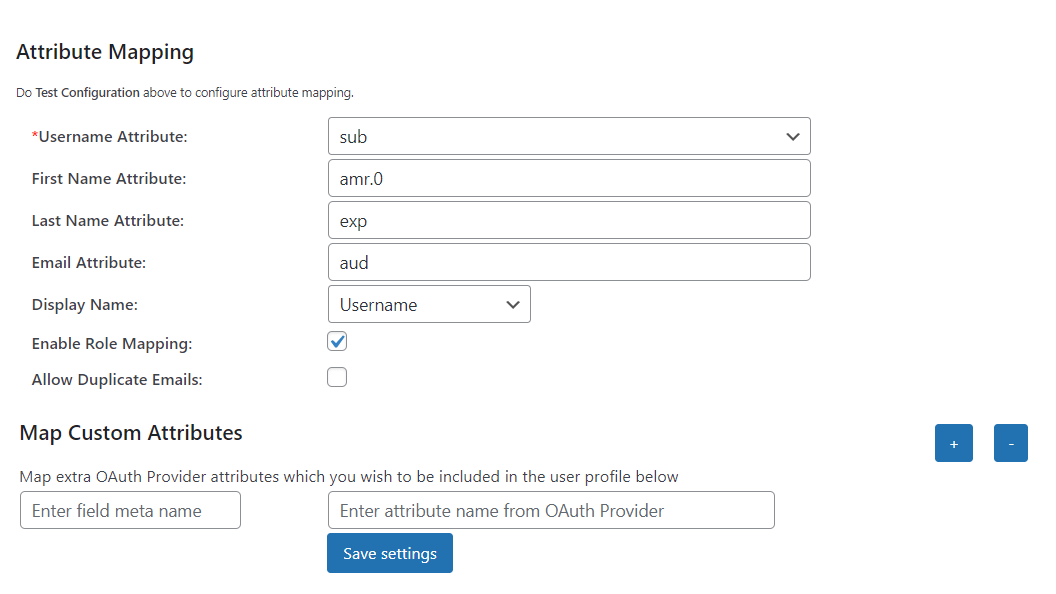
- You can map Username, FirstName, LastName, Email, Display name in this section. So that attributes received from your OAuth / OpenID provider will be mapped to the WordPress user profile. Simply add the appropriate values like shown below:
Custom Attribute Mapping
Applies to : Premium or Higher version
-
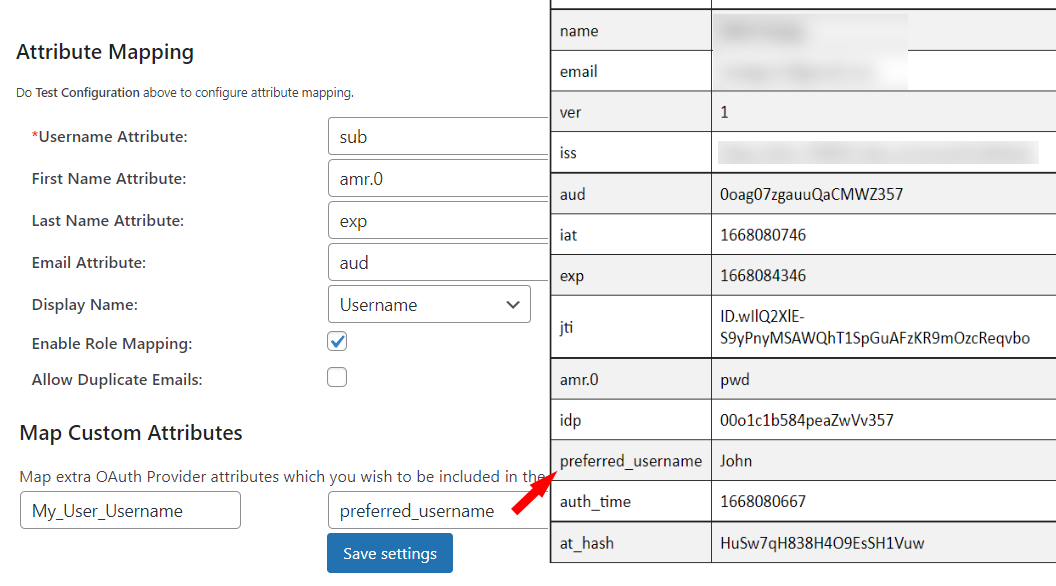
Custom attribute mapping allows you to map extra user profile attributes from an OAuth provider into your WordPress user profiles according to your needs.
-
To map the custom attributes go to the miniorange Oauth client single sign-on (sso) plugin and click on Configure OAuth —> Attribute Mapping section.
-
Using the Map Custom Attributes option, enter the field meta name you want and the attribute name from the OAuth provider and click on the Save Settings button. (Refer to the image below)
-
Eg: the My_User_Username field will map to the WordPress user profile attribute since I have added the field meta name My_User_Username from Oauth Provider's test configuration table.
