Upload
The Upload feature in our Embed SharePoint OneDrive Documents plugin for WordPress allows site visitors to upload files directly to a designated SharePoint folder through an embedded view on your WordPress site. This feature is particularly useful for collecting files such as documents, images, or other media from users while keeping them within a familiar context of your WordPress site.
Why?
This feature provides a seamless and secure way to gather files from your WordPress site visitors without giving them direct access to your SharePoint site. By embedding the Upload functionality within your WordPress pages or posts, you maintain control over file organization and permissions while offering a user-friendly interface.
Solution
Our Embed SharePoint OneDrive Documents plugin for WordPress includes the Enable Upload feature, which allows users to upload files directly to a SharePoint folder through an embedded view. This ensures that uploads are handled securely, and users only have the necessary permissions.
License Requirement
To use the Upload feature, you need to have the Premium/Enterprise version of the Embed SharePoint OneDrive Documents plugin for WordPress installed and activated on your WordPress site.
How to Enable Upload Feature?
Follow the below steps to Enable Upload Feature:
-
Navigate to the desired folder location where you want your users to be able to upload files. Once navigated there, click on the three dots in front of that particular folder, and then click on Manage Access as highlighted below.

-
You can limit users from uploading files in the following ways:
-
Enable Upload for Anonymous Users:
Check the checkboxes for Anonymous Access as highlighted below, then click on Save Permissions.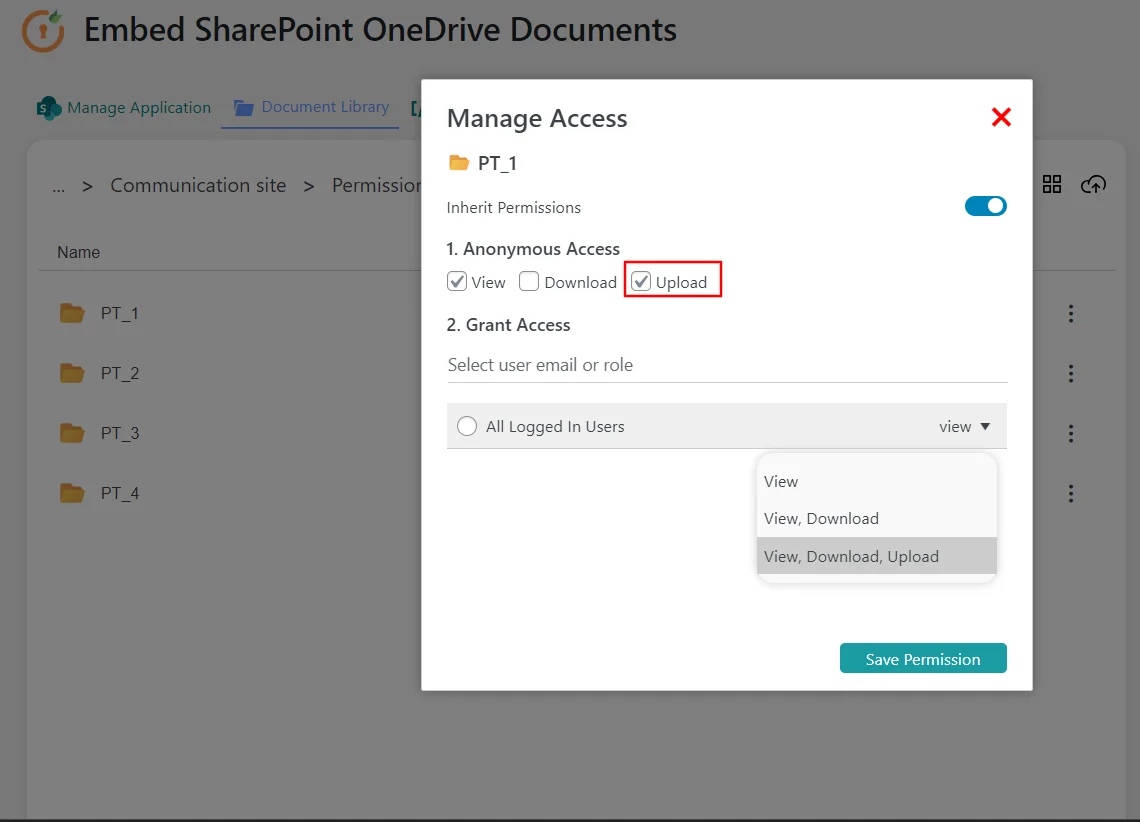
-
Enable upload for logged-in users:
Click on the dropdown and select the option View, Download, Upload as highlighted in the below image. Then, click on Save Permissions.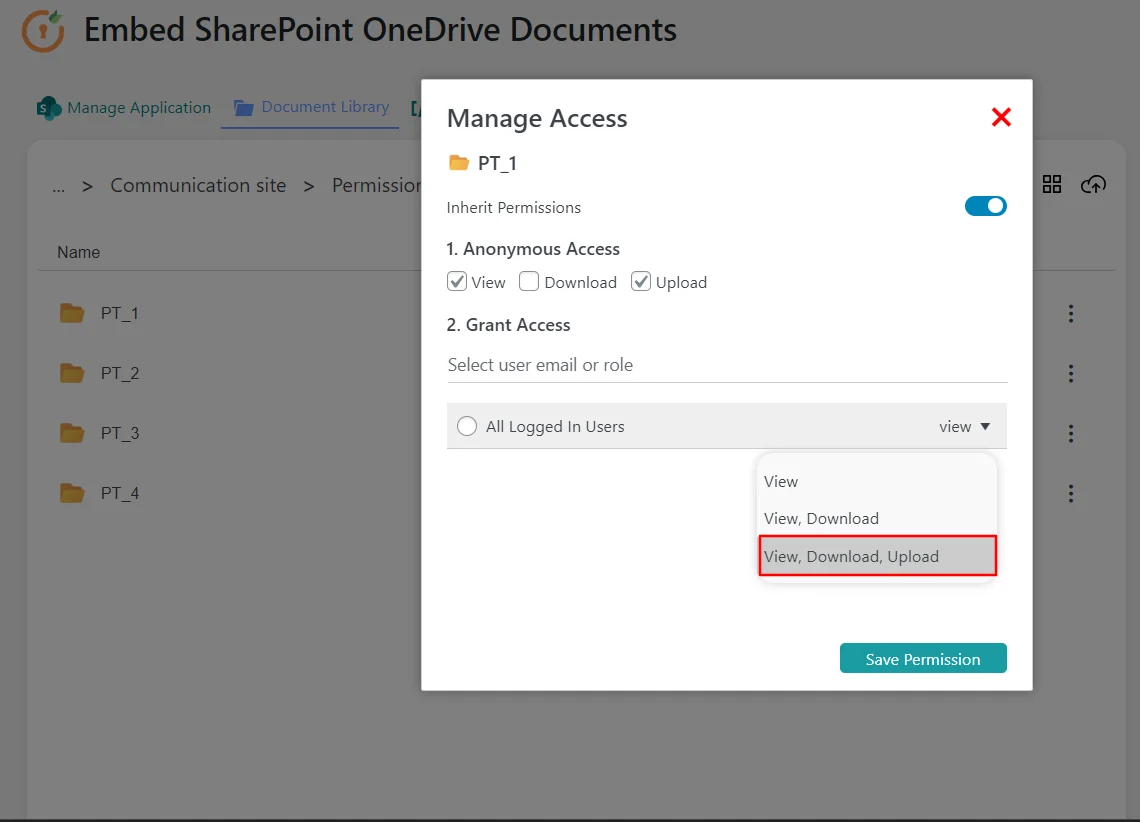
-
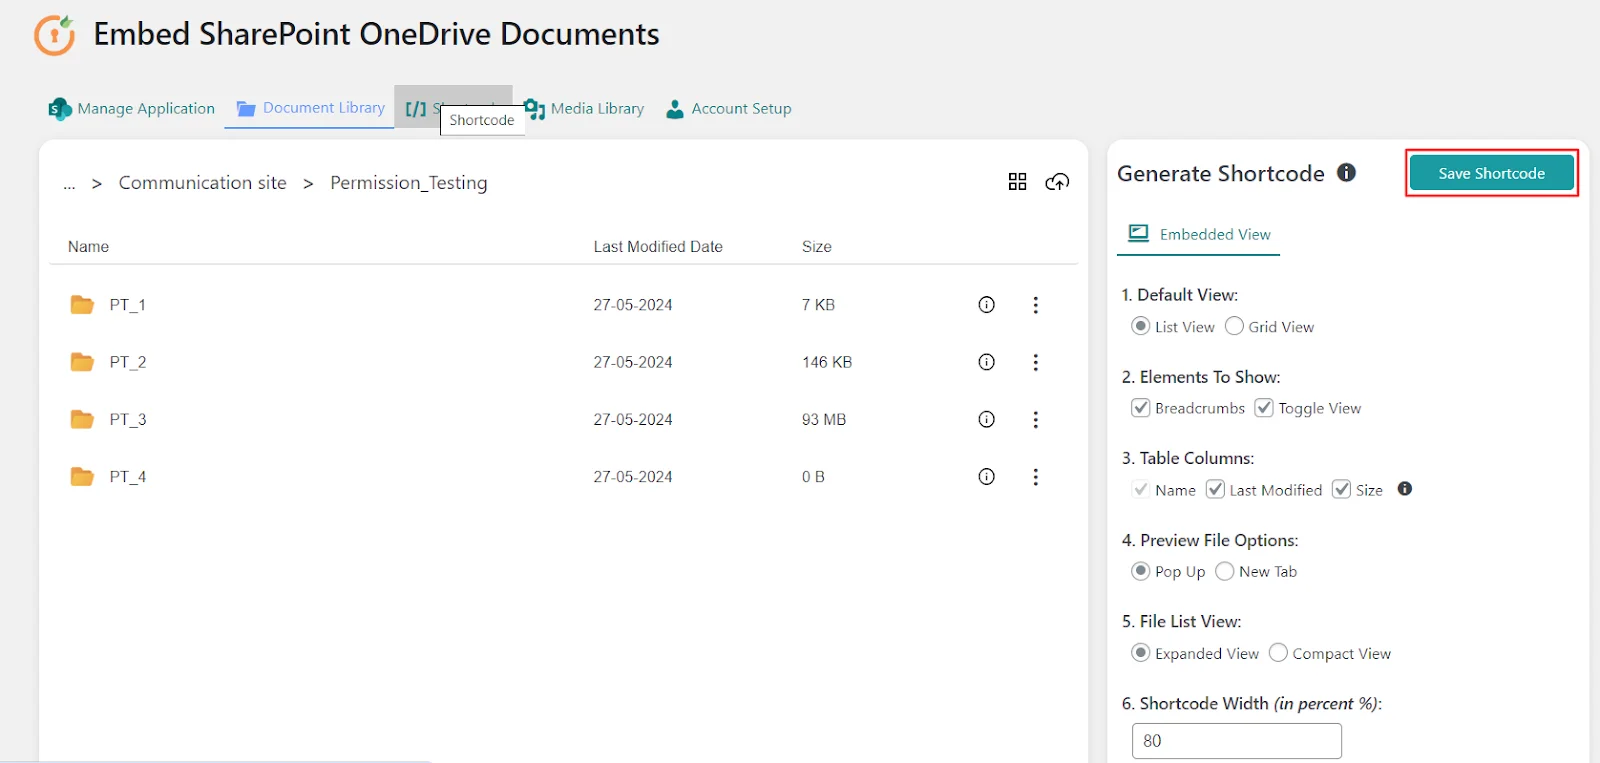
Click on Save Shortcode button.
-
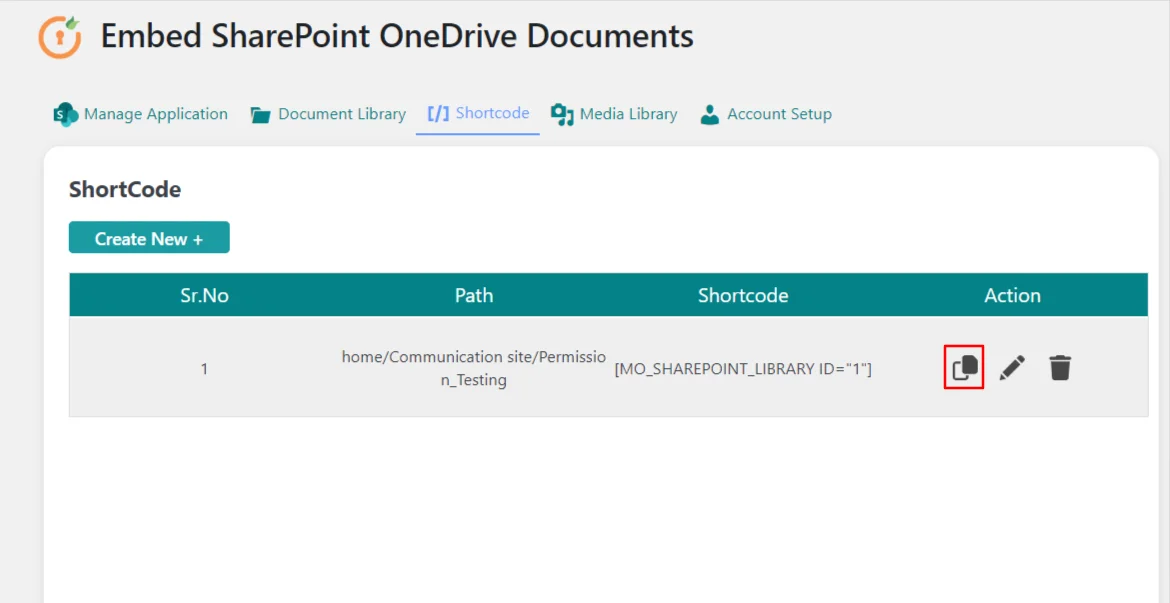
Copy the shortcode form the Shortcode tab and paste it in your page.
-
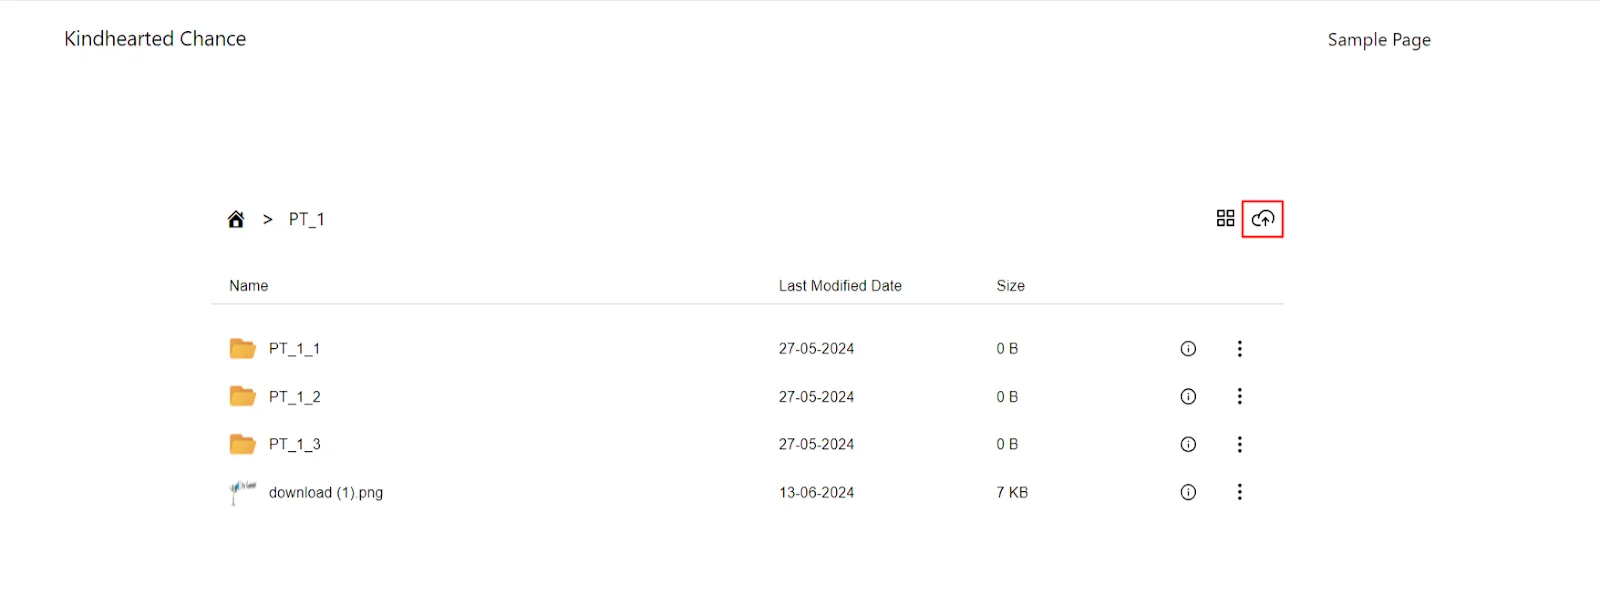
On the page where you have embedded the shortcode, navigate inside the folder where you have enabled the upload option. You will then see the upload icon on the right side of the page, as highlighted.
-
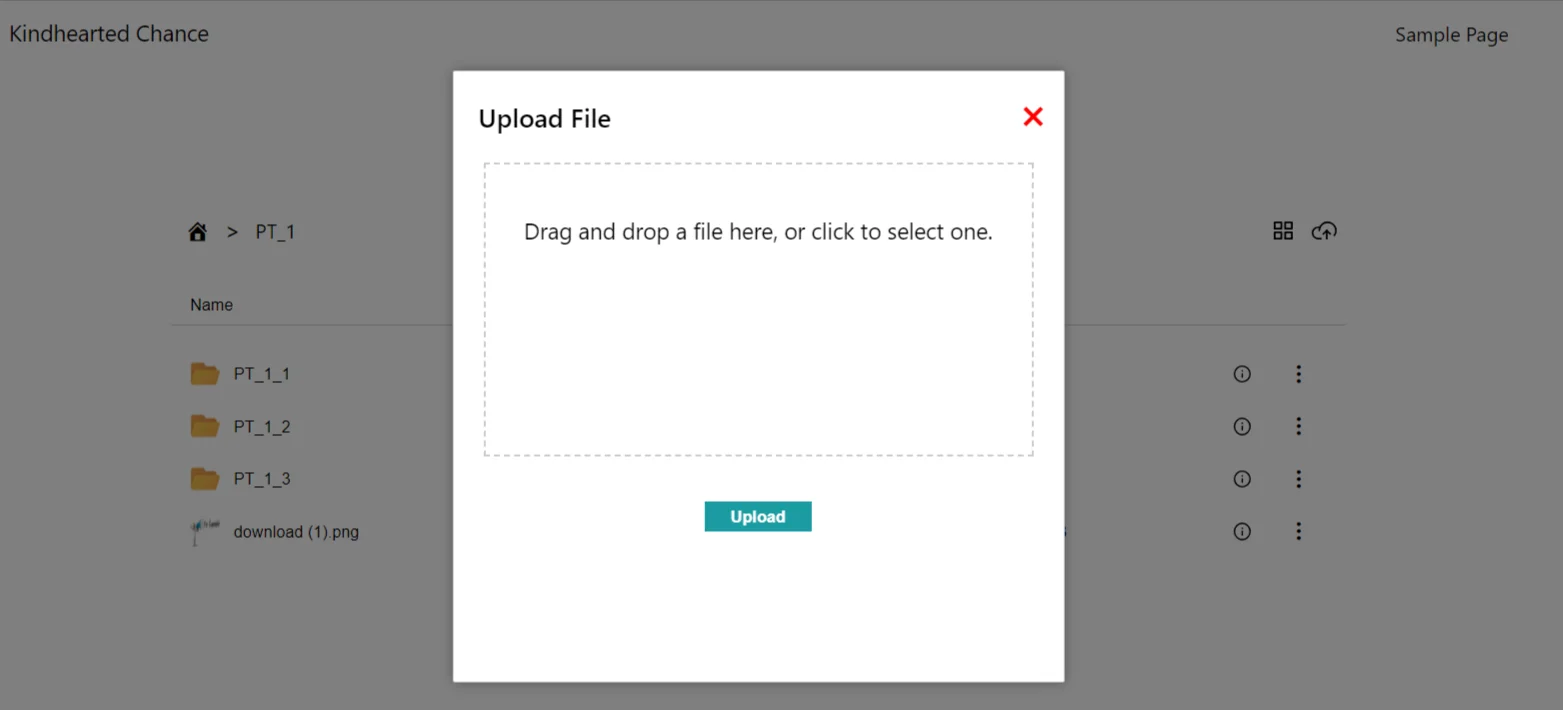
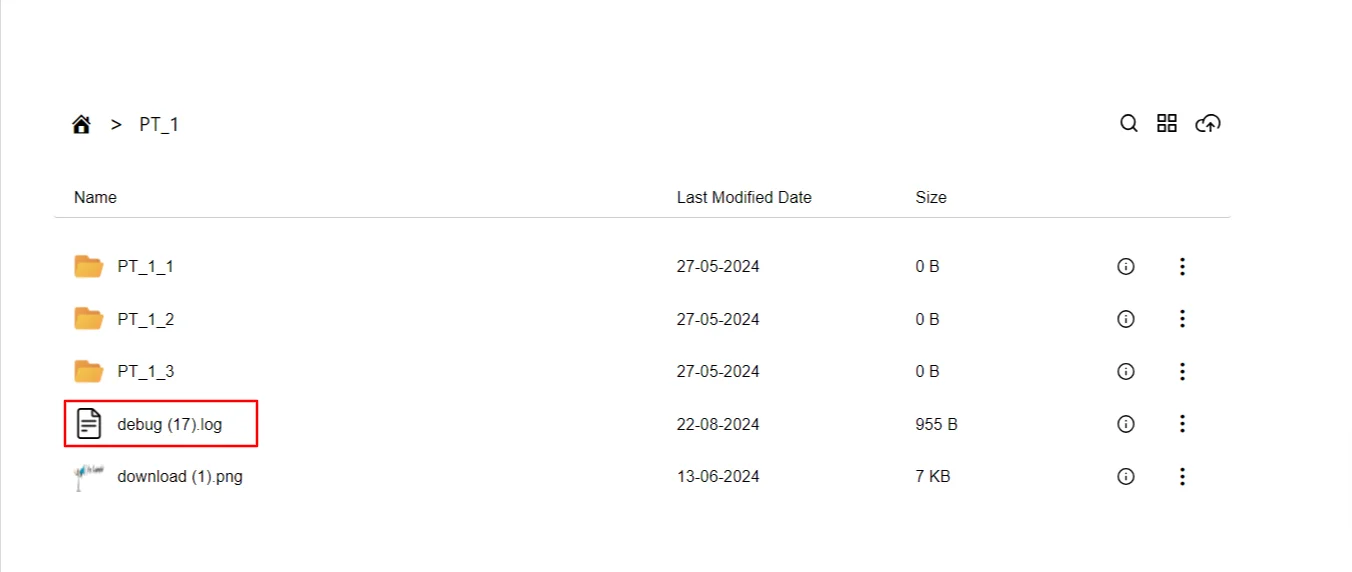
Click on the middle square, then select the file to be uploaded. After that, click on Upload, and you will see the uploaded file in the folder.
If you have any questions, feel free to contact us at office365support@xecurify.com.