Service Provider Metadata
To configure the Service Provider (SP) as an application on the Identity Provider (IdP), some details about the Service Provider are needed. You can find all these details in the Service Provider Metadata tab of the plugin.
What is SAML Metadata ?
-
Metadata provides information about other data that helps to understand, manage, and utilize the primary data more effectively.
-
SAML metadata is a set of data that is used to configure and manage the SAML authentication and authorization. It is an XML document that contains information about the entities like entity ID, certificate and Service Provider endpoint, etc. involved in the SAML protocol.
-
SAML Metadata facilitates secure and seamless exchange of configuration details between the Identity Provider (IdP) and Service Provider (SP), enhancing compatibility and correct SAML authentication setup.
In the Service Provider Metadata tab of the plugin, Service Provider Metadata is available in three formats.
Note - Any format of the metadata can be uploaded to configure the application created at Identity Provider side.

Metadata URL
-
A Metadata URL is a web address that provides the application’s SAML Metadata information that can be used to configure the application in the IdP as a SP in one go. It simplifies IdP and SP configuration. Provide metadata URL to your Identity Provider in the following format.
SAML SP Metadata URL format:
https://<site-url>/?option=mosaml_metadata
Metadata XML
Metadata XML file contains all the information about the SP in an XML format. If the IDP supports importing the metadata from a file, then you can configure the application on your IdP in seconds by just uploading this metadata file. You can download the plugin XML metadata and upload it on your Identity Provider.
You can download the plugin XML metadata and upload it on your Identity Provider.

Metadata Endpoints (for manual configuration)
You have the option of configuring your IdP manually using the SP URLs displayed in the Service Provider Metadata tab. You will need to copy and paste the required URLs from the table into your IDP SAML Configuration to add the application as a SAML SP.
1. SP-EntityID / Issuer
- In the Single Sign-On system SP-EntityID also known as Issuer, used to uniquely identify your Service Provider. It identifies the Service Provider for which the SAML assertions or responses are assigned.
2. ACS (AssertionConsumerService) URL
-
This URL is often referred to as the Service Provider (SP) sign-in URL. After successful authentication, users will be redirected to ACS (AssertionConsumerService) URL.
Note - Some IdPs also refer to ACS URL as Recipient URL or Destination URL.
3. Audience URI
- Audience URI is the same as the SP-EntityID, that refers to the identifier assigned to the Service Provider for which the SAML assertions or responses are assigned.
4. Single Logout URL
-
If your IdP supports it, this URL can be used to configure Single Logout. This feature allows the user to be logged out from both IdP and SP if the user logs out from either the Identity Provider or the Service Provider.
There are two types of SLO requests:
-
SP Initiated Logout
In this case the logout request is sent from the Service Provider to the Identity Provider. The IdP processes the request and logs the user out of all applications in the current identity provider login session and sends a logout response to the associated Service Provider. -
Initiated Logout
In this case, the logout request is sent from IdP to SP, when a user clicks the Logout button/link on IdP page, the IdP sends a logout request to all associated SPs. The Service provider processes the request and logs the user out of all the applications in the current Identity provider login session and sends a logout confirmation response to the IdP.
-
5. NameID format
- The NameID format is the unique ID to use for the given user who is logging in. IdPs are free to use whatever value the user chooses. It should be unique like email, username or something else.
6. Default Relay State (Optional)
- After successful authentication, the end user gets redirected to default URL i.e. Default Relay State.
7. Certificate
- In SAML SSO, Certificates are used to encrypt the SAML assertions like SSO and SLO, ensuring secure and trusted communication between the Identity Provider and the Service Provider.
- This certificate is used by the IdPs to validate the requests and to encrypt the responses. Some IdPs mandate the SPs to send signed requests so that they can verify that the requests are coming from the expected SPs.
- So whenever an IdP receives a SAML request, they use this certificate to validate the sender of that signed request.
- This certificate is also used by IdPs to send the SAML response in the encrypted format so that only SP can decrypt it using the private key and no one else gets access to the sensitive user information sent in the response/assertion.
- You can configure and use your own certificates to increase the security from the [Certificates Tab]() of the add-on.
Service Provider Endpoints
Note : Changing the SP Base URL and SP-Entity ID might break the already configured SSO as both the values need to be exactly the same in the application in IdP as well.
In this section, you can update SP Base URL and SP EntityID / Issuer endpoints.
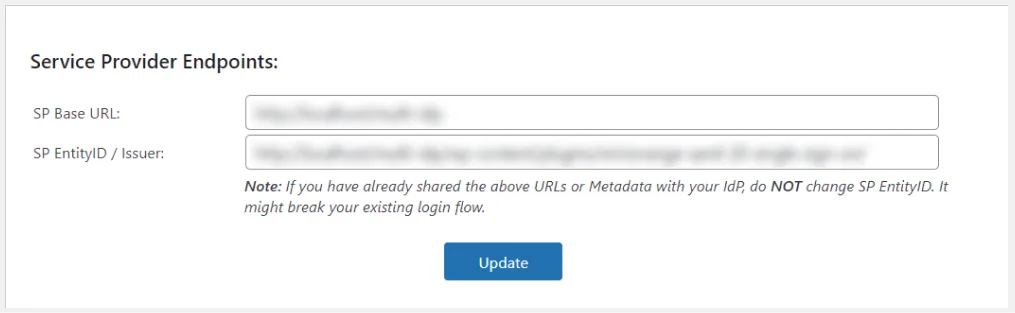
1. SP Base URL
- Set the SP Base URL to redirect the users after successful authentication.
2. SP Entity ID / Issuer
- Configure the SP Entity ID / Issuer to uniquely identify the Service Provider by IdP while SSO setup.
Modify Organization Details in the Metadata
This section enables you to customize the SAML SP Metadata by changing the organization, technical and support details.
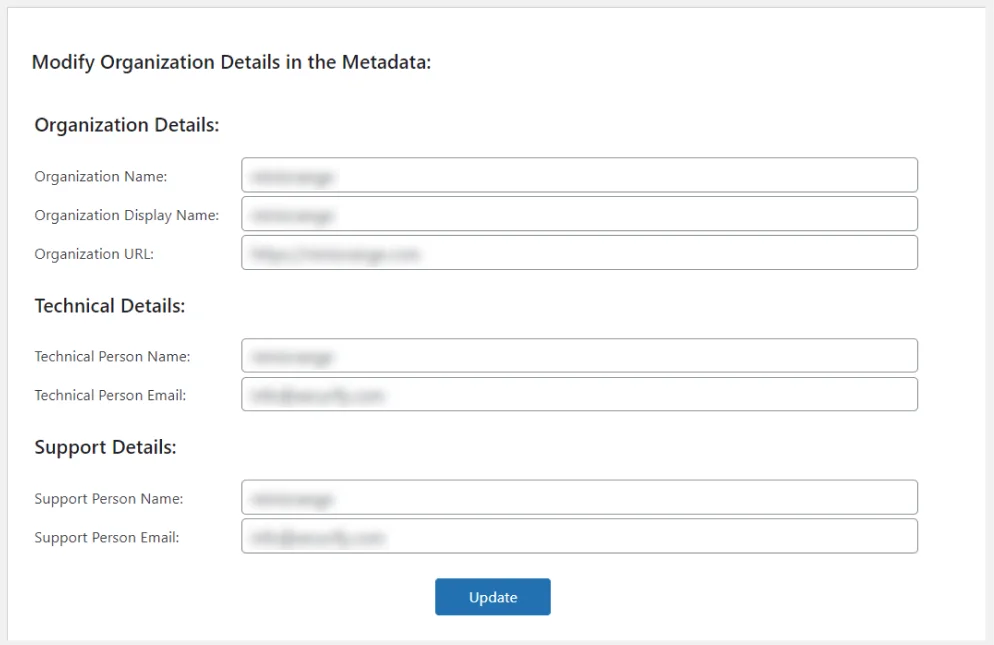
1. Organization Details
- Organization details can be updated by changing the Organization Name, Organization Display Name and Organization URL.
2. Technical Details
- You can provide technical person details of your choice in SAML SP Metadata by changing Technical Person Name and Technical Person Email fields.
3. Support Details
- Add support person details such as Support Person Name and Support Person Email of your choice to customize SAML SP Metadata.
For more information visit our SSO for WordPress page.