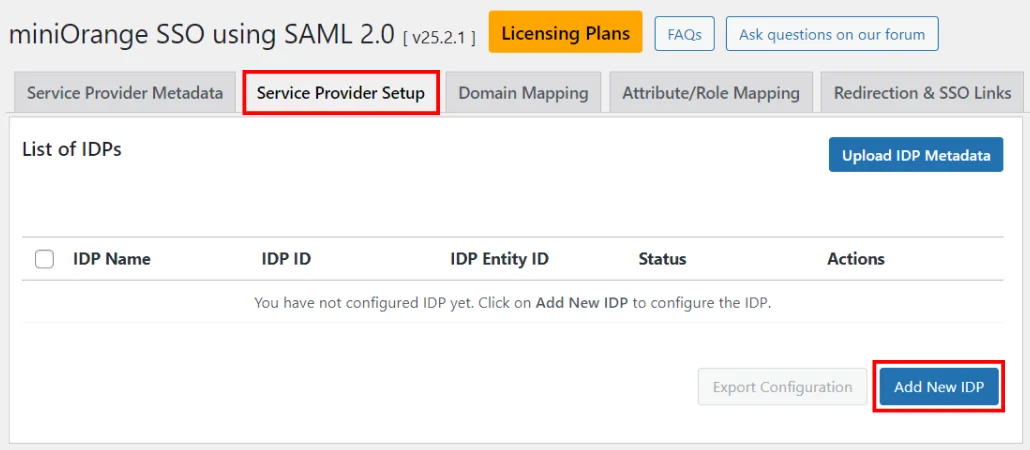
Service Provider Setup
The Service Provider Setup tab of the plugin allows you to configure your Identity Provider.
There are three ways to configure SAML SSO between your desired IDP and WordPress shown as below:
1. Manual Configuration
- Click on Add New IDP button.
- Add the required settings as provided by your Identity Provider and click on the Save button.
- Identity Provider Name
- IdP Entity ID or Issuer
- SAML Login URL ( The url where SAML request needs to be posted not the login URL )
- X.509 Certificate from the IDP
- Click on Test configuration to check the attributes and values sent by IdP.
Test Configuration
After you provide your IDP’s metadata URL, you SAVE it and go to Test Configuration. There a new window will open which will display either of the following configuration status :-
- Successful: User attributes will be displyed.
- Error message: Configuration error will be sent by IDP.
Sign SSO & SLO Requests
- When you are configuring your IDP, you will be given two options to send your SAML request in the Sign SSO & SLO Requests option.
- Enabling these settings adds another layer of security to your SSO process as the SSO and SLO requests will be digitally signed using the default signing and encryption certificate present in the plugin. You can also use your own custom certificate for this instead.
NOTE:
- This option is present in the Premium, Enterprise and All-Inclusive plans.
- You can select any of these options to send your SAML Request if your IDP supports the selected methods:
- HTTP-Post binding type
- HTTP-Redirect binding type
2. Upload IdP Metadata file
- Click on the Upload IDP Metadata button.
- Enter the Identity Provider Name.
- Upload the Metadata file and click on the Upload button.
3. Enter Metadata URL
- Click on the Upload IDP Metadata button.
- Enter the Identity Provider Name.
- Paste the Metadata URL and click on the Fetch Metadata button.
Service Provider Setup tab elements
Below are the elements within the Service Provider Setup tab:
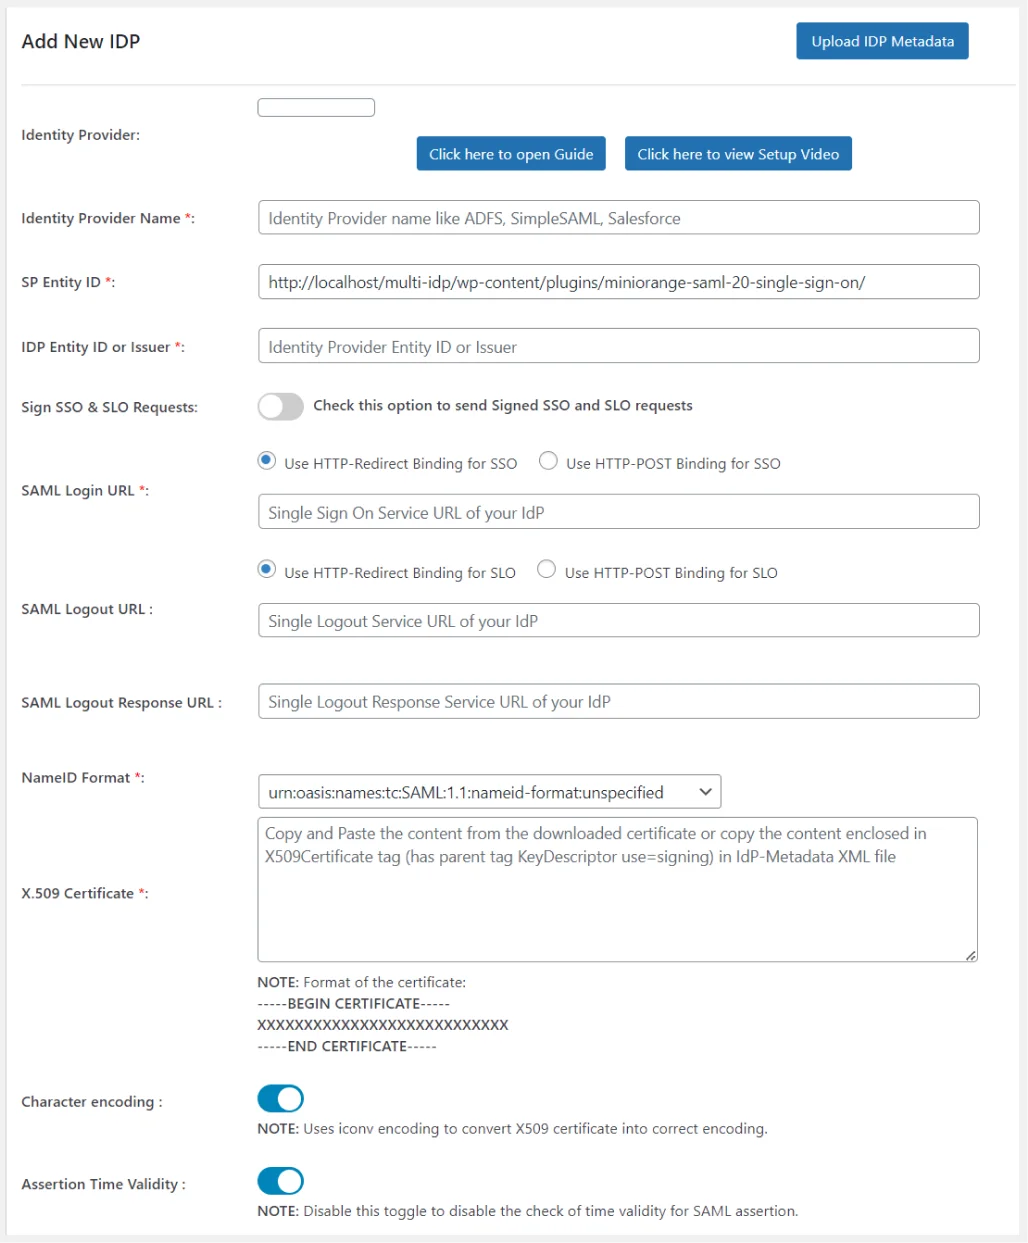
1. Identity Provider Name
- While configuring the plugin, you need to provide any name of your choice in the Identity Provider Name field.
2. IdP Entity ID or Issuer
- The IDP Entity ID or Issuer is a unique identifier assigned to the Identity Provider which is used to identify the IdP in SAML requests, responses, and assertions.
3. Sign SSO & SLO Requests
- In SAML SSO, Sign SSO and SLO requests enhance the security by ensuring the authenticity and integrity of communications between the IDP and SP, thereby protecting user identities and maintaining trust between service providers.
4. SAML Login URL
- The SAML Login URL is basically a login page where end users enter their login credentials to access a service or application which supports SAML based authentication.
5. SAML Logout URL
- SAML Logout URL is the web address from which users can log out of all services/applications they accessed during the SSO session. After sending the request, the session ends and the user gets logged out from all services at once.
6. NameID Format
- NameID Format is a unique value assigned to users which is used for authentication. It determines how to show the users’ identity after login. Some of the examples of NameID Format are Email address, Username, Employee ID, Employee Number.
7. X.509 Certificate
-
The X.509 Certificate in SAML SSO is used by the SP to validate the responses (SAML assertions) sent by the IDP. This validation process ensures that the information about authenticated users is genuine and has not been altered, thereby enhancing the security and trustworthiness of the SAML SSO authentication flow.
-
X.509 Certificate format
  -----BEGIN CERTIFICATE-----
  XXXXXXXXXXXXXXXXXXXXXXXXXXX
  XXXXXXXXXXXXXXXXXXXXXXXXXXX
  XXXXXXXXXXXXXXXXXXXXXXXXXXX
  XXXXXXXXXXXXXXXXXXXXXXXXXXX
  -----END CERTIFICATE-----
8. Character encoding
- Enabling the Character encoding setting allows for converting the X509 certificate in the UTF-8 encoding format, which makes it easier for all web browsers to interpret and recognize it without any misinterpretations due to other encoding formats.
Note - Here we used iconv encoding to convert X.509 certificate for character encoding.
9. Export Plugin Configuration
- Visit out this page to know more about how to export plugin configurations.
If the IdP sends any error in test configuration, you have the option to download the .json file in that window also. There, the .json file will also show the Error occurred with its cause.
After you download the .json file if any error occurred in your configuration, you just have to mail us at samlsupport@xecurify.com and our support team will get back to you.
For more information visit our SSO for WordPress page.