About Login and Spam Protection
We at miniorange ensure that all the users on your WordPress site are safe from Login threats and spam. For this reason, we have developed a lot of features that can make your job as an ADMIN or a user fairly simple. Through just a few clicks and in a matter of minutes you and your website will be completely protected from hackers and spamming servers.
How the miniOrange Google Authenticator plugin can help you keep your website safe
We provide different services under Login and Spam.
- Login security- Make sure that hackers cannot hit your WordPress login pages with brute force or dictionary attacks using our Brute Force Protection.
- Registration Security - Defend your site against fake bots by enabling OTP verification and Social Login integration.
- Content and Spam - Make sure that hackers cannot access data about your WordPress site by using WP REST API injection or accessing your config.php files, htaccess files, and directory browsing.
Below is a guide on using the miniOrange Plugin to protect your WordPress Website. If the specifics of Google Authenticator are still not clear, or if you want more information regarding how your website can be better protected please feel free to reach out to us through the following link.
How to setup Two Factor authentication ?
Login Section:-
Under this section, we will be covering all the features required for you to safeguard your site from brute force and Dictionary attacks.
Brute Force Protection (Login Protection)
A Brute Force Attack targets the website by repeatedly trying combinations of usernames and passwords until it gets a valid pair. This can be extremely effective when individuals use passwords like ‘admin’, ‘root’, ‘password123’. To protect your website from these kinds of attacks you can follow these simple steps.
-
Search for “miniorange two factor” in the search box and install the plugin called “Google Authenticator Wordpress Two Factor Authentication” in the plugins section under your WordPress dashboard Plugin Tab.
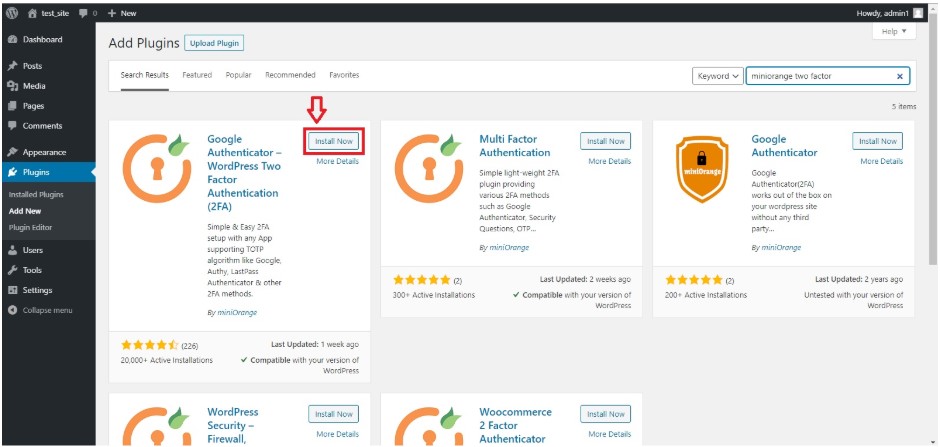
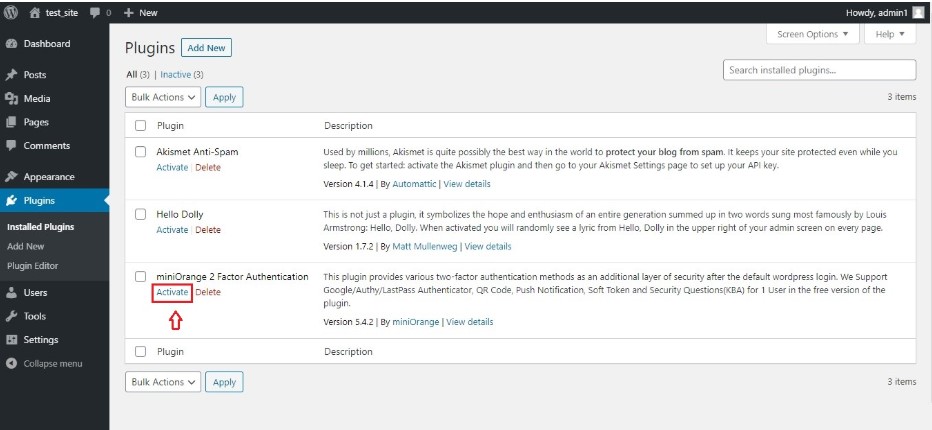
Install the plugin and activate it
-
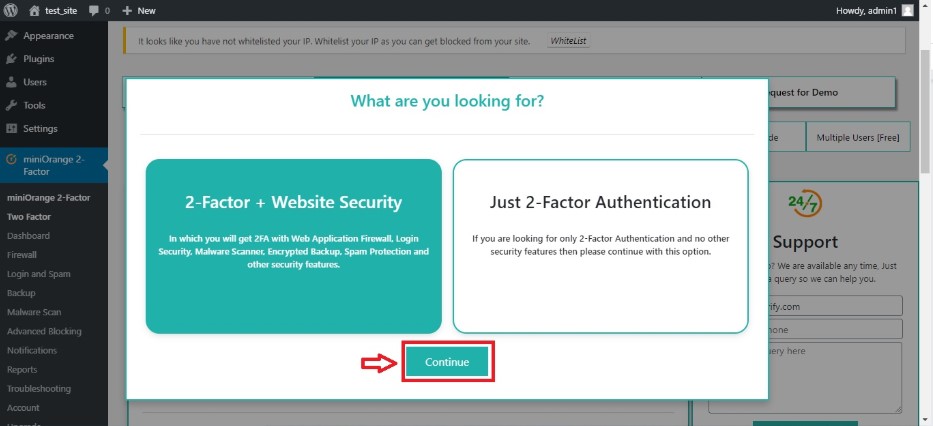
Now Go to miniOrange 2-Factor plugin and you will be prompted to choose a model. Activate all the features ( 2FA+ Website Security).
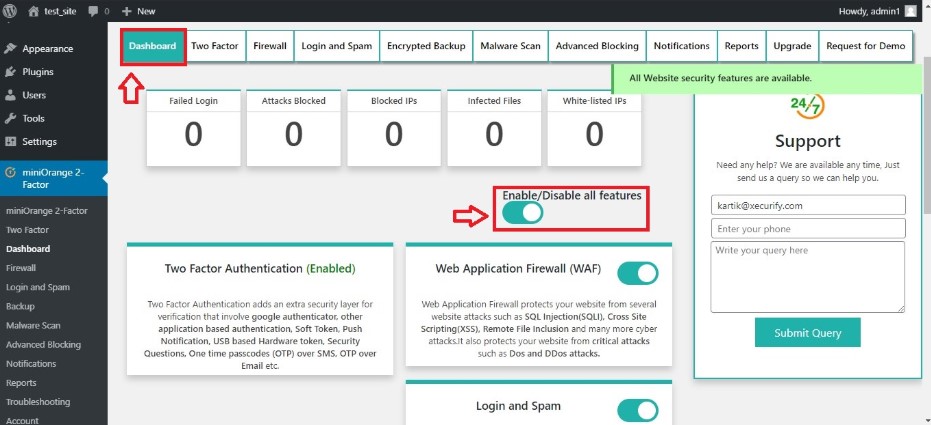
Now go to the plugin dashboard and enable all the features.
-
Let’s move towards the Login and Spam protection. Here you should find the Brute Force Protection section and you can set the limit on the Login attempts and if it is crossed you can also set the Time Period for which IP should be blocked.
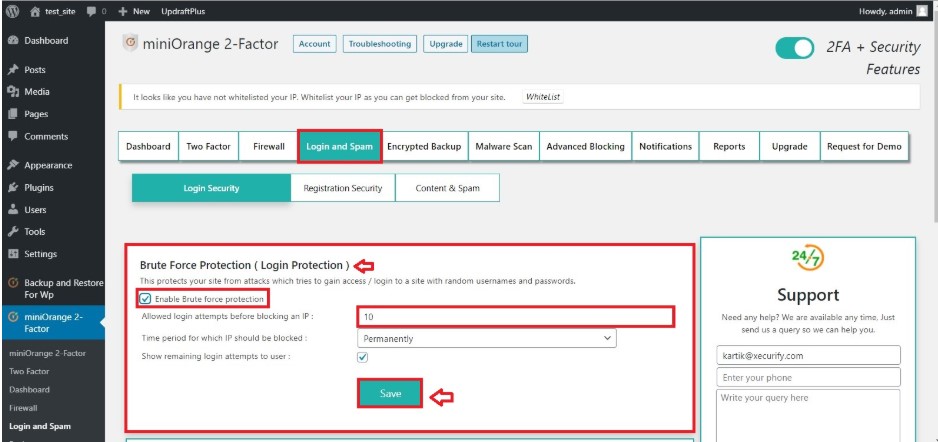
Note - IP Blocking Time Periods can be.
- Permanent
- Months - No of Months
- Days - No of Days
- Hours - No of Hours
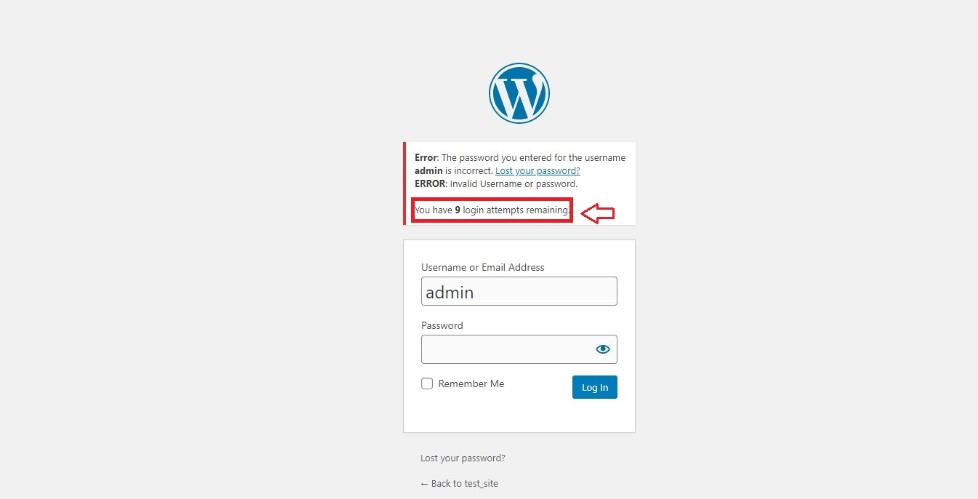
Now you are all set in just three simple steps and are ready to protect against those hackers. To test it you can log out of your account and enter the wrong credentials and should be prompted with an Error message showing the number of Login attempts left (Can be turned off as per user choice) from the plugin.
Google reCAPTCHA
Google reCAPTCHA shields your site from spam and misuse. A CAPTCHA is a challenge-reaction test utilized in processing to decide if a client is human. Hackers cannot automate the process of brute-forcing since you need to play out the captcha to demonstrate that you are a human and hence automation stands no chance.
To protect your website from these kinds of attacks you can follow these simple steps. You can follow STEP 1 and 2 from the above explanation.
- Click on the Google reCAPTCHA registration link to register and receive your reCAPTCHA keys.
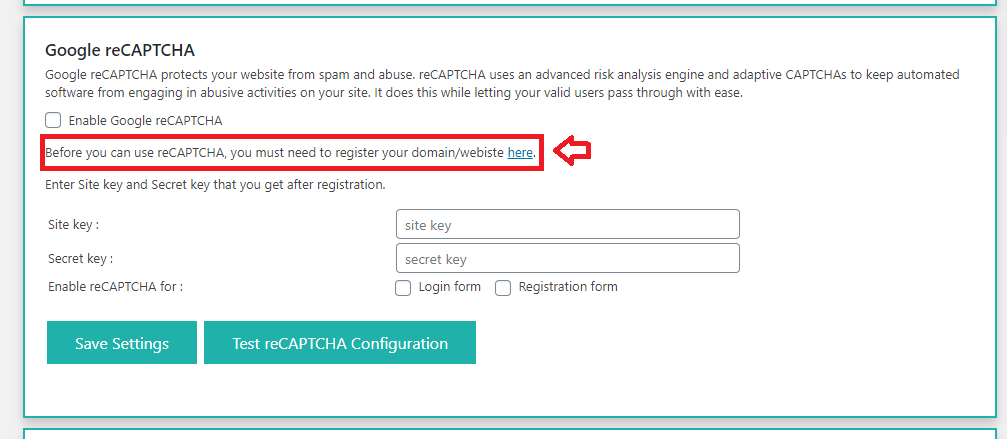
- Move forward to the Google reCAPTCHA section under Login and Spam Protection.
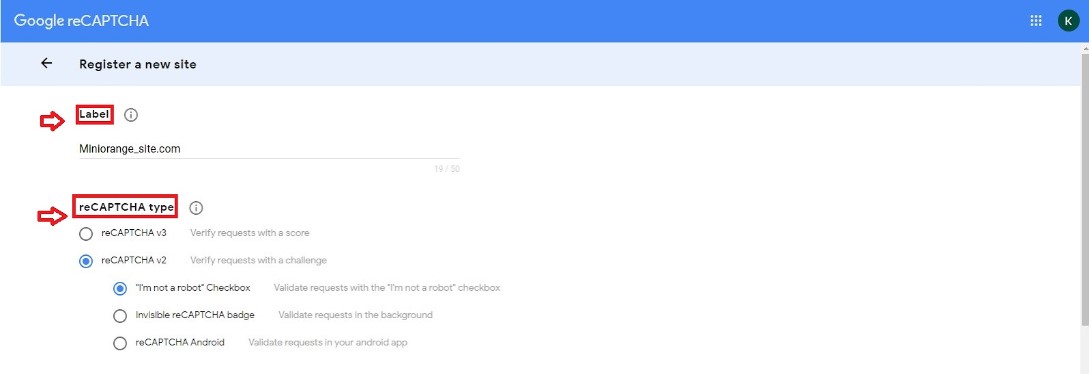
Visit the Google reCAPTCHA site and retrieve your site keys. For Key retrieval process, you can follow the steps shown below.
- Enter the label of the site you want to activate reCAPTCHA.
- Select the type of reCAPTCHA you want to activate for your website.
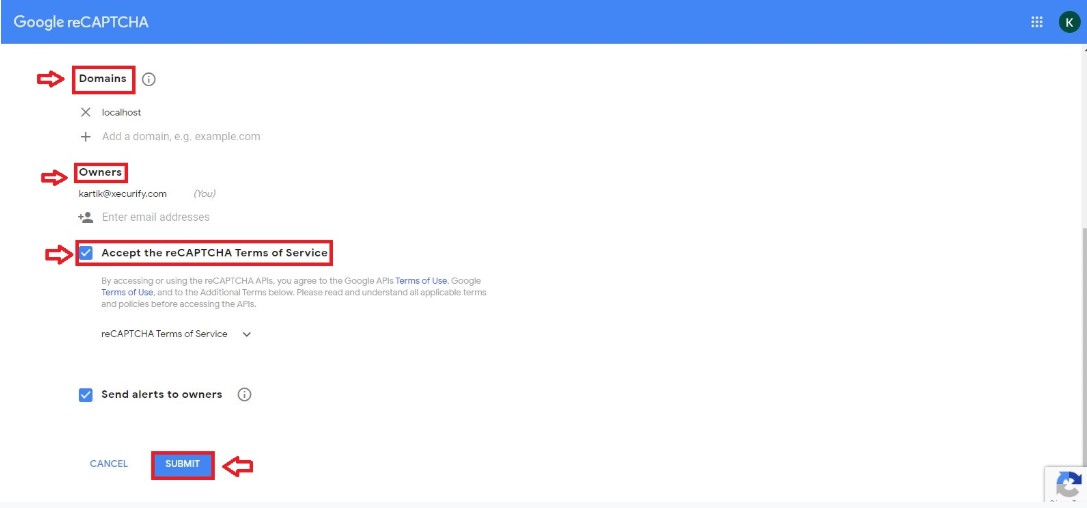
- Enter the Domain your site is hosted on.
- Enter the owners who can edit the CAPTCHA settings later.
- Accept the terms and conditions.
- Submit the form.
-
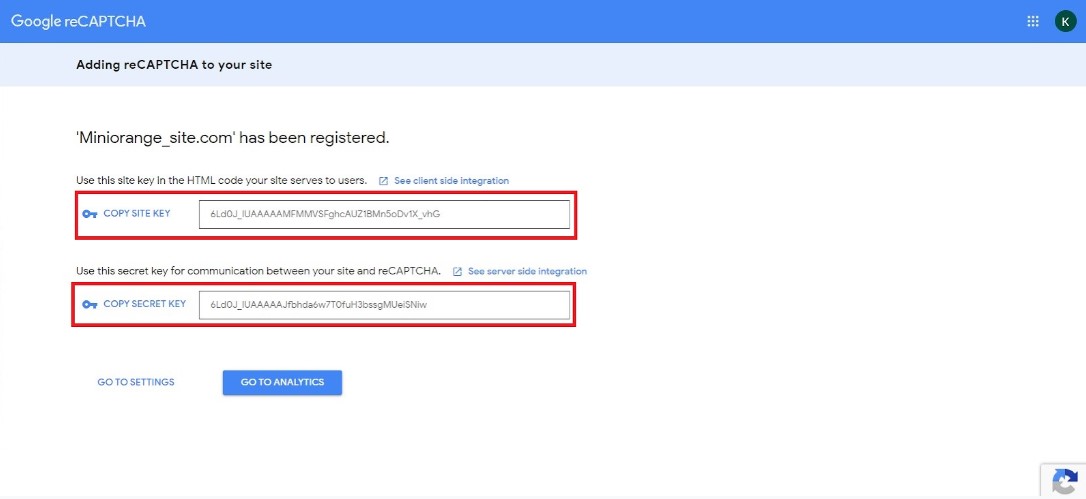
After performing the registration you will receive your keys which need to be inserted in our plugin.
-
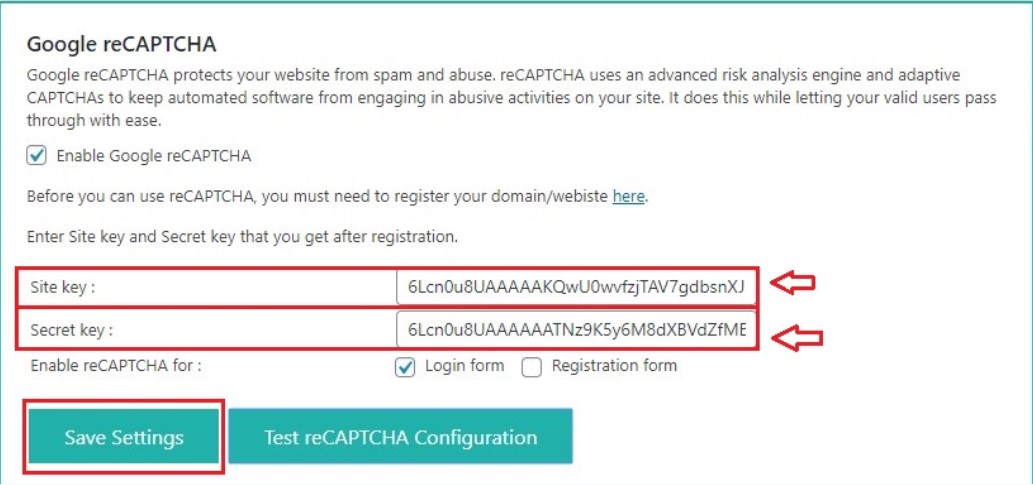
After getting your keys to copy your Site and Secret keys and paste them in the plugin and save settings.
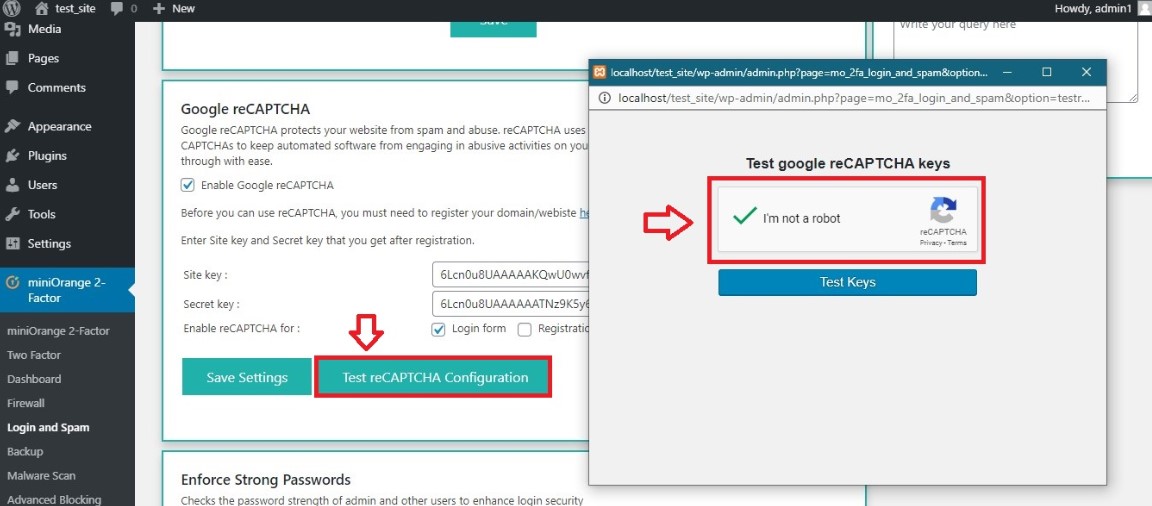
Once you have everything set up you can test the reCAPTCHA by clicking on the Test button.
-
Now you have all set to protect your site from bots trying to get into your site. You can choose the type of reCAPTCHA you want to be applied and just have to provide the keys to the plugin.

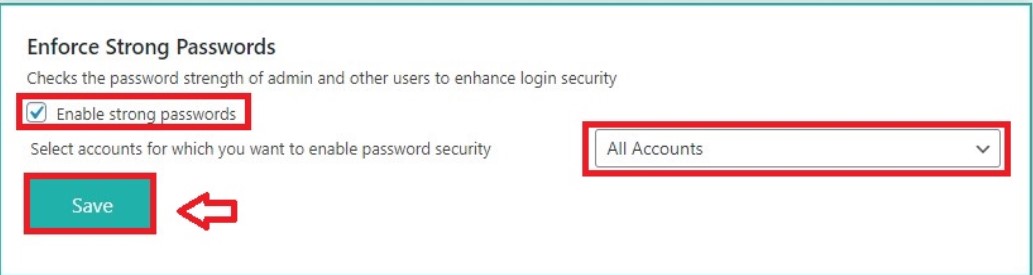
Enforce Strong Passwords
It might happen that you may not wish to apply these changes and want a much simpler method. This feature checks that the admin and all the other users are enforced to apply strong passwords. This is highly recommended since any attack can be stopped if the users have a really strong password which helps in keeping brute-force attacks at bay..
-
To enable Strong passwords to click on the checkbox and the account options for which you would like to Enforce strong passwords.
-
Now when you try to create a new user with a weak password the plugin will prevent you from doing so and will make sure you use a strong password. Let’s test this by creating a new user.
This way you can make sure that all your users have a strong password and are not vulnerable to brute force and dictionary attacks.

-
After clicking on Add New User the plugin will prompt you to apply a stronger password.
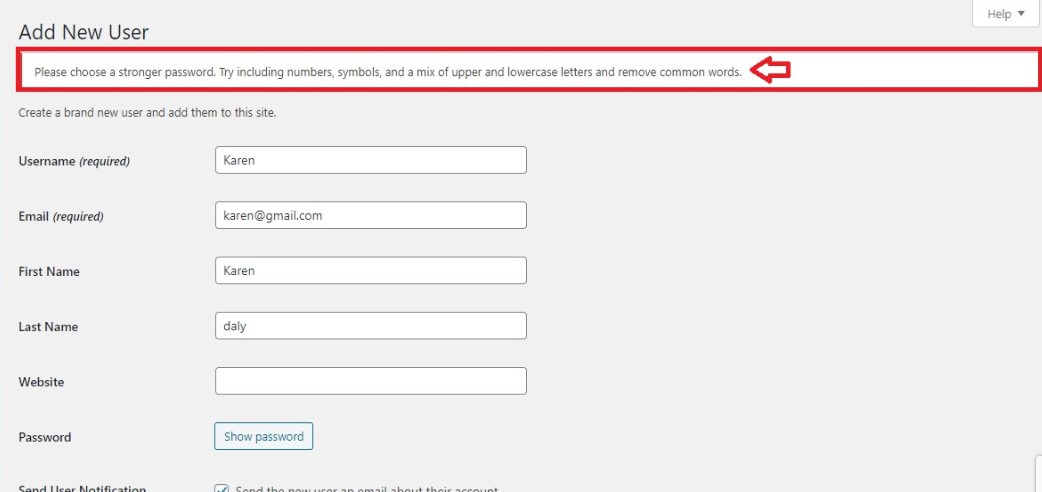
This way you can make sure that all your users have a strong password and are not vulnerable to brute force and dictionary attacks.
Happy Defending.