Setup Guide for installing the WordPress 2FA All inclusive/Business plugin.
-
Upgrading to the WordPress 2FA Business plugin (On-Premise) from the miniOrange plugin dashboard.
-
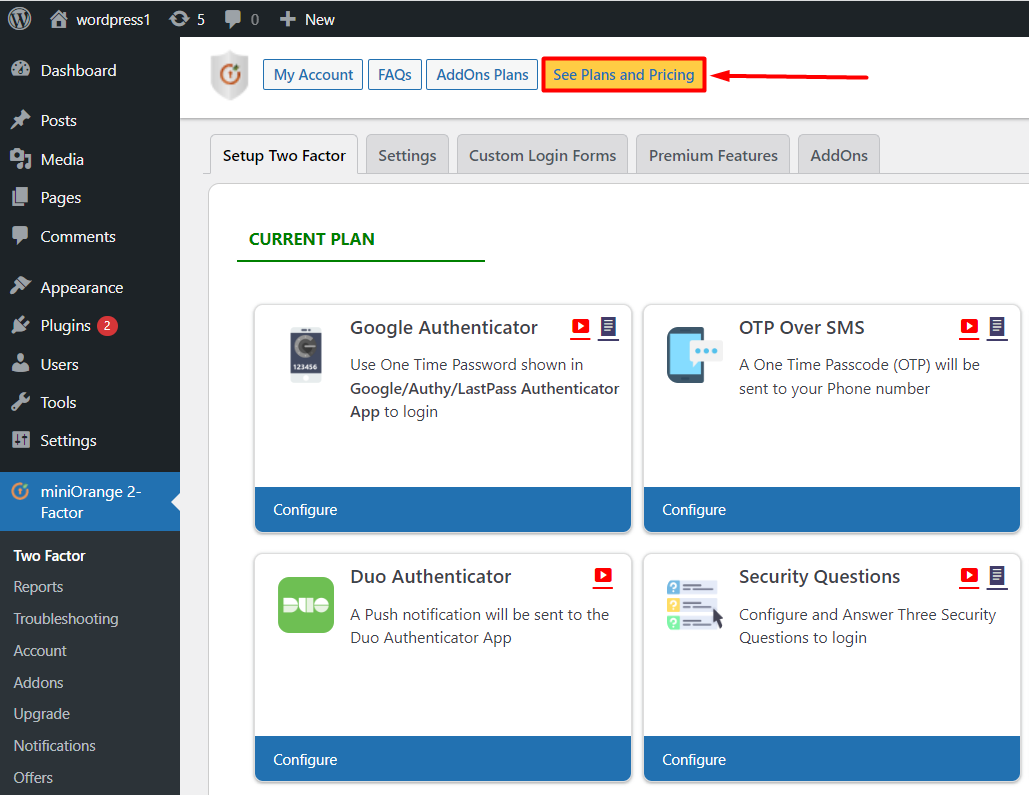
Click on the See Plans and Pricing button at the top.
-
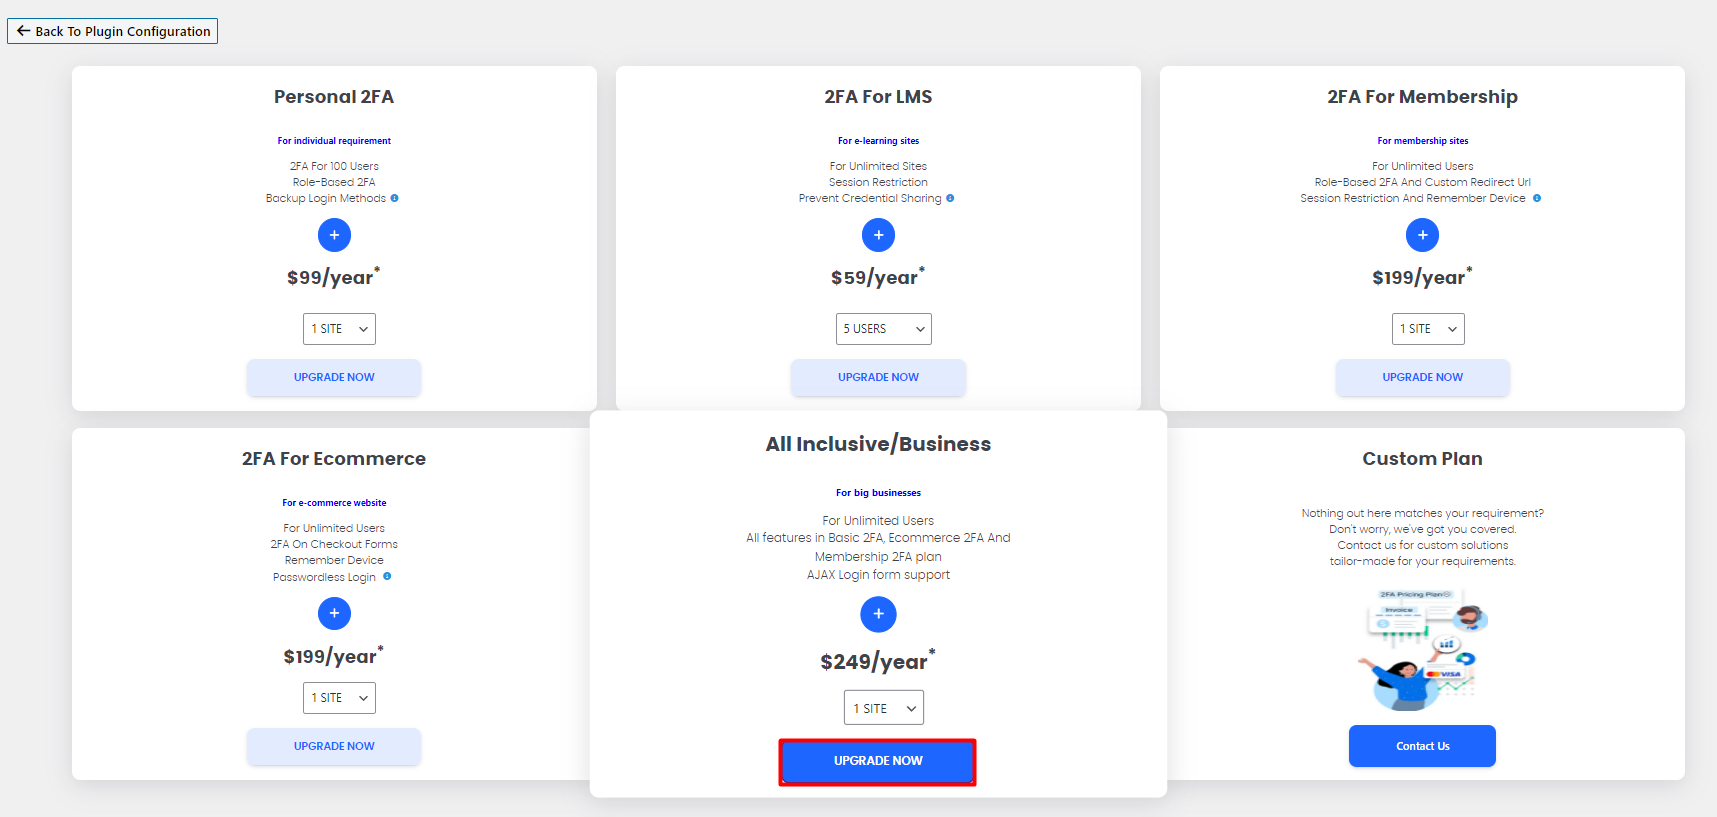
After that, click on the Upgrade button of the All Inclusive/Business plan.
-
It will redirect you to the miniOrange console, enter your credentials to log in with your miniOrange account.
[Note - In case you are not registered with miniOrange, you will be prompted to create miniOrange account. Use these credentials to login in to miniOrange console.]
-
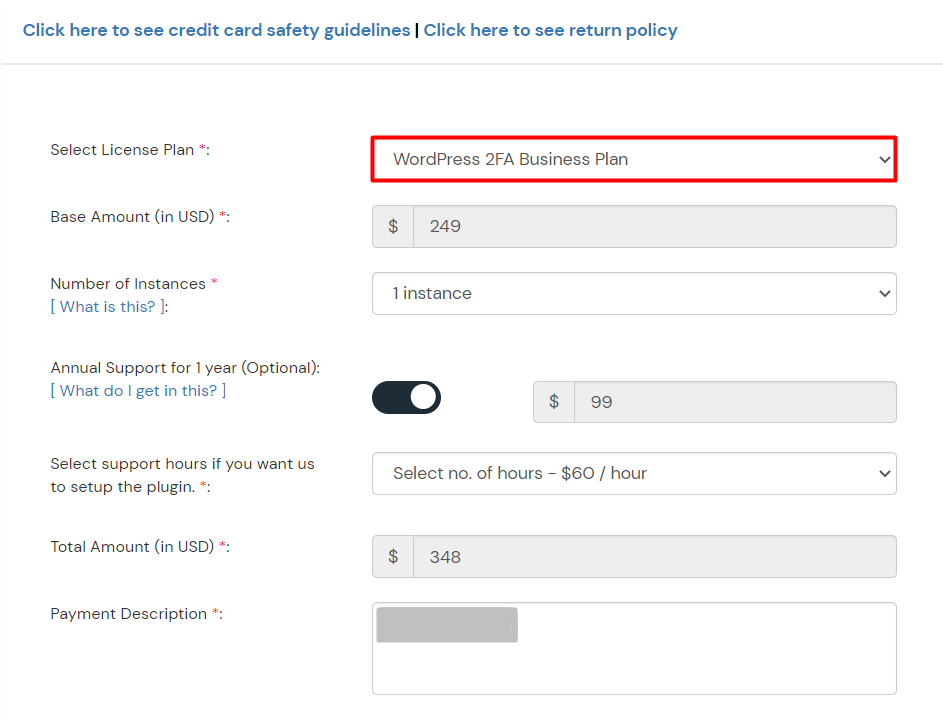
Now, check if the License Plan is correct in select license plan field. Otherwise, select the License Plan from the dropdown and fill all the other necessary details on the payment page.
-
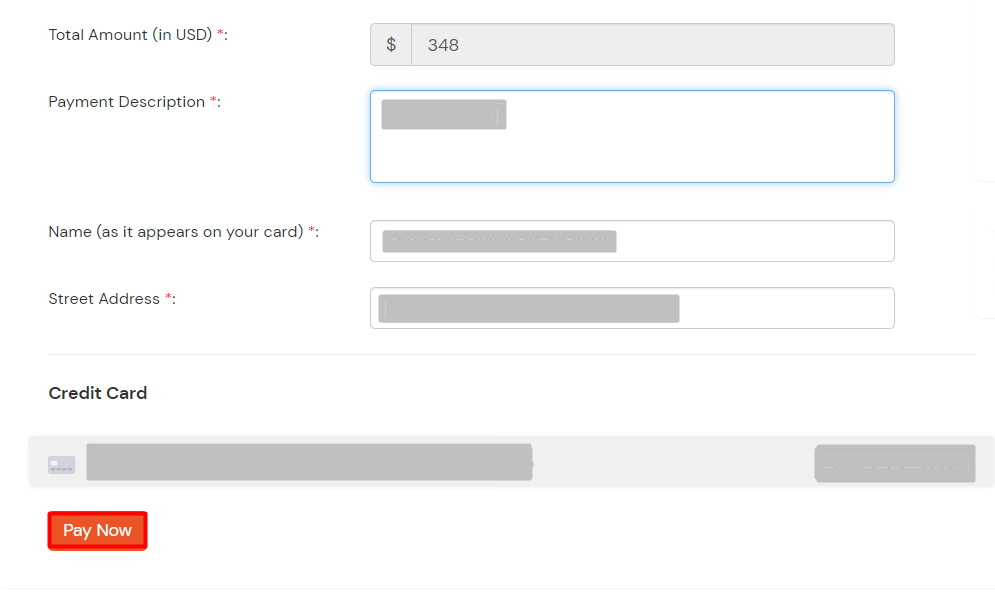
Then click on the Pay Now button.
-
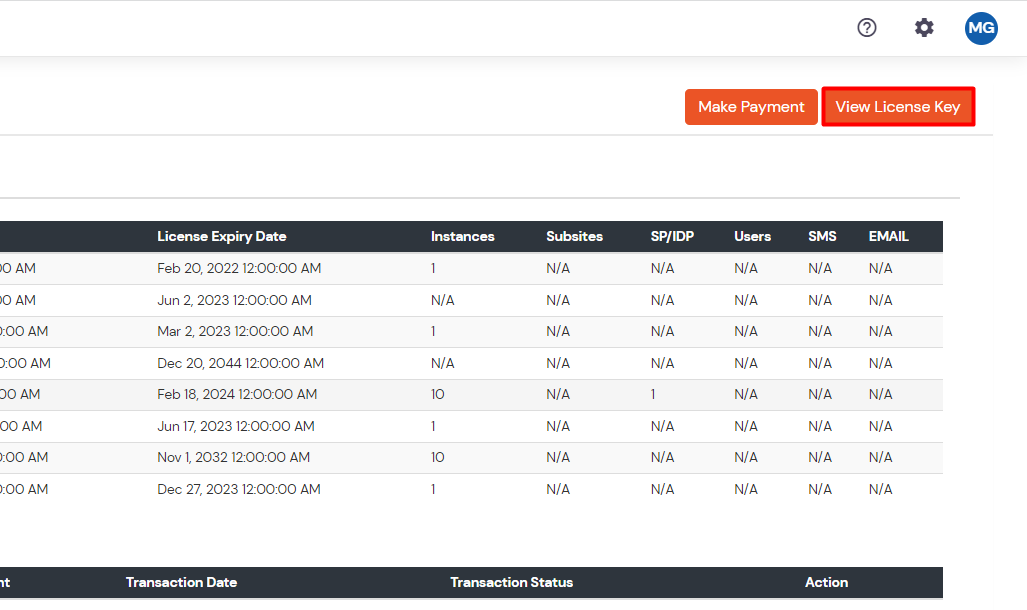
After successful payment, you will be redirected to the Manage Licence page and you will see the active Premium Licenses for your account here.
-
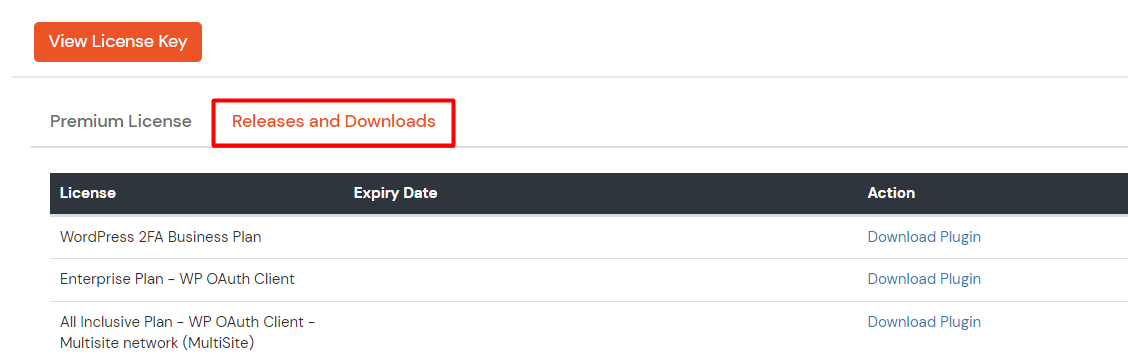
Now, click on the Releases and Downloads tab.
-
Click on Download Plugin corresponding to the WordPress 2FA Business plan.

-
After downloading the plugin successfully go to the WordPress admin dashboard and deactivate and delete the free plugin.
-
-
Installing the WordPress 2FA Business plugin from the WordPress dashboard.
-
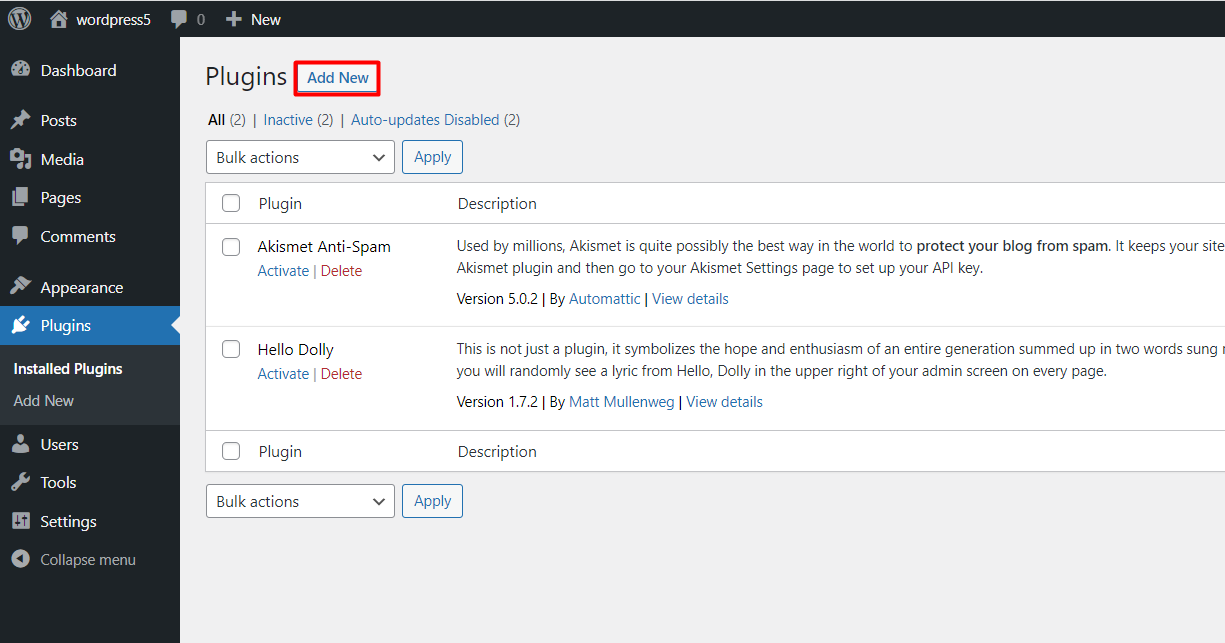
Click on Add New plugin.
-
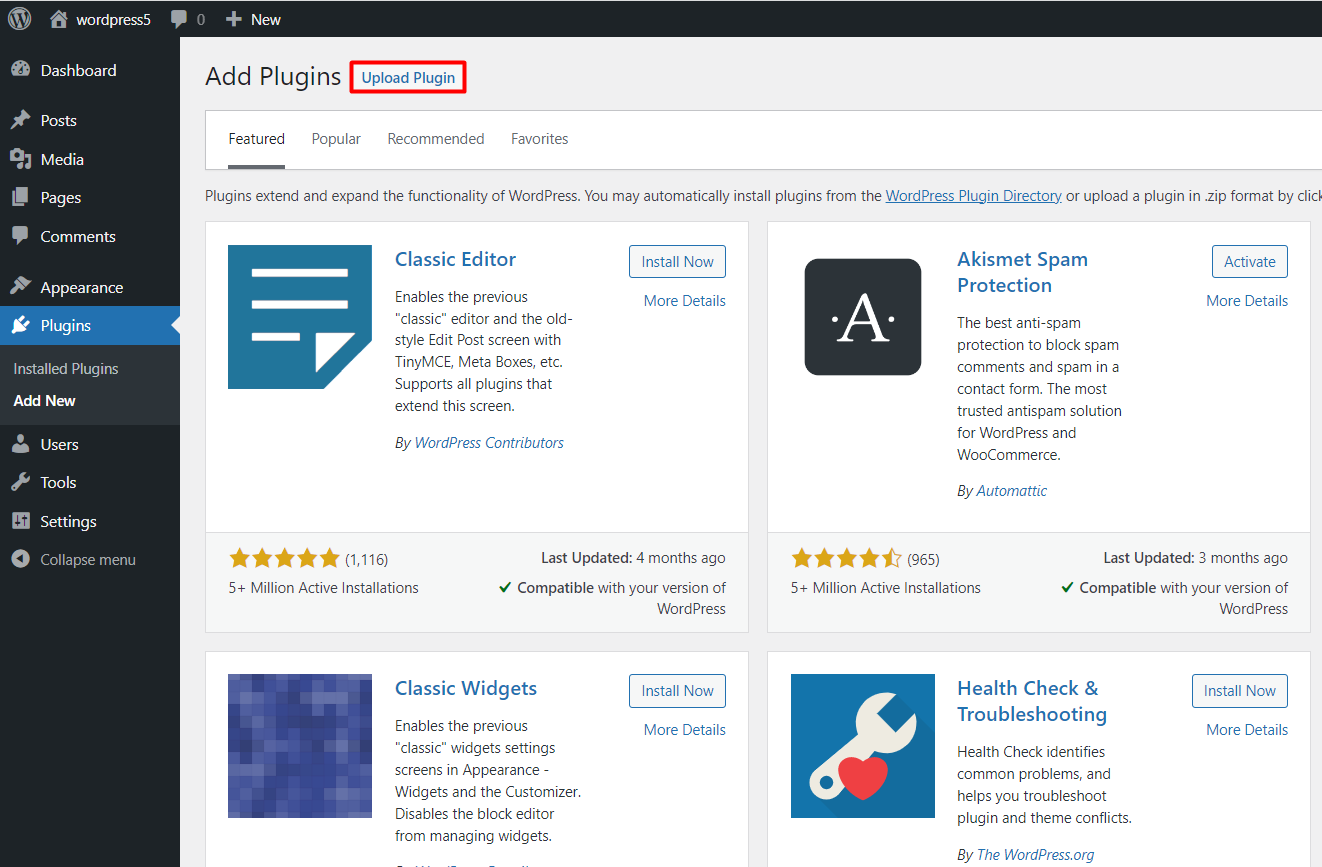
Click on Upload Plugin .
-
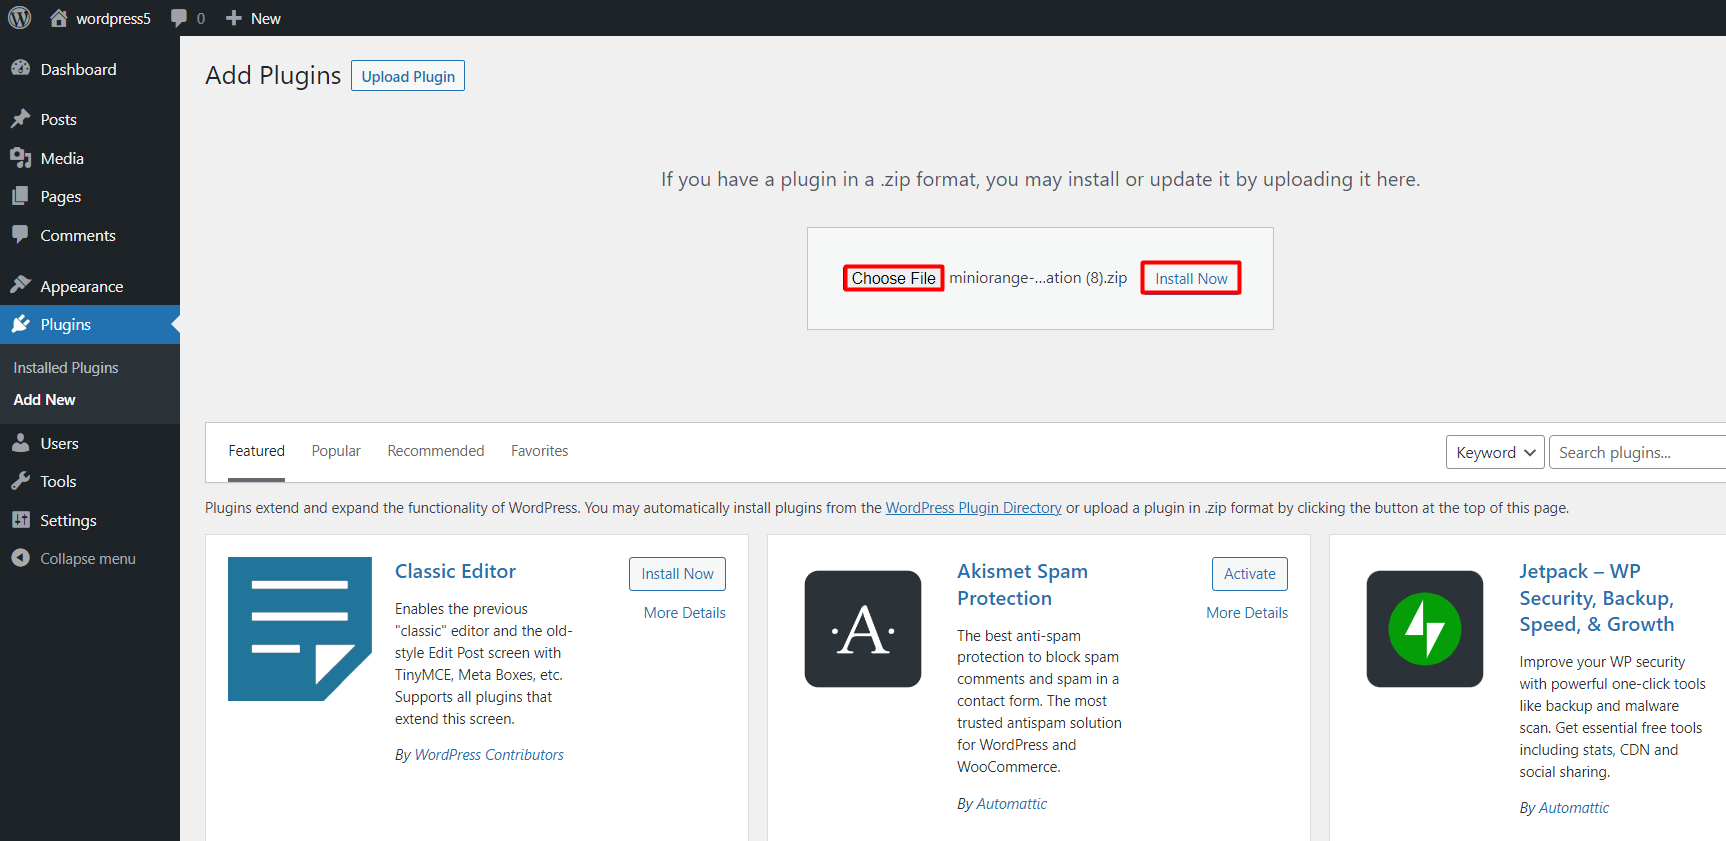
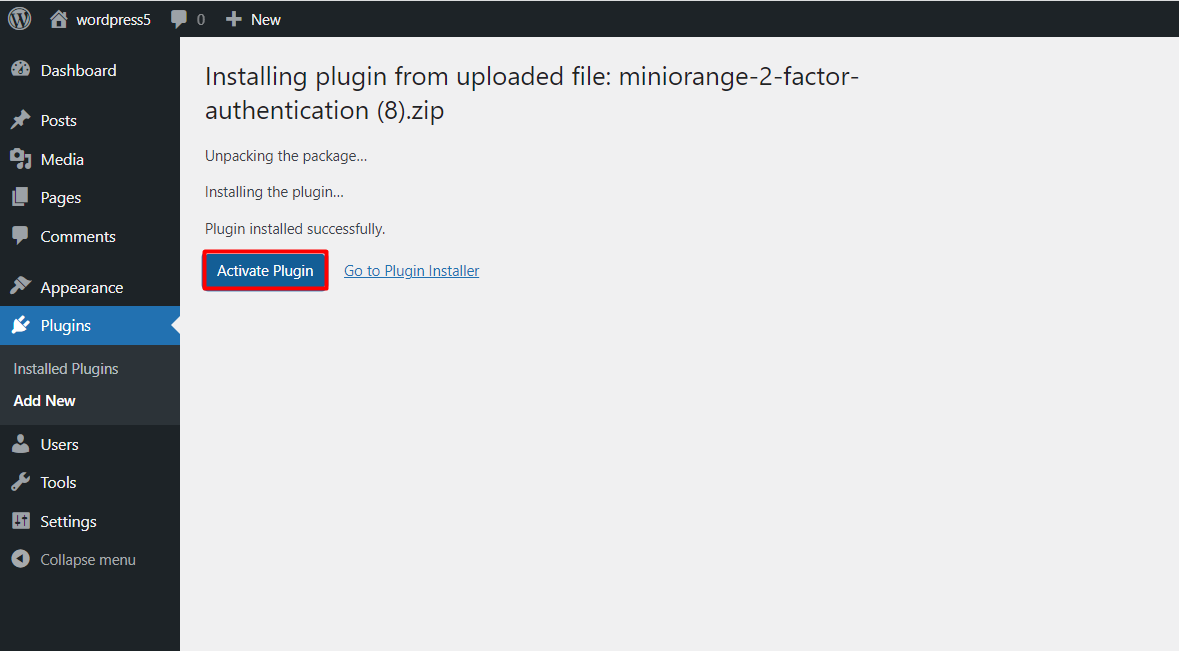
Click on Choose file button and select the WordPress 2FA Business plugin file which you have downloaded after making payment and click on Install Now button.
-
Click on the Activate Plugin button. It will activate the WordPress 2FA Business plugin.
-
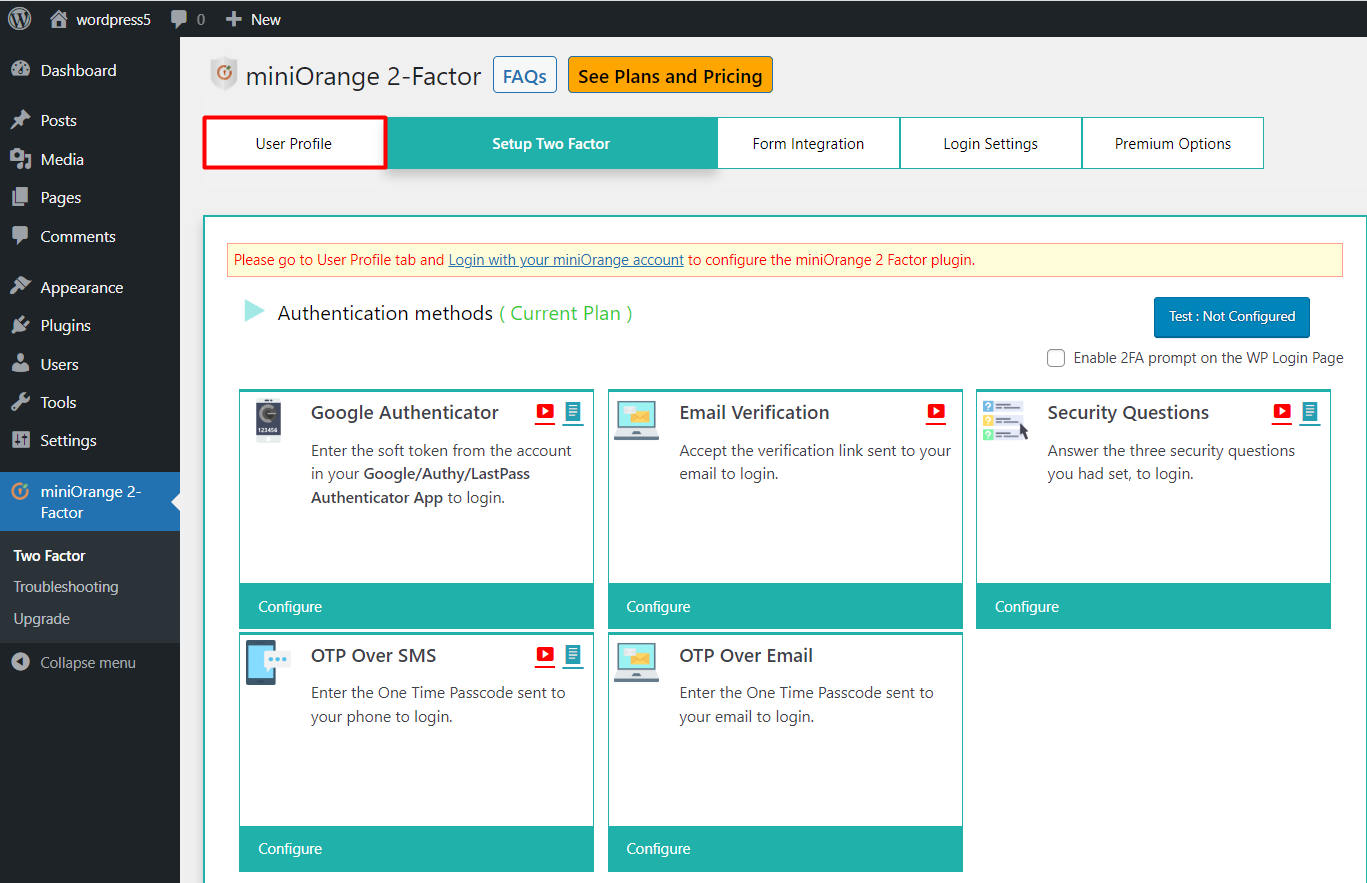
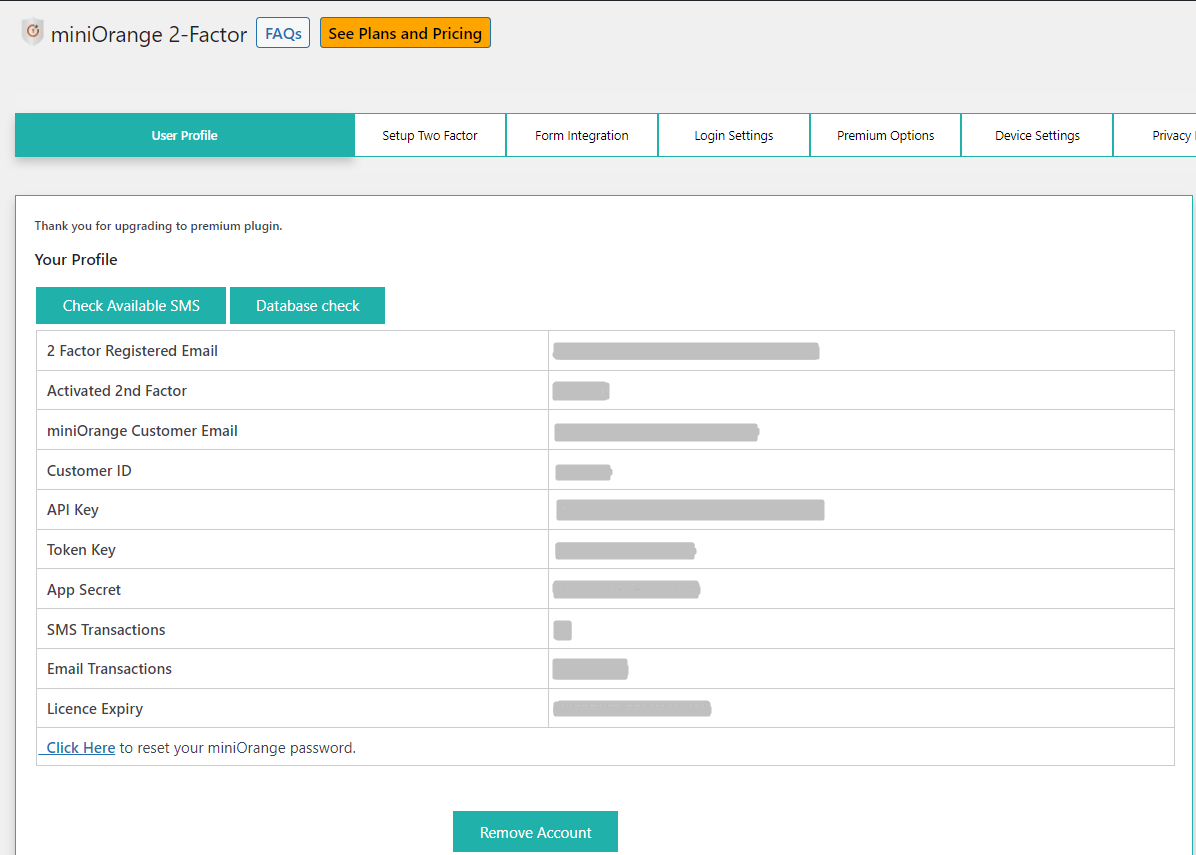
Then go to the User Profile tab.
-
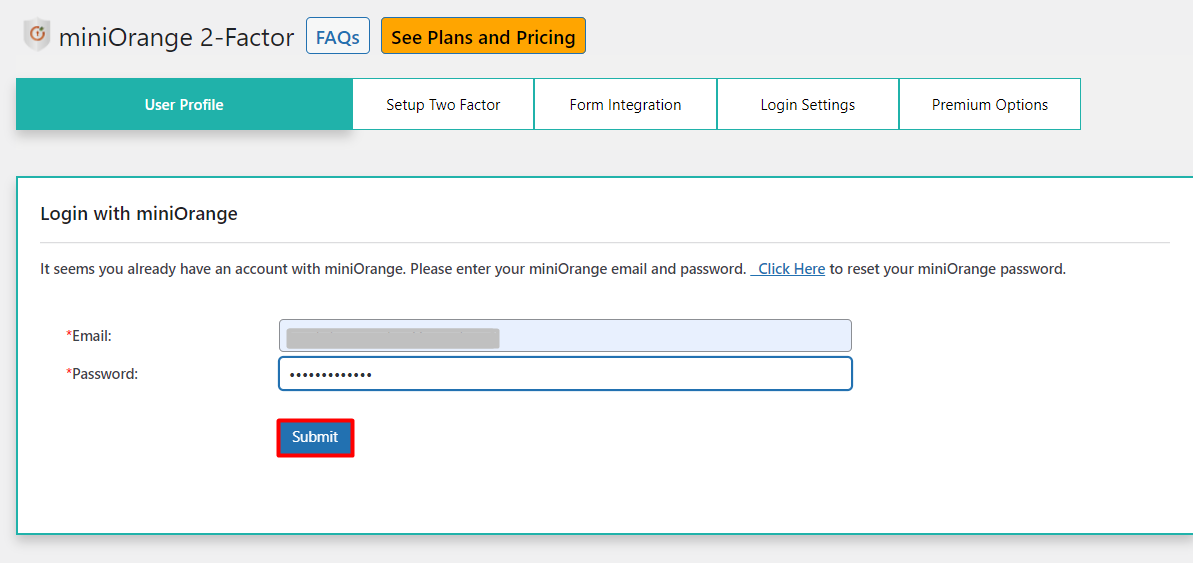
Now, you will need to log in to the miniOrange account from the plugin dashboard with the email address you used to make the payment.
-
Click on the Submit button.
-
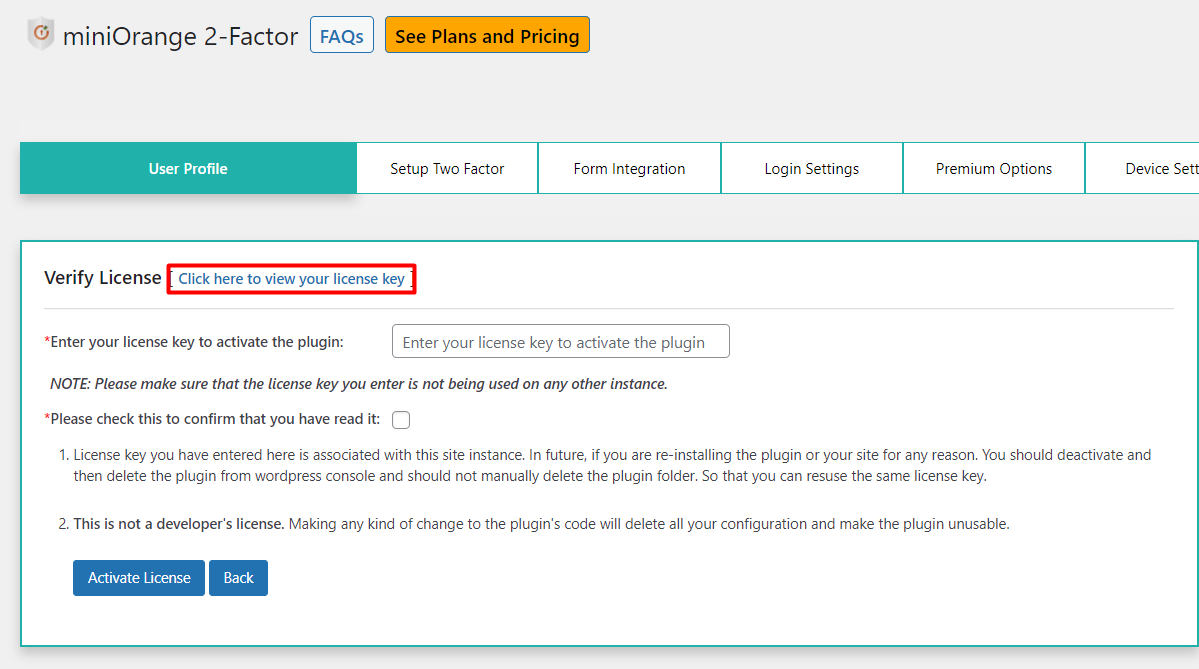
Now, it will ask you to enter your license key. To get a license key, click on Click here to view your license key.
-
After that you will be redirected to the miniOrange console, enter your credentials to log in.
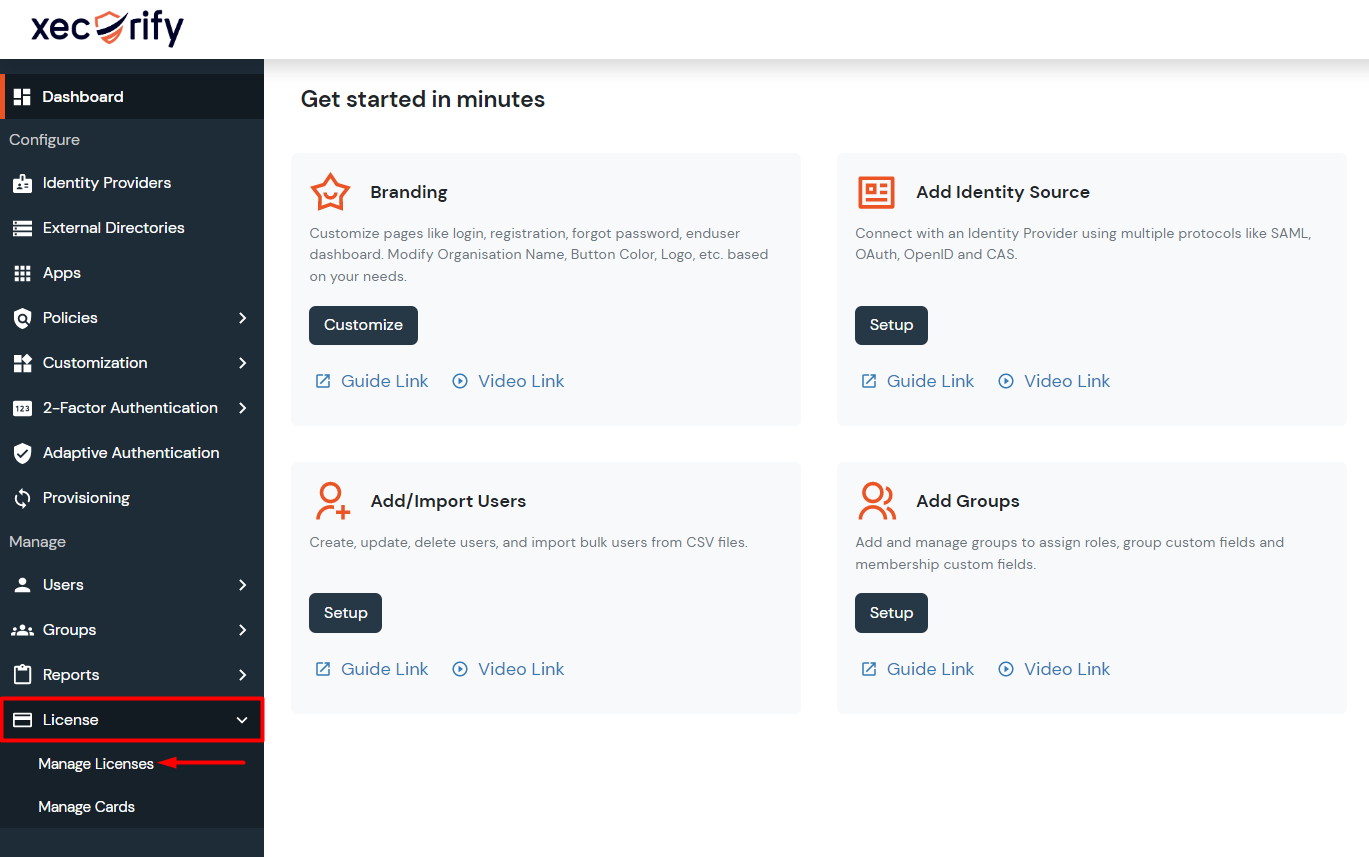
Click on License >> Manage licenses.
-
Now, click on the View license key.
-
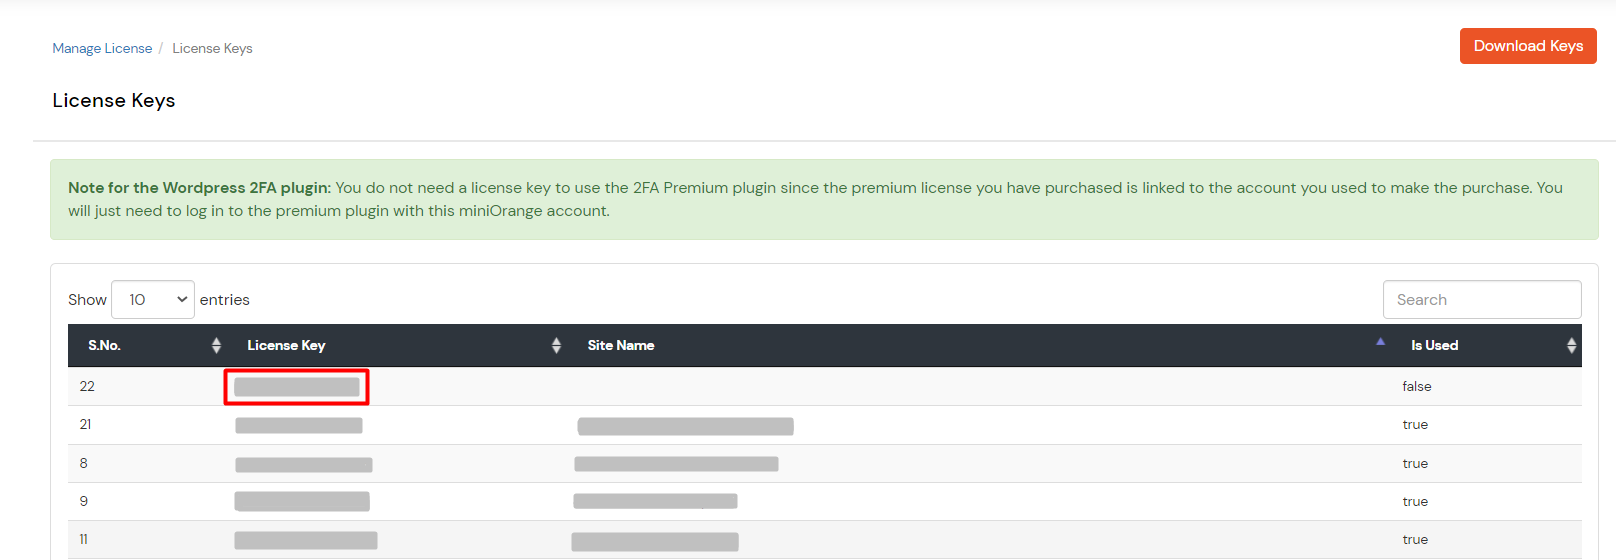
Copy License key from here.
-
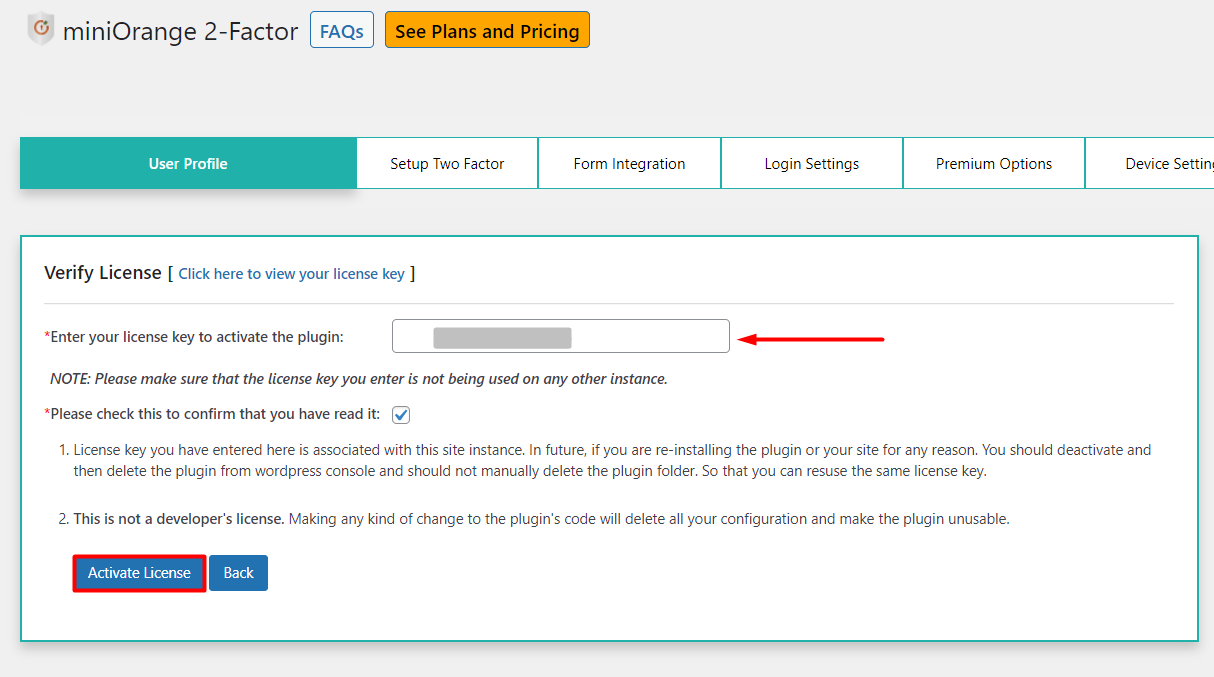
In the field provided, as shown below, paste that copied license key, and check the checkbox after reading the terms and conditions. Now, click on the Activate License button.
-
Your license is verified successfully.
-
-
Inline Two-Factor Setup by Users.
-
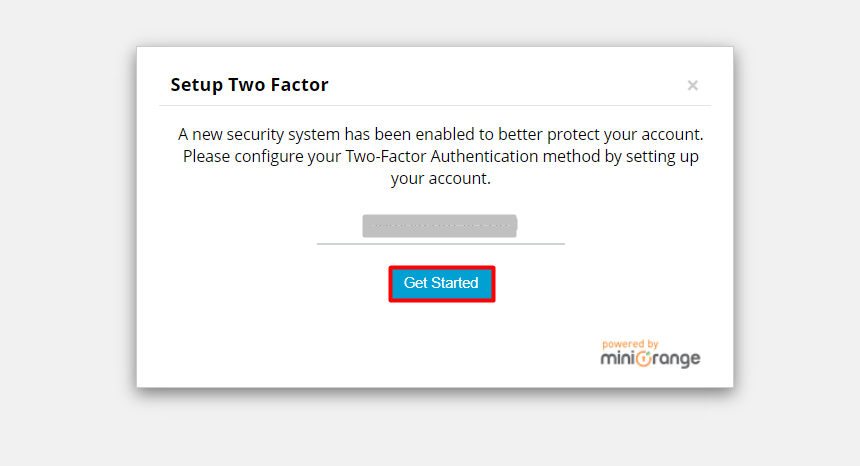
Now, when the user tries to login, the user will be prompted to set up two-factor. Check the email id and press the Get Started button.
-
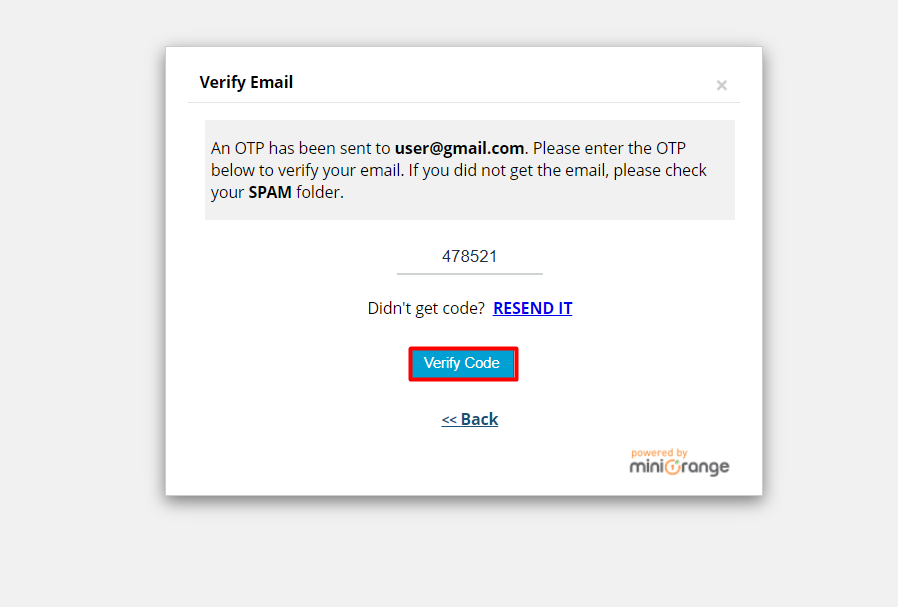
Enter the OTP code received on your email and then click on the Verify Code button.
-
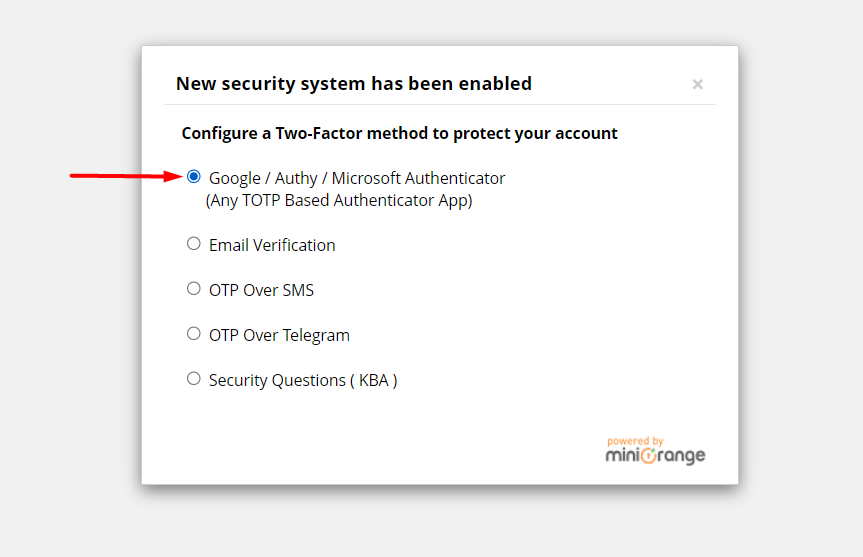
Prompt with the list of 2-factor authentication methods pops up, out of which any one can be selected. Here for the demo, we will select the Google Authenticator method.
-
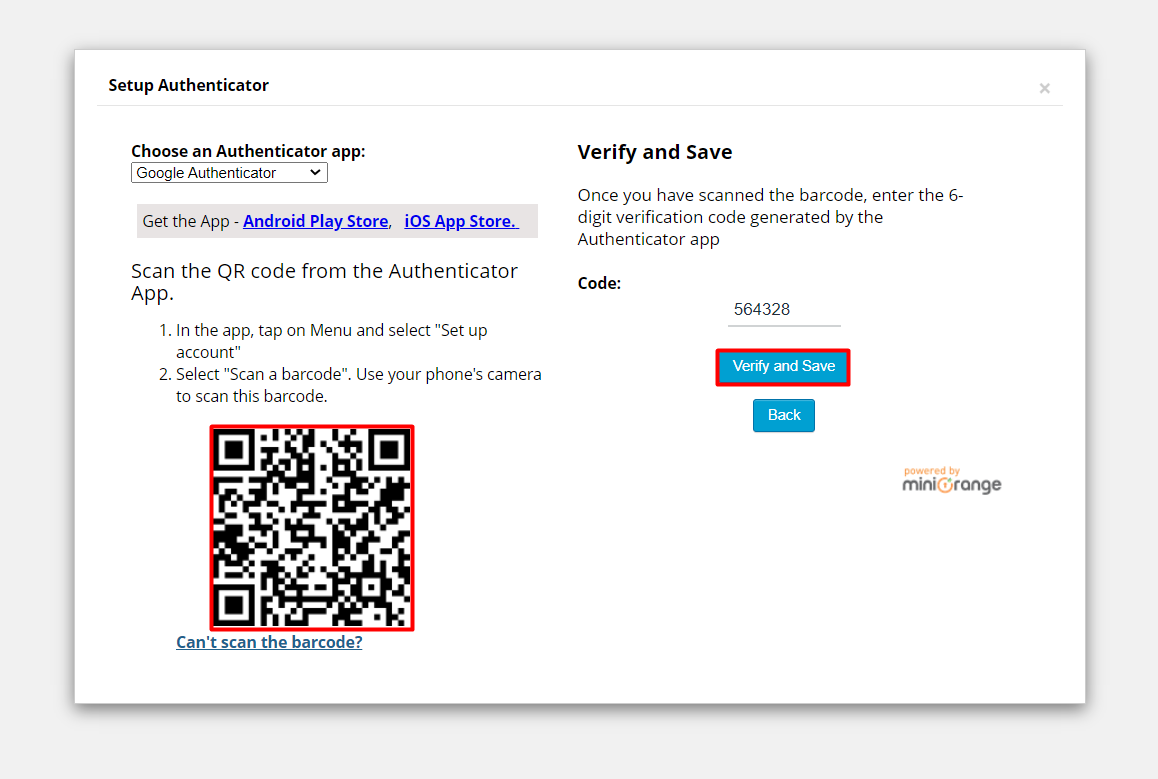
Scan the QR Code shown to setup the account in the Authenticator app, enter the Code generated by the App in the respective field. After entering the 6- digit code, press the Verify and Save button.
-
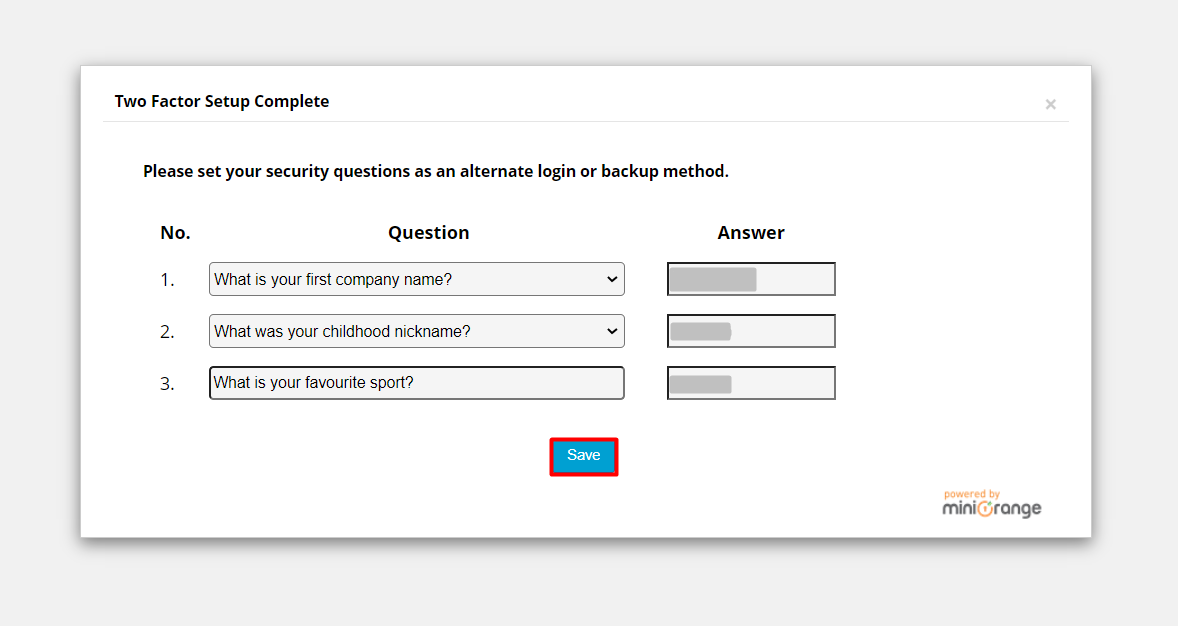
Next, you will be prompted to set up Security Questions as a Backup method. After setting up the security questions, click on the Save button and setup will then be Complete.
-
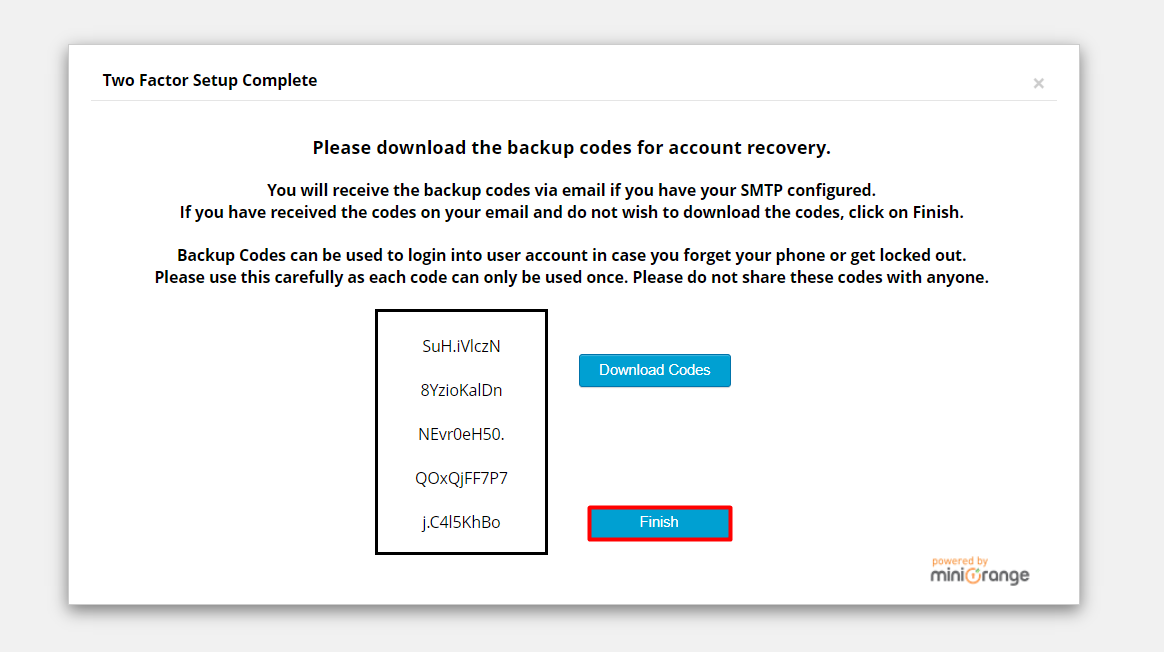
If you want backup codes in a text file, click on the Download codes button.
-
Then click on the Finish button.
-
-
Two-Factor Setup by Users inside the plugin.
-
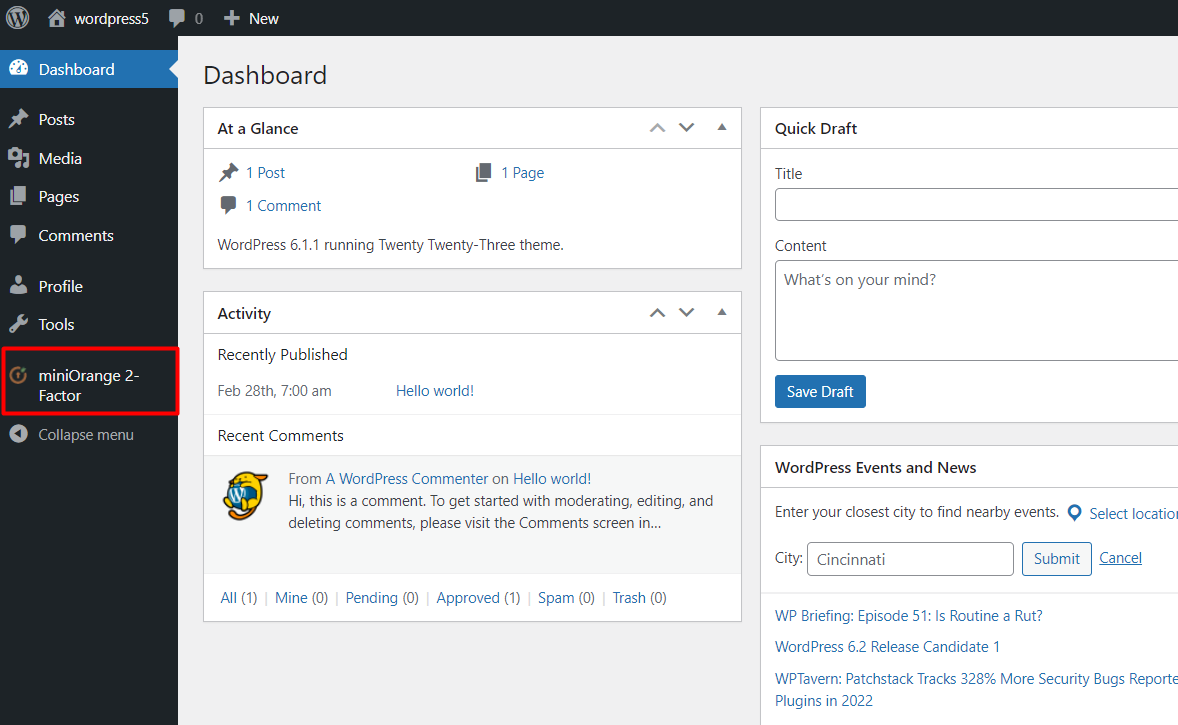
Click on the miniOrange 2-Factor plugin in the left pane of WordPress dashboard.
-
User will enter his/her email-id and click on the Get Started button.
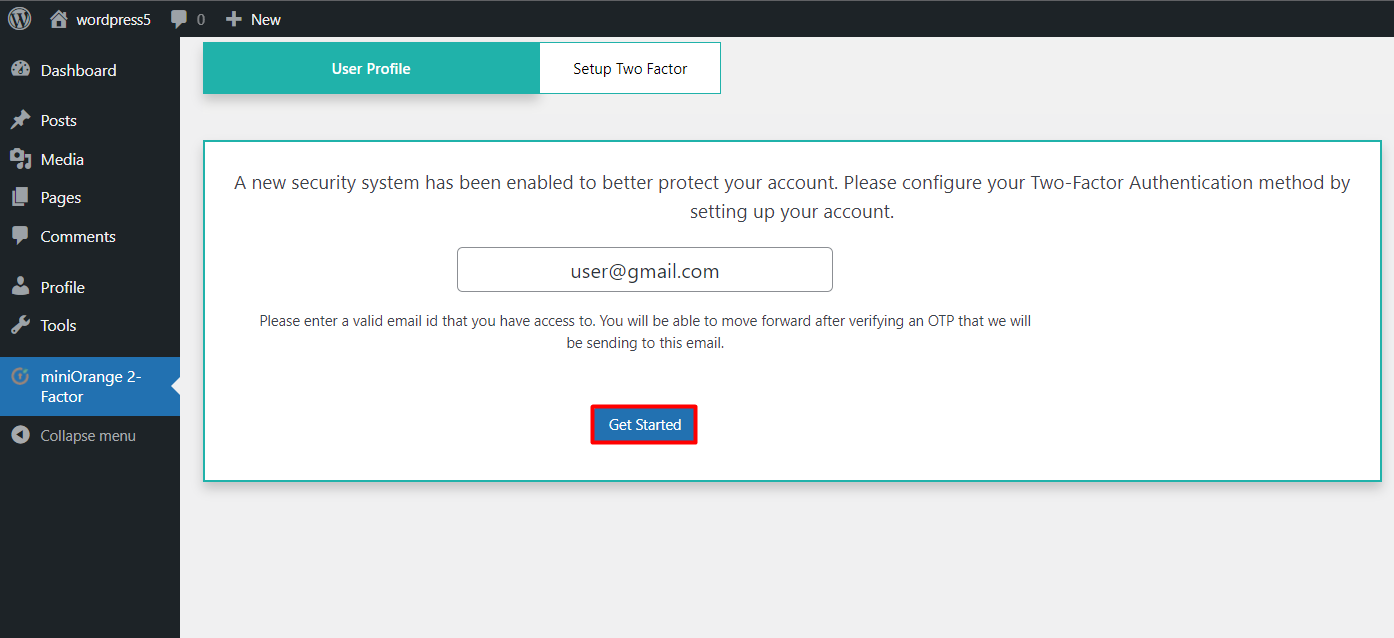
-
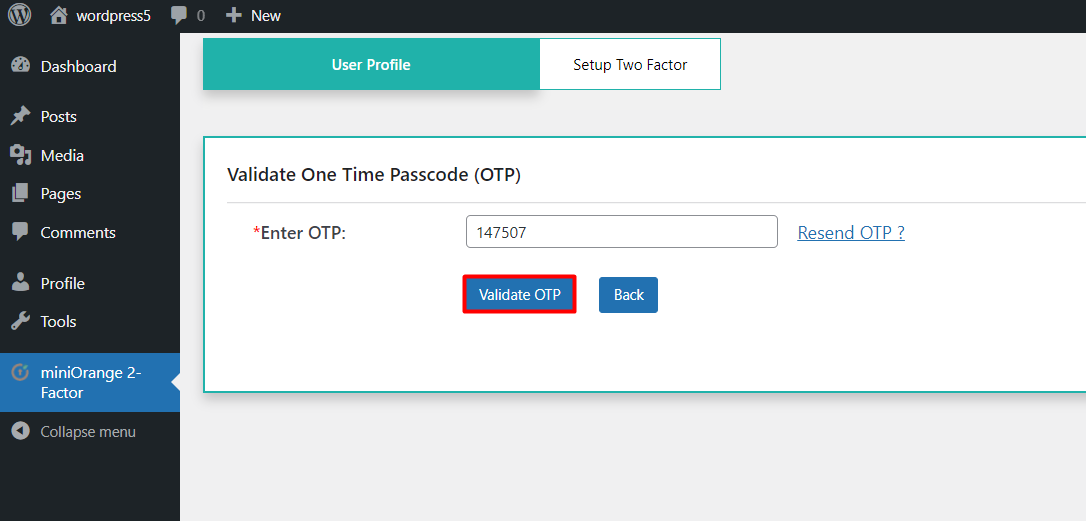
An OTP will be sent to the entered email address. Enter the OTP below to verify your email.
-
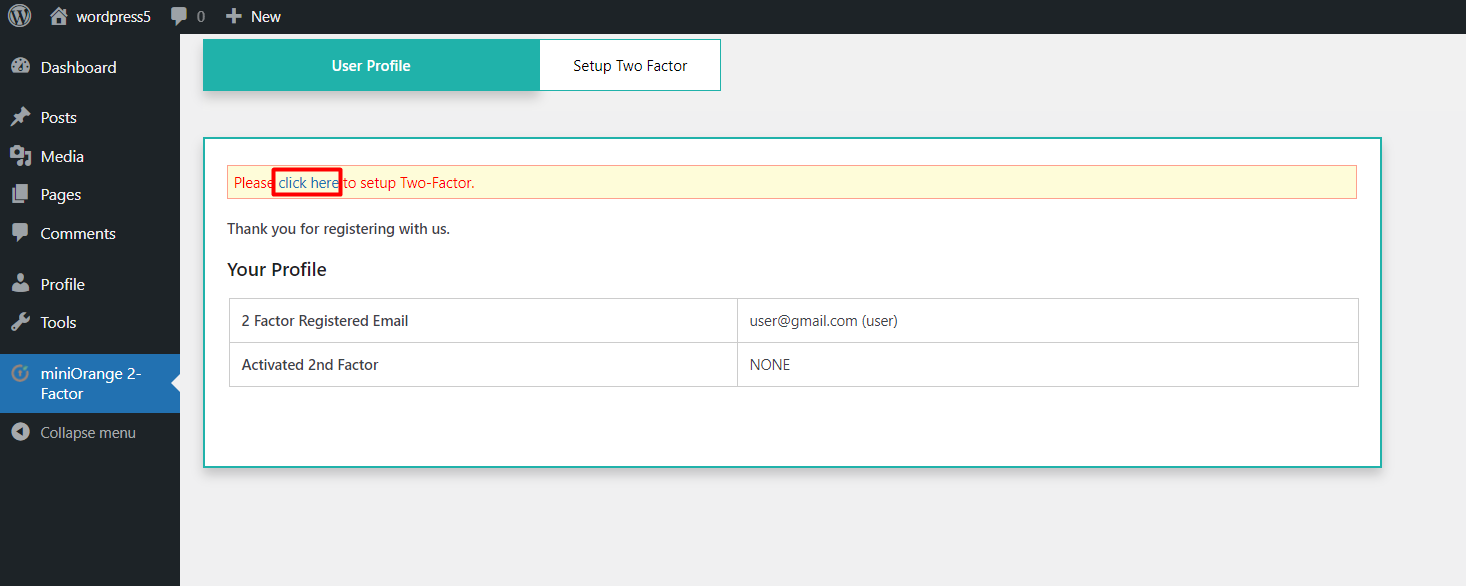
After the successful validation of OTP, click on Click here to setup the 2-Factor.
-
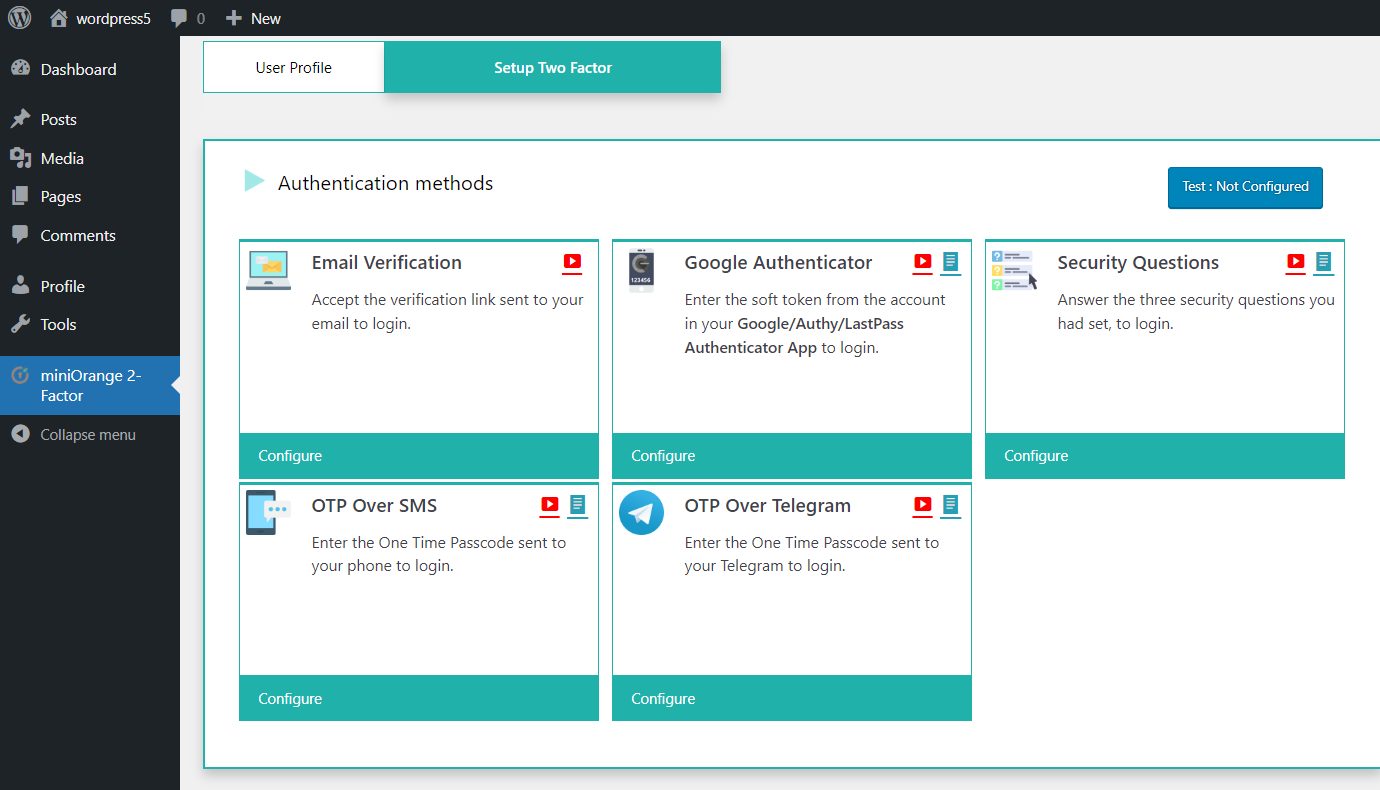
Now the user can select and configure the 2nd factor method of his choice. Choose any one of them. We have demonstrated the Google Authenticator method; this applies for all the other authentication methods as well.
-
After this, whenever the user tries to login, he/she will be prompted for the OTP sent to his/her Email-id to validate.
For more details about the plugin, visit: https://plugins.miniorange.com/2-factor-authentication-for-wordpress
For more queries or support, contact: info@xecurify.com and 2fasupport@xecurify.com